Button Configuration
Last updated
Was this helpful?
Last updated
Was this helpful?
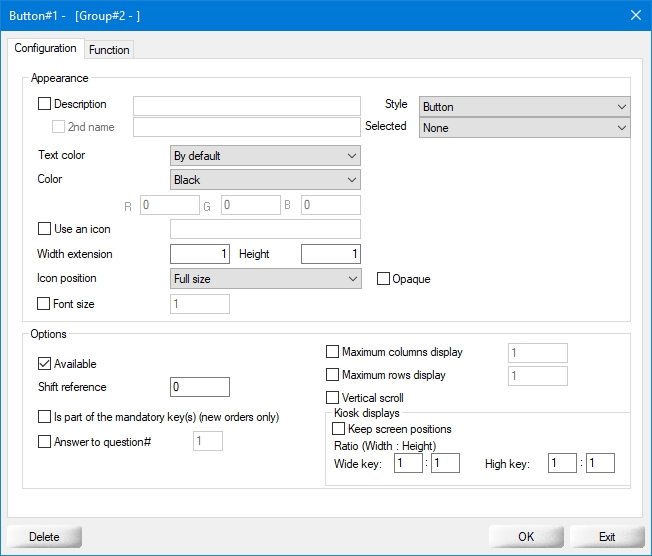
Once the group configuration is completed, click on a button on the grid to bring up its configuration options:
By default, the text on any button will be determined by the button's function. For instance, if the button calls an item screen, the item screen's description will be displayed on the button. You can override this by enabling the checkbox next to the Description field and typing a different description here.
This option will become available if the description checkbox is enabled. Use the 2nd name field to override the alternate description of the element called by this button.
From the drop-down list, select the visual style of the button
...
Select the desired text color from the drop-down list.
Select the desired button color from the drop-down list. selecting the Custom option will give access to the R, G, B fields, which allows you to create your own colors by entering RGB values from 0 to 255 in each field.
Enable this option to add an icon to the button, then type the image file name in the text field, without the file extension. For instance, if the name of the image is "Steak.png", simply type "Steak". Icons are stored in C:\VELOCE\WSDATA\WIN\ICONS\. This feature supports .png, .jpg and .bmp image types.
Buttons can be extended horizontally up to the maximum number of columns configured for the group. For example, if you enter 2 in this field, the button would become 2 columns wide.
Buttons can be extended vertically up to the maximum number of rows configured for the group. For example, if you enter 2 in this field, the button would become 2 rows high.
Select the icon's position on the button.
Enable this option so that the icon will hide everything beneath it.
By default the font size will automatically adapt to the available space on the button. You can override this by enabling this option and setting a custom font size for the text displayed on the button.
Enable this option to make the key visible on the POS screen. Disable this option to hide this key.
...
...
...
...
...
...
...
...
...
...
Related Topics
