Configure Languages
Supported Languages
Veloce supports two languages for its Back-Office User Interface and POS:
English (Canada)
French (Canada)
However, all elements which have free text descriptions also have a second name field which can be used as a third language at the POS. For instance, you could have the main POS interface in English, but have all item screens, items, divisions, etc, appear in Spanish for employees using the POS, while having the final invoice still print in English or French.
To configure languages in Veloce:
Login to the Veloce Back-Office.

Open the Setup/Utilities module

Click the System Config. link. (or use the Configuration > System Configuration... menu option)

Click on the Configuration tab. The language options are located at the bottom of that page.
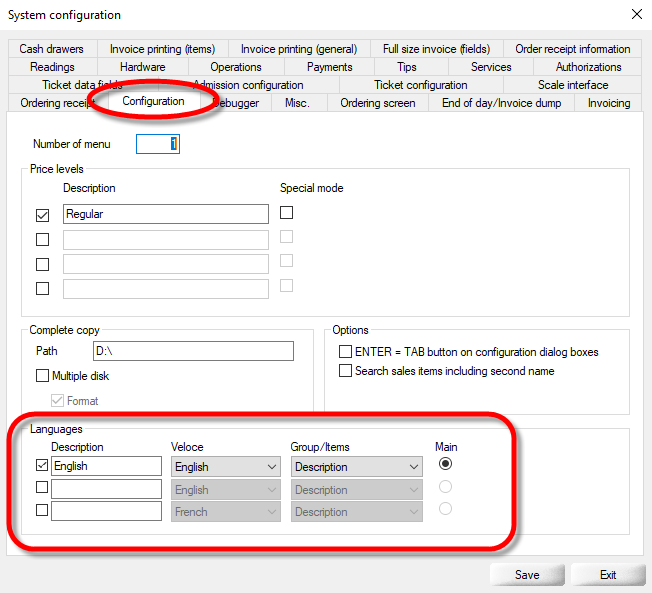
By default, only English is configured, which also makes it the default (main) language.
Checkbox
Enable the language profile(s) that will be available throughout your system by ticking the corresponding checkbox to the left. At least one profile needs to be enabled.
Description
Type in the description you wish to use for this language. This description is used on the language selection screen at logon and when creating back-office users or POS employee files. For instance, you could decide to name the third profile "Español", which would show up in these various drop-down lists afterwards.
Veloce

Select the Veloce built-in language to use. Only French or English are available. This selection applies to the Veloce Back-Office user interface and the default POS user interface.
Group/Items

Select whether Veloce should display the default Description or the Second Name of groups and items when the corresponding language is active. Note that this only affects the point of sale and printed invoices. The back-office itself is not affected by this selection.
NOTE: The Second Name is actually an alternate description that can be given to any item, groups, divisions, big divisions, etc. By typing these alternate descriptions in a third language, you can effectively create a system that will partially work in that third language, although the main user interface will always remain in English or French.
Main
Select which language will be used by default throughout the system. For instance, if English is set as the main language, the point of sale's interface will be displayed in English by default, until an employee with a different language profile logs on. For the back-office, it means that the login screen would always be in English, although a user with a French language profile could still logon and use the Back-Office in French.
Additionally, this setting will determine whether your sales items will print on the guest check using the main description or the second name.
Language profiles for Back-Office users and POS Employees
The topics of Back-Office users and POS Employees will be covered more in depth later. However, it makes sense to touch on it right now, in order to make more sense of the Veloce language settings and the impact it will have on programming items later.
Back-Office Users
To select the default language of a Back-Office user:
Logon to the Veloce Main Back-Office.

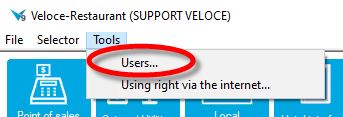
Click on the Tools menu and select the Users... option.
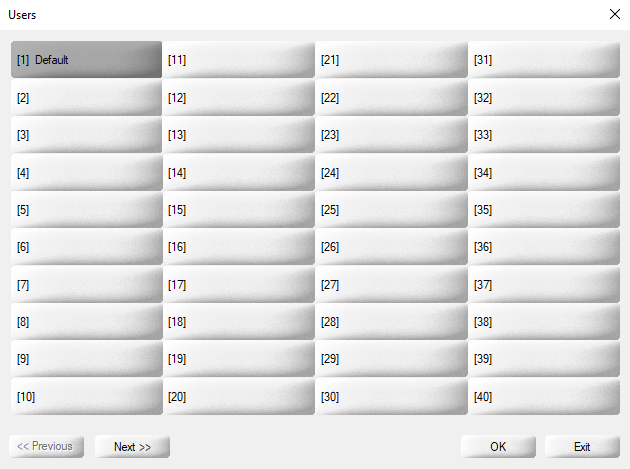
Select a user from the list by simply clicking on it.
On the Configuration tab, you will see a Language drop-down list. Select the desired language from that list, or use the Choice option.
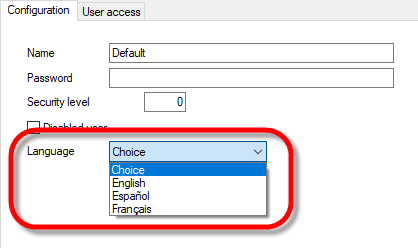
NOTE: Selecting a specific language will force that user to use the selected language. Using the Choice option will present the user with a list of available languages at every logon.
POS Employees
To select the default language of a POS employee:
Logon to the Veloce Main Back-Office.

Start the Point of Sale Control module by clicking the corresponding icon.

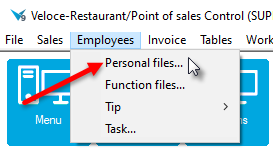
Click the Employees menu and select the Personal Files... option.
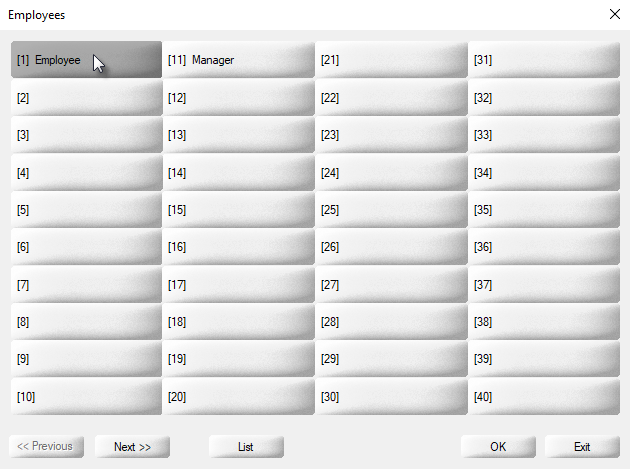
Select an employee file from the list by clicking on it.
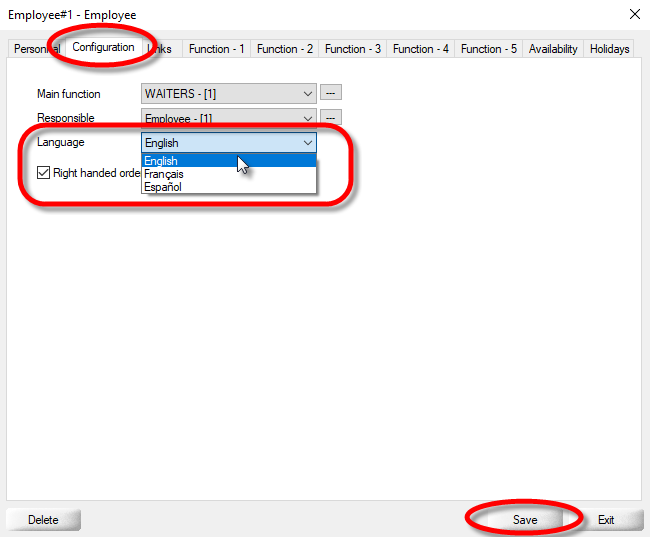
On the Configuration tab, you will see a Language drop-down list. Select the desired language from that list and click the Save button.
Last updated
Was this helpful?

