LogoLogo
FrançaisPayFacto homepageContact us
Veloce POS
Veloce POS
  • Veloce
    • About Veloce
    • Introduction
    • Hardware and Software Requirements
      • Hardware Requirements
      • Tablets
      • Network Requirements (Wired)
      • Network Requirements (Wi-Fi)
      • Network Layout
      • Operating System Requirements
      • Unsupported Operating Systems
    • Installation & Initial Setup
      • Before Installing Veloce
      • Configure your Windows Network Profile
      • Download Veloce Files
      • Install the Veloce Back-Office
      • Share the Veloce Back-Office folder
      • Veloce Shortcuts Installation
      • Veloce First Start and License Activation
      • Veloce Server First Start and Windows Defender Firewall Configuration
    • Veloce Back-Office
      • Introduction
        • Veloce First Login
        • Basic Navigation
        • Veloce Back-Office Overview
      • Back-Office User Accounts
        • Create Back-Office User Accounts
        • Login to the Veloce Back-Office
    • Setup / Utilities
      • Setup / Utilities Overview
      • Configure Languages
      • Add a third language profile in Veloce
      • Price Levels
      • Currency Options
      • Date & Time
      • Taking Backups
      • Restoring Backups
    • Point of Sales Control
      • Taxes
        • Taxes Overview
        • Tax Categories
      • B.C. Soda Tax
        • B.C. Soda Tax Overview
        • B.C. Soda Tax Configuration
        • B.C. Soda Tax Examples
        • Example #1: Simple item
        • Example #2: Combo with unlisted soda
        • Example #3: Combo with listed soda
      • Modes
      • Big Divisions
      • Divisions
        • Divisions - Configuration
        • Divisions - Price per Quantity
        • Divisions - Discounts
        • Divisions - Redistributed Tips
        • Divisions - Links
        • Divisions - General Ledger
        • Divisions - Taxes
      • Sales Items
        • Item Screens
        • Create Sales Items
        • Sales Item Setup - Configuration
        • Sales Item Setup - Item Types
        • Sales Item Setup - Ordering Options
        • Sales Item Setup - Links
        • Sales Item Setup - Options
        • Sales Item Setup - Availability / Schedule
        • Sales Item Setup - Delivery
        • Sales Item Setup - Preparation
        • Sales Item Setup - Variations
        • Sales Item Setup - Included Items
        • Sales Item Setup - POS Inventory
        • Sales Item Setup - Bar Interface
        • Sales Item Setup - Recipe
        • Sales Item Setup - Forced Modes
        • Sales Item Setup - Taxes
      • Groups and Keys
        • Group Configuration
        • Button Configuration
        • Button Functions
        • Button Functions - Detailed List
      • Payment Modes
    • Electronic Funds Transfer (EFT)
      • About Electronic Funds Transfer (EFT)
      • Overview of PayFacto solutions offered with Veloce
      • Payment Modes for EFT
        • Introduction
        • Generic Credit/Debit Payment Mode
        • Interac Debit Payment Mode
        • Credit Card Payment Modes
      • Veloce Mobile Application
        • Introduction and Prerequisites
        • Veloce Back-Office Setup
          • EFT Module Setup
          • Departments Setup (POS Control)
          • Workstation Setup in the Point of Sale Control module
          • System Configuration Setup
          • Finalize Configuration
        • Payment Terminal Setup
          • PayFacto Payment Application
          • Veloce POS Application Installation
          • Veloce POS Application Configuration
          • Veloce POS Application - Connection
    • PayFacto Verified Printers for MEV-WEB
  • Velmix LQ 232-IP
    • Safety Guidelines
    • Introduction to the Velmix LQ 232-IP
    • Included Materials
    • Connexions
    • Installation
    • Velmix LQ 232-IP Controller
    • Installing Bottle Stoppers
    • Sealing Bottles
    • Pouring a Product
    • Cleaning the Stoppers
    • Pairing the Velmix LQ IP to the POS
Powered by GitBook
LogoLogo

Legals

  • Terms & conditions

© 2024 PayFacto, Inc. All rights reserved.

On this page
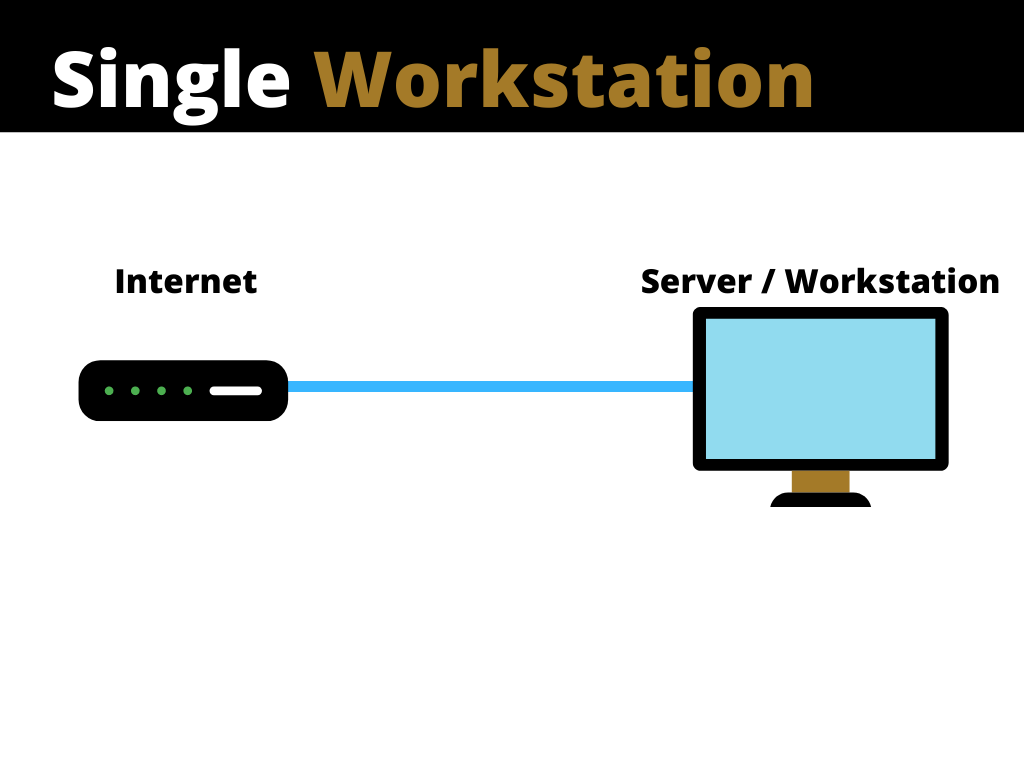
  • Single Workstation
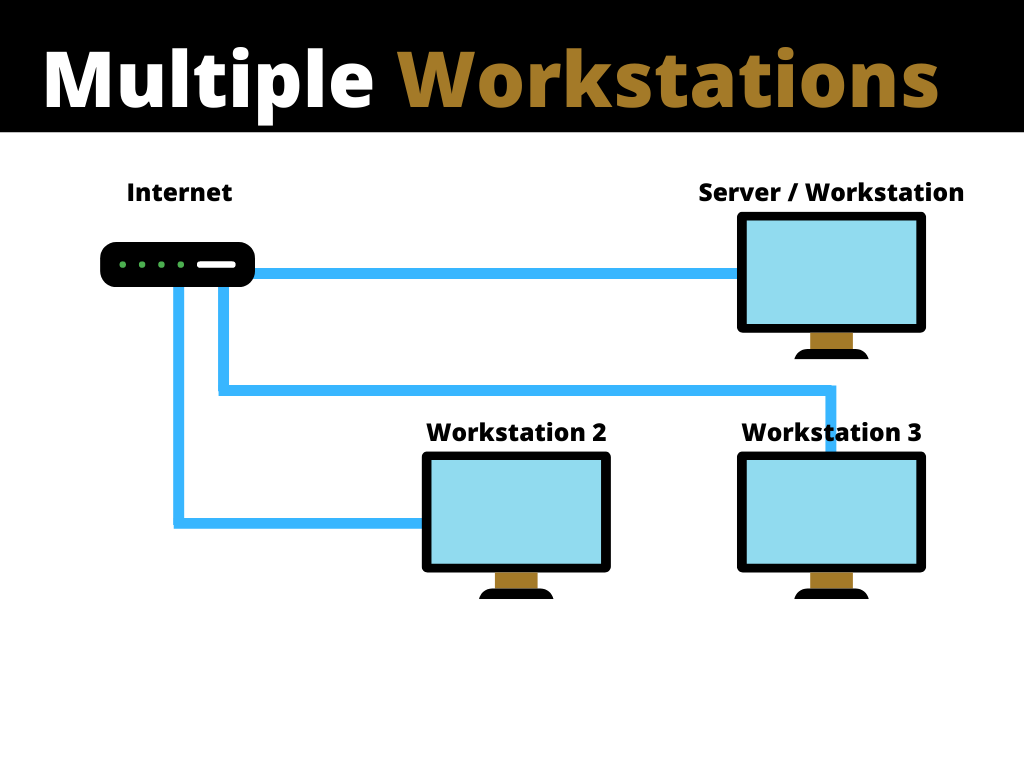
  • Multiple Workstations (Basic)
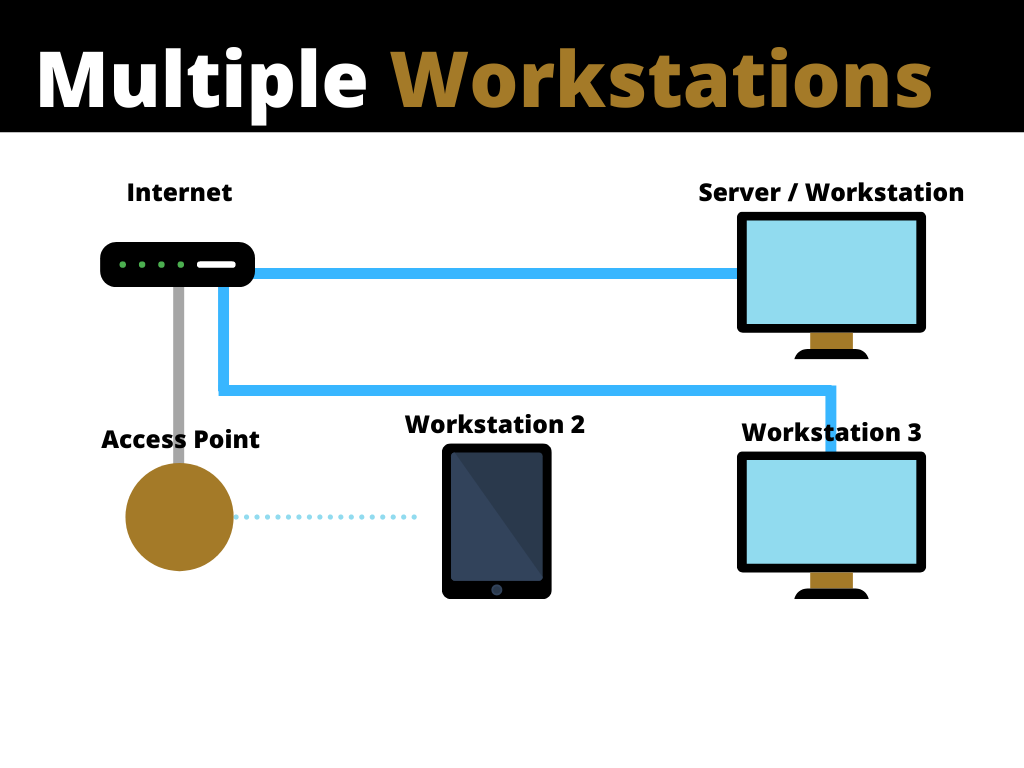
  • Multiple Workstations with WiFi
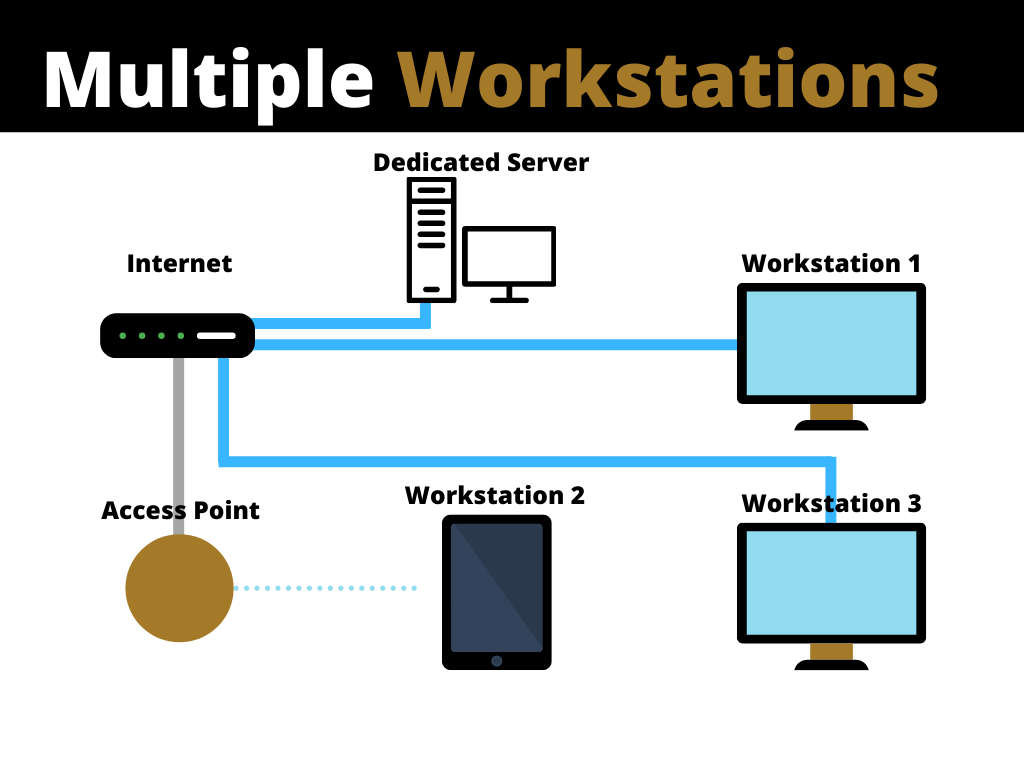
  • Multiple workstations with dedicated server

Was this helpful?

Export as PDF
  1. Veloce
  2. Hardware and Software Requirements

Network Layout

PreviousNetwork Requirements (Wi-Fi)NextOperating System Requirements

Last updated 1 year ago

Was this helpful?

Veloce can be installed using different network models depending on the specific needs of any business.

For instance, the Veloce Back-Office software and the POS software can both be installed on the same device for smaller establishments. For larger operations, the Back-Office can be installed on a separate PC located in a communication closet while dozens of POS workstations are installed throughout the building.

Here are a few examples of common configurations:


Single Workstation

This layout is used in small volume operations. The hardware used is generally a Windows 10 touchscreen workstation, but a generic Windows 10 PC with a mouse and keyboard may also be used. In this configuration, both the Veloce Back-Office and the POS sofware are installed on the same device, which reduces the system's footprint and saves space.

The workstation is generally connected to the Internet to benefit from online features, and nothing else is connected to it.

Multiple Workstations (Basic)

This is one of the most common layouts. This layout is very flexible, as it allows for additional workstations to be easily configured to follow an increase in the volume of operations.

In this layout, one of the workstations is also used as the Veloce Back-Office server, which avoids the use of a dedicated PC for that purpose, saving space and lowering hardware costs.

The other workstations are connected to the Back-Office server through a TCP/IP network, which is itself connected to the Internet.

Multiple Workstations with WiFi

This network layout is very similar to the Multiple Workstations layout seen previously. Like its predecessor, it uses a Back-Office Server / Workstation combo and workstations are connected together with a TCP/IP network. On this one, however, a WiFi access point is added to provide connectivity to an Android or iOS tablet workstation. Note that for security reasons, this access point is dedicated to workstations only. WiFi Internet access for customers needs to be provided by a separate device or VLAN.

Multiple workstations with dedicated server

Again, this layout is very similar to the other two layouts with multiple workstations. The main difference here is the fact that a dedicated server is used instead of a Server / Workstation combo. The dedicated server can be a simple desktop PC installed in the manager's office or in a small communication closet. For large operations, a rackmount server in a server room can also be used for this purpose.

This layout is used when there is space available to accommodate the dedicated server and that the processing power provided by a Server / Workstation combo is insufficient to meet the needs of a larger operation with dozens of workstations.

This layout offers maximum flexibility. It is very easy to add more workstations as needed, and the performance loss incurred by adding more workstations is negligible.