LogoLogo
FrançaisPayFacto homepageContact us
Veloce POS
Veloce POS
  • Veloce
    • About Veloce
    • Introduction
    • Hardware and Software Requirements
      • Hardware Requirements
      • Tablets
      • Network Requirements (Wired)
      • Network Requirements (Wi-Fi)
      • Network Layout
      • Operating System Requirements
      • Unsupported Operating Systems
    • Installation & Initial Setup
      • Before Installing Veloce
      • Configure your Windows Network Profile
      • Download Veloce Files
      • Install the Veloce Back-Office
      • Share the Veloce Back-Office folder
      • Veloce Shortcuts Installation
      • Veloce First Start and License Activation
      • Veloce Server First Start and Windows Defender Firewall Configuration
    • Veloce Back-Office
      • Introduction
        • Veloce First Login
        • Basic Navigation
        • Veloce Back-Office Overview
      • Back-Office User Accounts
        • Create Back-Office User Accounts
        • Login to the Veloce Back-Office
    • Setup / Utilities
      • Setup / Utilities Overview
      • Configure Languages
      • Add a third language profile in Veloce
      • Price Levels
      • Currency Options
      • Date & Time
      • Taking Backups
      • Restoring Backups
    • Point of Sales Control
      • Taxes
        • Taxes Overview
        • Tax Categories
      • B.C. Soda Tax
        • B.C. Soda Tax Overview
        • B.C. Soda Tax Configuration
        • B.C. Soda Tax Examples
        • Example #1: Simple item
        • Example #2: Combo with unlisted soda
        • Example #3: Combo with listed soda
      • Modes
      • Big Divisions
      • Divisions
        • Divisions - Configuration
        • Divisions - Price per Quantity
        • Divisions - Discounts
        • Divisions - Redistributed Tips
        • Divisions - Links
        • Divisions - General Ledger
        • Divisions - Taxes
      • Sales Items
        • Item Screens
        • Create Sales Items
        • Sales Item Setup - Configuration
        • Sales Item Setup - Item Types
        • Sales Item Setup - Ordering Options
        • Sales Item Setup - Links
        • Sales Item Setup - Options
        • Sales Item Setup - Availability / Schedule
        • Sales Item Setup - Delivery
        • Sales Item Setup - Preparation
        • Sales Item Setup - Variations
        • Sales Item Setup - Included Items
        • Sales Item Setup - POS Inventory
        • Sales Item Setup - Bar Interface
        • Sales Item Setup - Recipe
        • Sales Item Setup - Forced Modes
        • Sales Item Setup - Taxes
      • Groups and Keys
        • Group Configuration
        • Button Configuration
        • Button Functions
        • Button Functions - Detailed List
      • Payment Modes
    • Electronic Funds Transfer (EFT)
      • About Electronic Funds Transfer (EFT)
      • Overview of PayFacto solutions offered with Veloce
      • Payment Modes for EFT
        • Introduction
        • Generic Credit/Debit Payment Mode
        • Interac Debit Payment Mode
        • Credit Card Payment Modes
      • Veloce Mobile Application
        • Introduction and Prerequisites
        • Veloce Back-Office Setup
          • EFT Module Setup
          • Departments Setup (POS Control)
          • Workstation Setup in the Point of Sale Control module
          • System Configuration Setup
          • Finalize Configuration
        • Payment Terminal Setup
          • PayFacto Payment Application
          • Veloce POS Application Installation
          • Veloce POS Application Configuration
          • Veloce POS Application - Connection
    • PayFacto Verified Printers for MEV-WEB
  • Velmix LQ 232-IP
    • Safety Guidelines
    • Introduction to the Velmix LQ 232-IP
    • Included Materials
    • Connexions
    • Installation
    • Velmix LQ 232-IP Controller
    • Installing Bottle Stoppers
    • Sealing Bottles
    • Pouring a Product
    • Cleaning the Stoppers
    • Pairing the Velmix LQ IP to the POS
Powered by GitBook
LogoLogo

Legals

  • Terms & conditions

© 2024 PayFacto, Inc. All rights reserved.

On this page

Was this helpful?

Export as PDF
  1. Velmix LQ 232-IP

Pairing the Velmix LQ IP to the POS

PreviousCleaning the Stoppers

Last updated 11 months ago

Was this helpful?

Pairing the Velmix LQ IP to the POS

The Velmix LQ IP version uses an Ethernet network to communicate with the Veloce POS workstation. Several Velmix LQ IP controllers can be connected to the Ethernet network at the same time with multiple Veloce POS workstations present on site. An individual Veloce POS workstation must know which Velmix LQ IP controller it is assigned to for use. The pairing operation links the Veloce POS workstation to the Velmix LQ IP controller.

IMPORTANT! The Veloce POS pairing procedure described below is only available for the Velmix LQ IP. Generally, the procedure will be performed by an authorized PayFacto reseller or a member of PayFacto technical support with the necessary technical knowledge. It is presented to you in case you need to do the pairing without the assistance of a PayFacto representative.

To pair the Velmix LQ IP with the Veloce POS workstation:

  1. Take note of the serial number of the Velmix controller to pair.

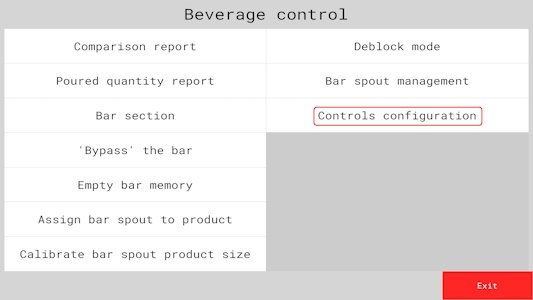
  2. In the Veloce POS to be paired with the Velmix LQ IP identified in step 1, go to: Functions > Beverage control > Controls configuration.

  1. To set the Velmix LQ IP into pairing mode, make sure the activator is in the rest position on the activator holder, with no stopper in the activator. Press and hold the Velmix multifunction button for 20 seconds until the Ethernet N status LED glows red briefly, followed by flashing yellow, then release the button. The Velmix will send a DHCP request to obtain an IP address from the router.

  2. After the Velmix obtains the DHCP address, the Ethernet N status LED flashes green. The Velmix then transmits a UDP broadcast to be detected by the Veloce POS workstation.

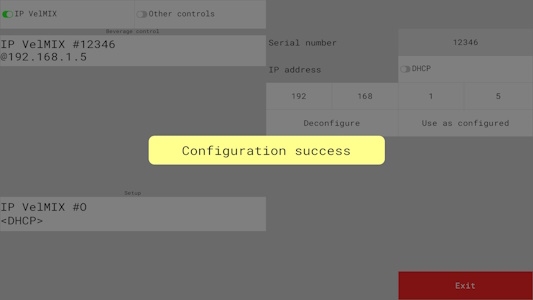
  3. On the Veloce POS workstation, select the desired Velmix LQ configuration in the Beverage control menu. The Controls configuration menu displays all Velmix LQ controllers currently in pairing mode. Select the Velmix LQ controller to be paired with the previously selected configuration.
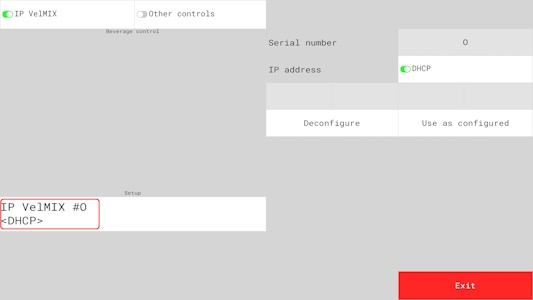
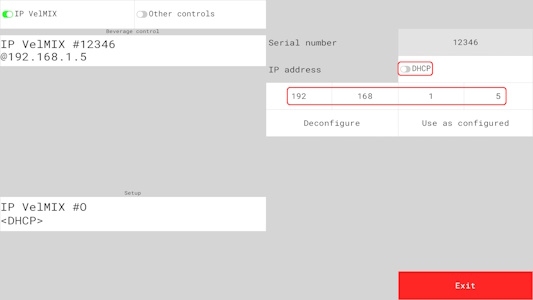
  1. After selecting the Velmix to pair with Veloce POS, select the network connection mode:

  • DHCP mode (default) where the Velmix controller's IP address may change depending on the router,

or

  • Disable DHCP mode to use a static IP address. With static mode, you can assign the IP address of your choice according to your network specifications.
  1. To complete the pairing, click the Use as configured button.
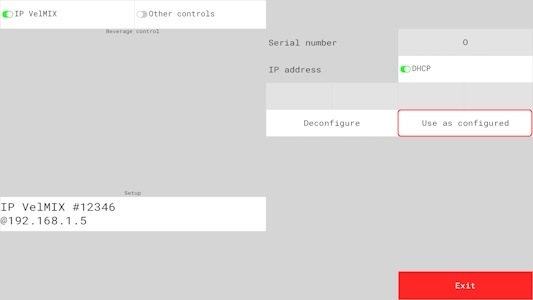
  1. A Configuration success message appears. On the Velmix LQ IP controller, the Ethernet N status LED may flash blue for a few seconds; when the TCP/IP connection is established, the LED will remain a solid blue and the pairing process will be complete.
NOTE : If the pairing process fails, a message appears indicating that the timeout period has been exceeded. Repeat the pairing procedure starting from step 3.