Transactions
Transactions
Gift card transactions are very similar to regular credit or debit card transactions with the exception that gift cards have a preset amount available to spend. Depending on your Point of Sale (POS) environment, you may need to indicate that a sale is a debit card transaction on the POS workstation before using the payment terminal.
If you are using your payment terminal in standalone mode (no communication with a POS), or your POS system does not need to identify gift card transactions, then the transaction workflow begins on the payment terminal. Gift card transactions are similar to regular sales transactions, but some of the terms may differ; for more information about processing gift card transactions, refer to the following links:
Redemption (process a sale)
Empty Card (empties the balance of a card)
Balance (card balance inquiry)
Increment (add funds to the gift card balance)
Complete Cancel (reimburse the entirety of a previous gift card sale)
Partial Cancel (reimburse a portion of a previous gift card sale)
Activation (new cards must be activated before use)
Gift Card Transactions
There are 7 transactions available when you accept gift cards. Each transaction type applies to a specific situation as explained below:
Redemption: Uses a portion of the remaining balance on the card as payment for a product or service.
Empty Card: A redemption used to clear the remaining balance on the card. Only applicable to card balances below $5 ($4.99 or less).
Balance: Informational only; queries the DataCandy server for the remaining card balance.
Increment: Adds funds to an active card.
Complete Cancel: Reverses the full amount from a previous transaction and adds the funds back to the card’s balance. Requires the authorization number from DataCandy printed on the original receipt.
Partial Cancel: Reverses a partial amount from a previous transaction and adds the funds back to the card’s balance. Requires the authorization number from DataCandy printed on the original receipt.
Activation: Activates and adds funds to a new card.
Redemption
Processing sales using gift cards are referred to as redemptions. A redemption is like any other sale, except instead of using a credit or debit card, the customer presents a gift card. The sale amount is deducted from the card’s balance and the new balance is printed on the customer receipt. Redeeming funds from a gift card to pay for a purchase is a two-step process:
The sale transaction is processed on the Point of Sale (POS) system.
The funds redeemed from the card’s current balance.
To perform a redemption:
Process the sale transaction on your POS, indicating that the payment method is a gift card.
Touch the number pad to enter the redemption amount.
Touch Redemption.

Swipe the customer’s gift card. You can also touch GIFT CARD MANUAL ENTRY, enter the Admin password, and then enter the card number and touch OK.

The authorization server deducts the amount from the card balance, and the terminal prints a transaction receipt. Tear off the receipt and hand it to the customer with their card. Touch OK to print a second receipt, or touch CANCEL.
Empty Card
If a customer has a balance of $4.99 or less on their gift card, they can empty the card balance for a sale. The purchase cannot be more than the available card balance. After the balance is reduced to $0.00, the gift card becomes inactive. Emptying the balance of a card is a two-step process:
The sale transaction is processed on the Point of Sale (POS) system.
The funds redeemed from the card’s remaining balance.
NOTE: The Empty Card transaction does not require that you enter the purchase amount. If the client does not know the remaining balance on the card, you should perform a balance inquiry to ensure that the balance qualifies for the Empty Card transaction.
To empty a card balance:
Process the sale transaction on your POS, indicating that the payment method is a gift card.
Touch the Action button on the main screen.

Touch Transactions.

Touch Empty Card.

Touch Empty Card.

Swipe the customer’s gift card. You can also touch GIFT CARD MANUAL ENTRY, enter the Admin password, and then enter the card number and touch OK.

The authorization server empties the card balance, and the terminal prints a transaction receipt. Tear off the receipt and hand it to the customer with their card. Touch OK to print a second receipt, or touch CANCEL.
Balance
Because gift cards are loaded with a set amount of money, customers may not know their balance prior to paying for a product or service. Checking the available funds on a gift card does not affect the balance.
To check the balance on a card:
Touch the Action button on the main screen.

Touch Transactions.

Touch Balance.

Swipe the customer’s gift card. You can also touch GIFT CARD MANUAL ENTRY, enter the Admin password, and then enter the card number and touch OK.

The authorization server verifies the card balance, and the terminal prints a transaction receipt. Tear off the receipt and hand it to the customer with their card. Touch OK to print a second receipt, or touch CANCEL.
Increment
If a customer has a reloadable gift card, they can add funds to their balance (increment) whenever they want. Adding funds is a two-step process:
Customer pays for the funds they want to add using cash, credit, or debit.
The funds are added to the card’s existing balance.
To add funds to a card:
Using your POS, process the payment for the funds that will be added to the card.
Touch the Action button on the main screen.

Touch Transactions.

Touch Increment.

Touch the number pad to enter the funds amount to add to the card balance.
Touch Increment.

NOTE: If you are using the terminal in standalone mode (no POS), you may need to enter the administrator password; if required, enter the Admin password and touch OK.
Swipe the customer’s gift card. You can also touch GIFT CARD MANUAL ENTRY, enter the Admin password, and then enter the card number and touch OK.

The authorization server adds the increment amount to the card balance; the terminal prints a transaction receipt showing the new balance. Tear off the receipt and hand it to the customer with their card. Touch OK to print a second receipt, or touch CANCEL.
Complete Cancel
A complete cancel reverses the entire amount of a previous redemption. Gift cards do not allow for refunds in the same way as credit or debit cards. If a customer wants to return a product redeemed (purchased) with a gift card, the transaction must be reversed to allow the funds to be returned to the card balance. Reversing the complete amount is a two-step process:
The transaction is reversed on the Point of Sale (POS) system.
The full amount of the redemption is reversed to return the funds to the card’s balance.
IMPORTANT: The customer must present the original transaction receipt, as it contains the transaction confirmation number required to cancel the previous redemption. Transaction confirmation numbers have a maximum length of 12 digits.
To reverse the complete amount of a previous redemption:
Touch the Action button on the main screen.

Touch Transactions.

Touch Complete Cancel.

Touch Complete Cancel.

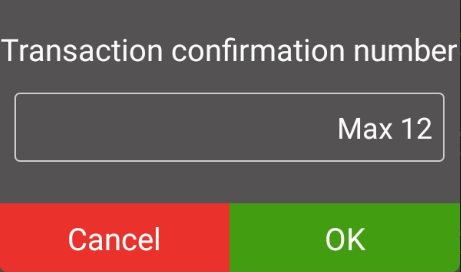
Use the number pad to enter the transaction confirmation number that appears on the original receipt and touch OK.

Swipe the customer’s gift card. You can also touch GIFT CARD MANUAL ENTRY, enter the Admin password, and then enter the card number and touch OK.

The authorization server cancels the previous redemption and increments the total to the card balance; the terminal prints a transaction receipt showing the updated balance. Tear off the receipt and hand it to the customer with their card. Touch OK to print a second receipt, or touch CANCEL.
Partial Cancel
While the Complete Cancel procedure reimburses an entire transaction, you can cancel a partial amount of a transaction. Use this transaction if your customer used a gift card to purchase more than one product or service in a single transaction. Cancelling a partial amount is a two-step process:
The portion of the transaction is reversed on the Point of Sale (POS) system.
The partial amount of the redemption is reversed to return the funds to the card’s balance.
IMPORTANT: The customer must present the original transaction receipt, as it contains the transaction confirmation number required to cancel the previous redemption. Transaction confirmation numbers have a maximum length of 12 digits.
To reverse a partial amount of a previous redemption:
Touch the Action button on the main screen.

Touch Transactions.

Touch Partial Cancel.

Touch the Number pad to enter the amount of the transaction to reverse.
Touch Partial Cancel.

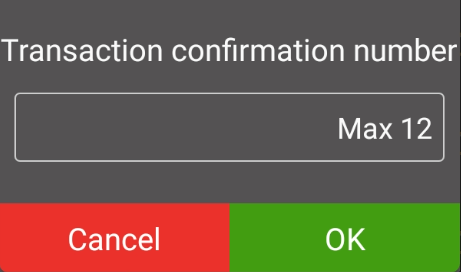
Use the number pad to enter the transaction confirmation number that appears on the original receipt and touch OK.

Swipe the customer’s gift card. You can also touch GIFT CARD MANUAL ENTRY, enter the Admin password, and then enter the card number and touch OK.

The authorization server cancels the specified amount of the previous redemption and increments the amount to the card balance; the terminal prints a transaction receipt showing the updated balance. Tear off the receipt and hand it to the customer with their card. Touch OK to print a second receipt, or touch CANCEL.
Activation
Gift cards have no value and cannot be redeemed prior to activation. When you activate a card, you are adding funds to the card balance while the card’s unique identification number is registered as valid on the DataCandy server. Cards may have a preset value or allow the purchaser to add funds in the amount of their choosing; the procedure is the same for both. Activating a card is a two-step process:
Customer pays for the card’s preset value or the amount they wish to load onto the card using cash, credit, or debit.
The card is registered as active on the DataCandy server and the funds are added to the card’s balance.
To activate a new gift card:
Using your POS, process the sale for the card’s value or the funds to add to the card.
Touch the Action button on the main screen.

Touch Transactions.

Touch Activation.

Touch the number pad to enter the amount of funds to increment to the new card’s balance.
Touch Activation.

NOTE: If you are using the terminal in standalone mode (no POS), you may need to enter the administrator password; if required, enter the Admin password and touch OK.
Swipe the customer’s gift card. You can also touch GIFT CARD MANUAL ENTRY, enter the Admin password, and then enter the card number and touch OK.

The authorization server activates the card and increments the balance; the terminal prints a transaction receipt showing the card balance. Tear off the receipt and hand it to the customer with their card. Touch OK to print a second receipt, or touch CANCEL.
Was this helpful?

