LogoLogo
FrançaisPayFacto homepageContact us
UK Docs Center
UK Docs Center
  • TERMINALS
    • Mobile
      • PAX A920
        • Terminal Overview
        • Terminal Setup and Configuration
        • Terminal Activation
        • Terminal Usage
      • PAX A920 Pro
        • Terminal Overview
        • Initial Terminal Configuration
        • Terminal Activation
        • Working with the Terminal
      • A920 / A920 Pro Accessories
        • PAX A920 - A920 Pro Terminal Charging Base Installation Guide
          • Charging Base Overview
          • Charging Base Installation
          • Using the Charging Base
        • PAX A920 Multi-Terminal (5) Charging Base Installation Guide
          • Charging Base Overview
          • Charging Base Installation
          • Using the Charging Base
    • Countertop
      • PAX A80
        • A80 Spec
        • A80 Setup Guide
          • Introduction
          • A80 Terminal Overview
            • Overview
            • Terminal Hardware
            • A80 Communication Ports
          • Terminal Setup and Configuration
            • Installing the Printer Paper
            • Connect the Terminal Cables
            • Configuring the Terminal Display Language
            • Configuring the Terminal Network Connections
            • Configuring the Terminal Ethernet Connection
            • Configuring the Terminal Wi-Fi Connection
          • Terminal Activation
            • Overview
            • Activate Terminal
            • Set Passwords
          • Working with the Terminal
            • Powering the Terminal On or Off
            • Terminal Input Options
            • Replacing the Printer Paper
            • Card Payment Options
        • Accessories
          • Introduction
          • Installing the T Bracket
          • Cable Installation
  • APPLICATIONS
    • SecureTable
      • SecureTable: Online User Manual
        • Overview
        • Requirements
        • STPI Secure Installation
          • Installation Process Overview
          • Install Microsoft .NET Framework 3.5 SP1
          • Install Java for Windows
          • Install the STPISecure Client software
          • Activate the STPI Secure License
          • Start the STPI Client for the first time
          • Configure the STPI Client as a Service
        • Maitre'D Configuration
          • Electronic Funds Transfer Module Setup
          • Media Type mappings for SecureTable or SecurePay
          • Generic Media Type mapping for SecureTable or SecurePay
        • SecureTable Application
          • SecureTable installation on Android Payment Terminals
          • SecureTable Application - Basic Navigation
          • SecureTable Application Configuration
          • SecureTable Functions
        • Payment Process
          • SecureTable Full Transaction Workflow
          • Working with Tips
          • Voids
        • Tasks-How To's
          • Task: Add an APN to your Android Payment Terminal
          • Task: Configure Port Forwarding
          • Task: Switch between Wifi and 4G/LTE
        • Troubleshooting
      • SecureTable Maitre'D Edition for TYRO
        • Introduction
        • Requirements
        • STPI Secure Installation
          • Install the STPISecure Client software
          • Activate the STPI Secure License
          • Start the STPI Client for the first time
          • Configure the STPI Client as a Service
        • Maitre'D Configuration
          • Electronic Funds Transfer (EFT) Interface setup
          • Media Type mappings for SecureTable
          • Generic Media Type mapping for SecureTable
        • SecureTable Application
          • SecureTable Installation on Android Payment Terminals
          • SecureTable Application - Basic Navigation
          • SecureTable Application Configuration
          • SecureTable Functions
        • Payment Process
          • General use of SecureTable to apply payments
          • Transaction workflow
          • Working with Tips
          • Voids
        • Tasks - How To's
          • Task: Add an APN to your Android Payment Terminal
          • Task: Configure Port Forwarding
          • Task: Switch between Wifi and 4G/LTE
        • Troubleshooting
          • Microsoft .NET Framework 3.5 is missing
          • Java is missing
    • SecurePay
      • Overview
      • Requirements
      • Use the STPI Secure Installer to install the RTI-SIPA plugin
        • Installation Process Overview
        • Install Microsoft .NET Framework 3.5 SP1
        • Install Java for Windows
        • Install the RTI-SIPA Plugin
      • Maitre'D Configuration
        • Electronic Funds Transfer Module Setup
        • Assign a Payment Terminal to POS Workstation
        • Main Media Type for SecurePay
        • Media Type Mappings for SecurePay
        • Generic Media Type Mapping For SecurePay
        • Employee Configurations
      • SecurePay Application
        • SecurePay Installation on Android Payment Terminals
        • SecurePay Application - Basic Navigation
        • SecurePay Application Configuration
        • SecurePay Functions
      • Payment Process
        • SecurePay Full Transaction Workflow
        • Working with Tips
      • Troubleshooting
  • PROTECTION AGAINST FRAUD
Powered by GitBook
LogoLogo

Legals

  • Terms & conditions

© 2024 PayFacto, Inc. All rights reserved.

On this page
  • Verify the Maitre’D license
  • Electronic Funds Transfer (EFT) Interface setup

Was this helpful?

Export as PDF
  1. APPLICATIONS
  2. SecureTable
  3. SecureTable: Online User Manual
  4. Maitre'D Configuration

Electronic Funds Transfer Module Setup

PreviousMaitre'D ConfigurationNextMedia Type mappings for SecureTable or SecurePay

Was this helpful?

Verify the Maitre’D license

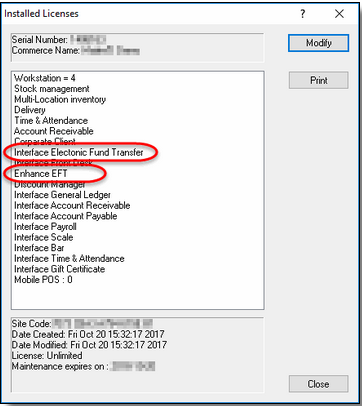
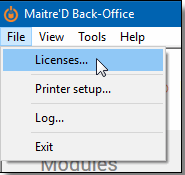
Make sure that the Maitre’D Electronic Funds Transfer Interface and Enhanced EFT options are included on the Maitre’D license. To confirm this, simply logon to the Maitre’D Back-Office using appropriate credentials, click on the File menu and select the Licenses option.
This will bring up the license’s properties. Two options are required for SecureTable to operate properly:

  • Interface Electronic Fund Transfer.

  • Enhanced EFT.

If any of these two options are missing, they will need to be purchased before you can use SecureTable. Please contact your local sales representative.


Electronic Funds Transfer (EFT) Interface setup

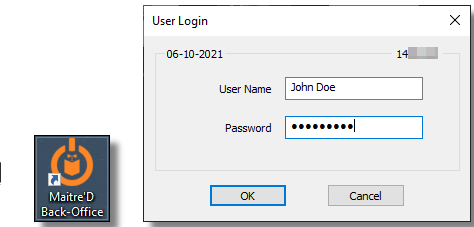
  1. Logon to the Maitre’D Back-Office with appropriate credentials. (Distributor or System Owner)
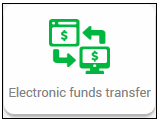
  1. Start the Electronic Funds Transfer Module.
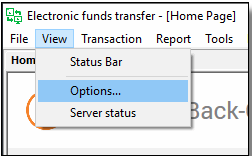
  1. Click the View menu, and select Options…
  1. The Configuration screen opens on the Interface branch.
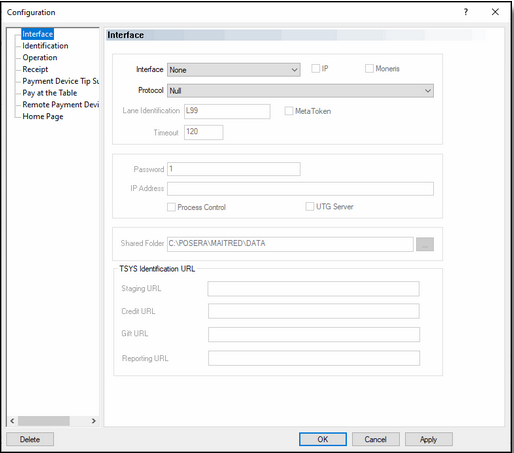
  1. The settings from the Interface, Identification, Operation, Receipt, Payment Device Tip Suggestion, Remote Payment Device and Home Page branches don't have any effect on the operation of SecureTable. Please make sure not to change or remove any settings found in these pages, as these could affect the operation of tethered payment terminals.

NOTE: It is possible to use tethered payment terminals from a third-party processor along with SecureTable. The settings in these windows would then be setup per your processor’s requirements.

  1. Click on the Pay at the Table branch.
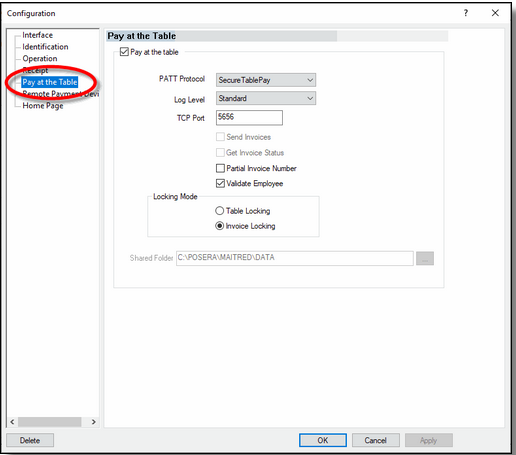
Pay at the table

Enable this option to activate Pay at the Table (PATT) functionality.

PATT Protocol

Select the SecureTablePay protocol.

Log Level

Select the desired log level for the Pay at the Table interface. Available choices are:

  • None: No log file is created.

  • Standard: Standard log level. All operations are logged in a summary format.

  • Detailed: Detailed log level. All operations are logged with detailed information.

  • Debug: Detailed log level with extra information for troubleshooting and investigation purposes.

TCP Port

Type in the TCP Port number used by the STPI Secure client.

Send Invoices

Disabled. This option is not available because it is not compatible with the SecureTablePay protocol.

Get Invoice Status

Disabled. This option is not available because it is not compatible with the SecureTablePay protocol.

Partial Invoice Number

Enable this option to allow the payment terminal to retrieve checks by entering only the last 4 digits of the check number. If this option is disabled, the full check number will be required to retrieve checks.

Validate Employee

Enable this option to force the validation of the employee number entered at the payment terminal. With this option enabled, only the employee who owns the table associated with the printed check will be able to access that check from the payment terminal. If this option is disabled, any employee will be able to access any checks from the payment terminal.

Locking mode

Select the locking mode that will be used when accessing checks from the payment terminal. Two locking modes are available:

Table Locking

Select the table locking mode to lock the entire table as soon as a check is accessed by a payment terminal with SecureTable. For example, if you have 4 printed checks on Table #99, accessing any check from table #99 from a payment terminal with SecureTable will lock all checks from table #99. This prevents any of these checks from being accessed by other payment terminals or POS workstations.

Invoice Locking

Select the invoice locking option to lock only the check being accessed, without locking the entire table. This allows other checks on a given table to be closed simultaneously with other payment terminals or from POS workstations.

Shared Folder

This option is not available because it is not compatible with the SecureTablePay protocol.

  1. Click OK to save changes and close the options window.


Note on locking (Table locking or invoice locking)

As soon as a table or invoice is accessed from a payment terminal with SecureTable, it is locked. This is done to prevent accidental double payment or double processing of invoices. While it is possible to override table or invoice locking, it is not recommended to do so. Unlocking a table or invoice in the middle of it being processed can cause invoices to remain open after being paid and discrepancies in reporting.