LogoLogo
FrançaisPayFacto homepageContact us
UK Docs Center
UK Docs Center
  • TERMINALS
    • Mobile
      • PAX A920
        • Terminal Overview
        • Terminal Setup and Configuration
        • Terminal Activation
        • Terminal Usage
      • PAX A920 Pro
        • Terminal Overview
        • Initial Terminal Configuration
        • Terminal Activation
        • Working with the Terminal
      • A920 / A920 Pro Accessories
        • PAX A920 - A920 Pro Terminal Charging Base Installation Guide
          • Charging Base Overview
          • Charging Base Installation
          • Using the Charging Base
        • PAX A920 Multi-Terminal (5) Charging Base Installation Guide
          • Charging Base Overview
          • Charging Base Installation
          • Using the Charging Base
    • Countertop
      • PAX A80
        • A80 Spec
        • A80 Setup Guide
          • Introduction
          • A80 Terminal Overview
            • Overview
            • Terminal Hardware
            • A80 Communication Ports
          • Terminal Setup and Configuration
            • Installing the Printer Paper
            • Connect the Terminal Cables
            • Configuring the Terminal Display Language
            • Configuring the Terminal Network Connections
            • Configuring the Terminal Ethernet Connection
            • Configuring the Terminal Wi-Fi Connection
          • Terminal Activation
            • Overview
            • Activate Terminal
            • Set Passwords
          • Working with the Terminal
            • Powering the Terminal On or Off
            • Terminal Input Options
            • Replacing the Printer Paper
            • Card Payment Options
        • Accessories
          • Introduction
          • Installing the T Bracket
          • Cable Installation
  • APPLICATIONS
    • SecureTable
      • SecureTable: Online User Manual
        • Overview
        • Requirements
        • STPI Secure Installation
          • Installation Process Overview
          • Install Microsoft .NET Framework 3.5 SP1
          • Install Java for Windows
          • Install the STPISecure Client software
          • Activate the STPI Secure License
          • Start the STPI Client for the first time
          • Configure the STPI Client as a Service
        • Maitre'D Configuration
          • Electronic Funds Transfer Module Setup
          • Media Type mappings for SecureTable or SecurePay
          • Generic Media Type mapping for SecureTable or SecurePay
        • SecureTable Application
          • SecureTable installation on Android Payment Terminals
          • SecureTable Application - Basic Navigation
          • SecureTable Application Configuration
          • SecureTable Functions
        • Payment Process
          • SecureTable Full Transaction Workflow
          • Working with Tips
          • Voids
        • Tasks-How To's
          • Task: Add an APN to your Android Payment Terminal
          • Task: Configure Port Forwarding
          • Task: Switch between Wifi and 4G/LTE
        • Troubleshooting
      • SecureTable Maitre'D Edition for TYRO
        • Introduction
        • Requirements
        • STPI Secure Installation
          • Install the STPISecure Client software
          • Activate the STPI Secure License
          • Start the STPI Client for the first time
          • Configure the STPI Client as a Service
        • Maitre'D Configuration
          • Electronic Funds Transfer (EFT) Interface setup
          • Media Type mappings for SecureTable
          • Generic Media Type mapping for SecureTable
        • SecureTable Application
          • SecureTable Installation on Android Payment Terminals
          • SecureTable Application - Basic Navigation
          • SecureTable Application Configuration
          • SecureTable Functions
        • Payment Process
          • General use of SecureTable to apply payments
          • Transaction workflow
          • Working with Tips
          • Voids
        • Tasks - How To's
          • Task: Add an APN to your Android Payment Terminal
          • Task: Configure Port Forwarding
          • Task: Switch between Wifi and 4G/LTE
        • Troubleshooting
          • Microsoft .NET Framework 3.5 is missing
          • Java is missing
    • SecurePay
      • Overview
      • Requirements
      • Use the STPI Secure Installer to install the RTI-SIPA plugin
        • Installation Process Overview
        • Install Microsoft .NET Framework 3.5 SP1
        • Install Java for Windows
        • Install the RTI-SIPA Plugin
      • Maitre'D Configuration
        • Electronic Funds Transfer Module Setup
        • Assign a Payment Terminal to POS Workstation
        • Main Media Type for SecurePay
        • Media Type Mappings for SecurePay
        • Generic Media Type Mapping For SecurePay
        • Employee Configurations
      • SecurePay Application
        • SecurePay Installation on Android Payment Terminals
        • SecurePay Application - Basic Navigation
        • SecurePay Application Configuration
        • SecurePay Functions
      • Payment Process
        • SecurePay Full Transaction Workflow
        • Working with Tips
      • Troubleshooting
  • PROTECTION AGAINST FRAUD
Powered by GitBook
LogoLogo

Legals

  • Terms & conditions

© 2024 PayFacto, Inc. All rights reserved.

On this page

Was this helpful?

Export as PDF
  1. APPLICATIONS
  2. SecureTable
  3. SecureTable: Online User Manual
  4. STPI Secure Installation

Install the STPISecure Client software

PreviousInstall Java for WindowsNextActivate the STPI Secure License

Was this helpful?

The following instructions describes the installation and configuration process for the Maitre’D POS System.

STPI Secure installation

Note for Maitre'D POS users

On a Maitre'D POS system, the latest version of the STPISecure Installer is bundled with each service pack update. To obtain the latest compatible version of the STPI Secure Installer and ensure optimal compatibility, please install the latest service pack update for your Maitre'D POS system.

Once the Maitre'D service pack update is installed, the STPISecure installer will be located here:

C:\POSERA\MaitreD\PRG\Setup

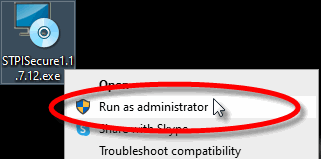
  1. Locate the STPISecureX.X.X.X.exe file, then right-click the file and select Run as administrator.

STPISecure Installer Icon
Run as Admin
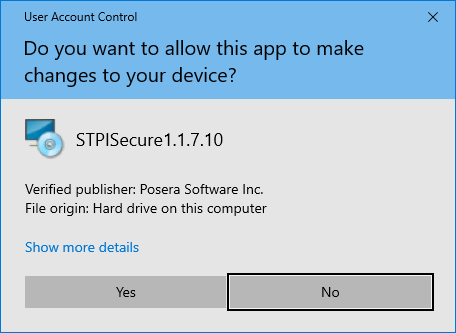
  1. You may see a UAC prompt. Click Yes.
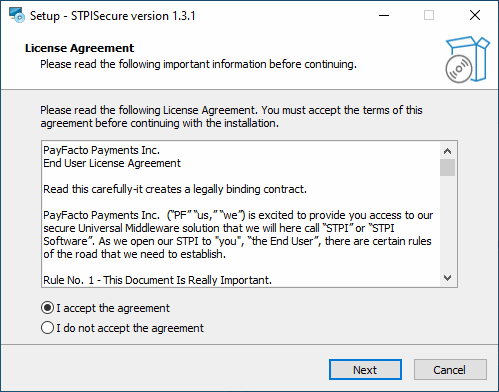
  1. Please read the End-User Licence Agreement. If you agree with the terms, select I accept the agreement and click Next>.
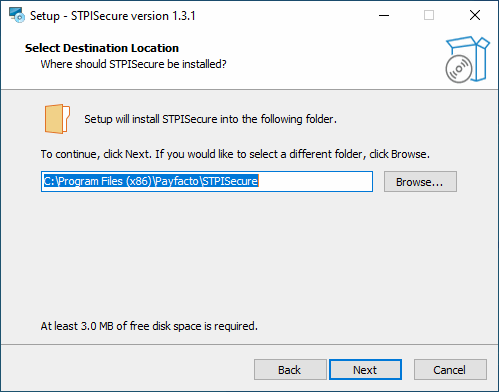
  1. Select the installation destination for STPISecure files. Accept the default path by clicking Next>.
  1. Select the components you wish to install and click Next>. A brief description of each available component is provided below. Install only what you need.
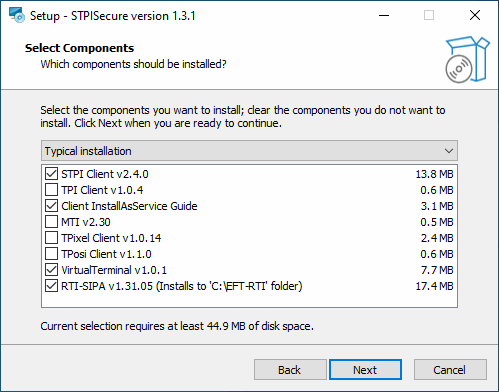
STPI Client v2.x.x.x

This component is required to use the SecureTable application with wireless payment terminals in a table service environment, with a POS system like Maitre'D, Veloce and others. It can be installed alone or alongside RTI-SIPA v1.xx.x.x if a combination of Wireless PATT terminals and fixed terminals are used.

TPI Client v1.x.x

This component is only required with older versions of Maitre'D, such as 7.05.x.x. Do NOT install this component with newer versions of Maitre'D.

Client InstallAsService Guide

This component is optional and copies documents to the install folder with instructions on how to setup various clients as services.

MTI v2.30

This component is required for the Micros POS system only.

TPixel Client v1.0.12

This component is required for the Pixel Point POS system only.

TPosi Client v1.1.0

This component is required for the Positouch POS system only.

VirtualTerminal v1.0.1

This is an optional component that allows for the software to be tested and demonstrated.

RTI-SIPA v1.xx.x.x

This component installs the Retail Terminal Interface for Semi-Integrated Payment Application (RTI-SIPA) plugin files for use with the SecurePay application. This component needs to be installed on the POS system's main Back-Office PC as well as on all POS workstations that will manage a payment terminal. It can be installed alone or alongside STPI Client v2.x.x.x if a combination of Wireless PATT terminals and fixed terminals are used.

NOTE: If you don't use fixed payments terminals with SecurePay, you don't need to install this component

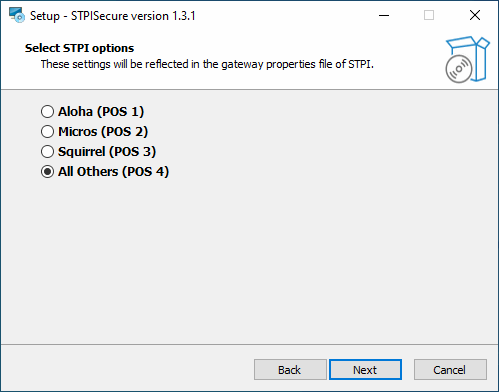
  1. Select the All Others (POS 4) option and click Next>.
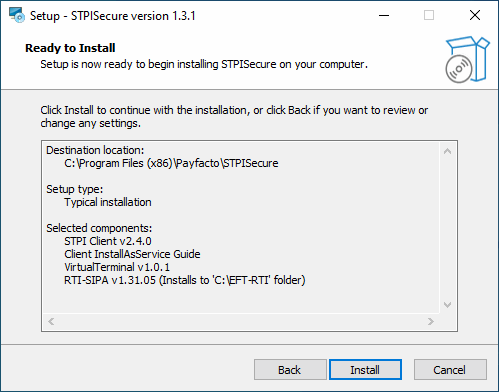
  1. The setup wizard is now ready to begin the automated installation process. Review your settings and click the Install button.
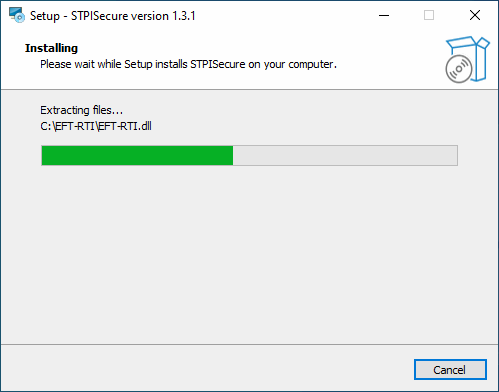
  1. You will see various progress bars during the installation process. This could take a few minutes.
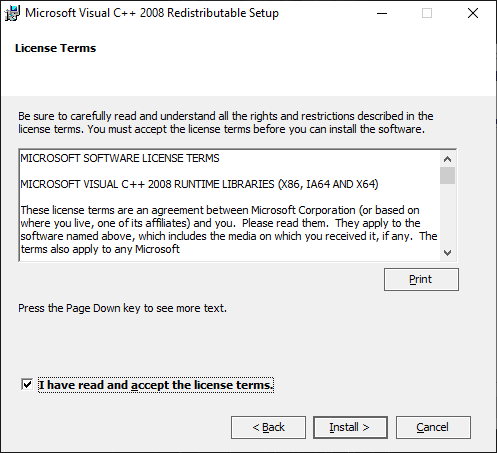
a. During the installation, you could see the installation of required components like Microsoft C++ 2008 Redistributables. This will only appear if the component is missing from your system. Otherwise, you will not see this.
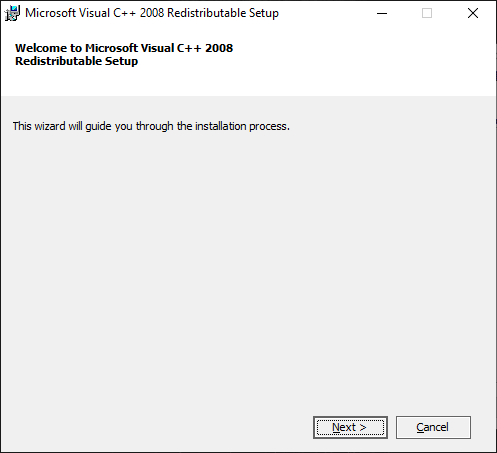
b. Select I have read and accept the license terms and click Install.
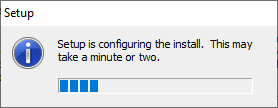
c. A progress bar will be displayed during the installation process.
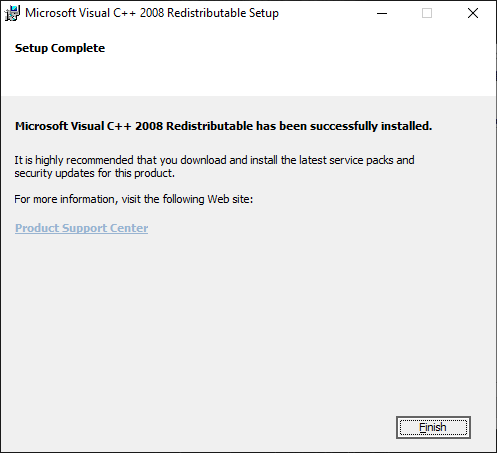
d. When the process completes, a confirmation will appear. Click Finish.
  1. Once the installation completes, you will see the screen pictured below. Click the Finish button.
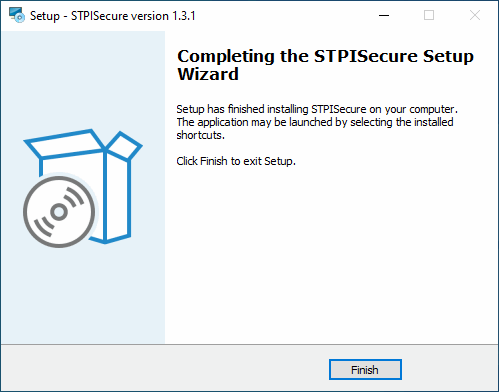
This completes the installation process for the STPISecure Client software.

UAC Warning
STPISecure EULA
STPI Secure Install Path
STPISecure Component selection
STPISecure POS Select - All Others
STPISecure Review Install Settings
STPISecure Install Progress
Redist Install 1
Redist Install 2
Redist Install 3
Redist Install 4
STPISecure Install Completed