Application Management
Assing Clerk Identification Home Page Application Management
You can configure the Freebees Gift and Loyalty app to meet your specific business needs. This section explains how to configure the different application settings.
Configure Language
The Freebees Gift and Loyalty app can display instructions and messages in English or French. By default, the app uses the terminal's configured language, but you can select a specific language if desired.
To configure the application's language:
On the main page, touch the ADMIN button at the bottom of the screen.

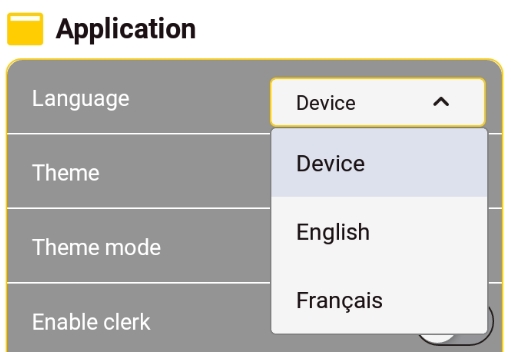
In the Application section, select the language to use from the Language list. The available options are:
Device: The app uses the terminal's configured language.
English: The app displays instructions and messages in English.
French: The app displays instructions and messages in French.
Configure Application Appearance
You can change the appearance of the Freebees application to match your business theme/appearance. By default, the app uses the terminal's configured appearance, but you can select a specific mode (dark or light) if desired.
To configure the application's appearance:
On the main page, touch the ADMIN button at the bottom of the screen.

In the Application section, select the desired custom theme from the Theme list (if a custom theme is available).
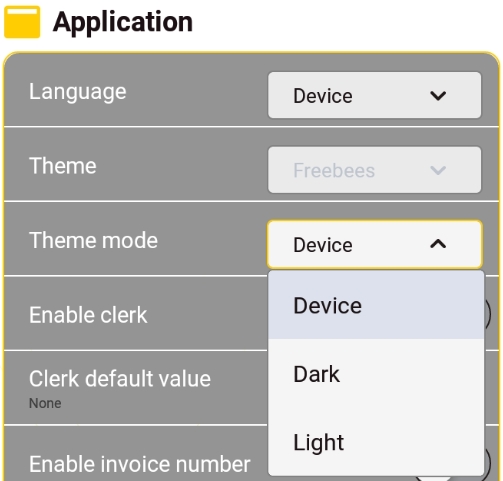
To select between dark and light themes, select the theme mode to use from the Theme mode list. The available options are:
Device: The app uses the terminal's configured appearance.
Dark: The app uses a dark mode as its display.
Light: The app uses a light mode as its display.
Clerk Management
The Freebees Gift and Loyalty app allows you to identify the clerk before processing a gift card transaction. When you enable clerk identification, all operators must enter their clerk number prior to processing a gift card transaction.
This section explains how to enable and configure clerk management for the app. The topics include:
Enable Clerk Identification
When you enable clerk identification, each terminal operator must enter their clerk number before they can process a gift card transaction. When you enable clerk identification, you need to assign a numerical identifier (between 1 and 4 characters) for each terminal operator.
If you have multiple payment terminals with the Freebees Gift and Loyalty app and you want to enable clerk identification on each terminal, you must enable and configure the clerks on each terminal individually.
If your terminal payment application uses operator identification, you can assign the same identifiers (up to 4 characters) in the Freebees app.
To enable clerk identification:
On the main page, touch the ADMIN button at the bottom of the screen.

In the Application section, toggle the Enable clerk button to On. A new menu option appears.

Assign Clerk Identification Home Page
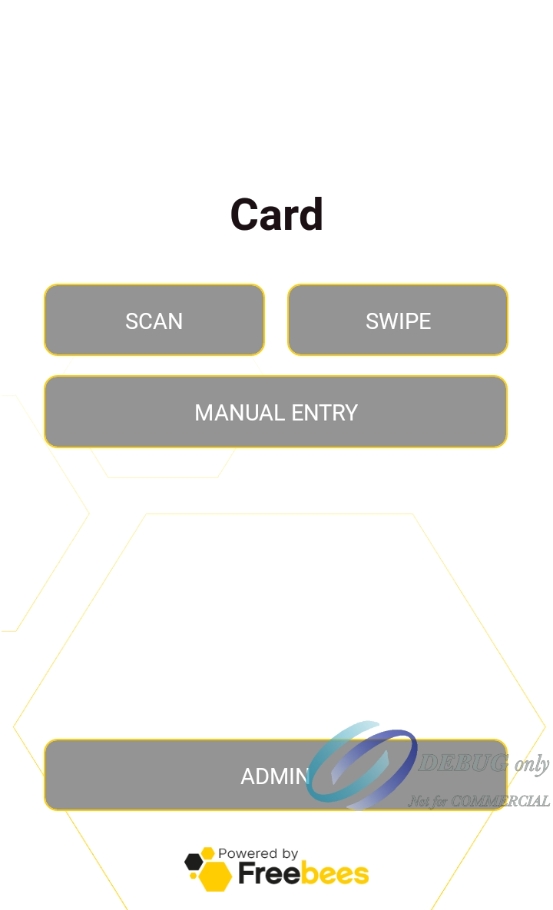
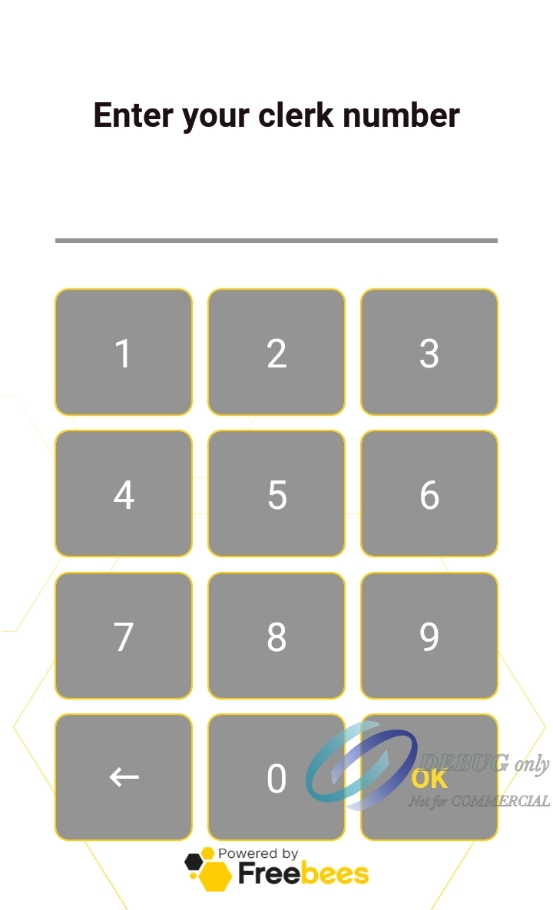
When you enable clerk identification, you can choose to have the app display the main page for transactions or the clerk identification page, where operators enter their identifier before accessing the main transactions page.
Main Transactions Page
Clerk Identification Page
To select the clerk identification home page:
On the main page, touch the ADMIN button at the bottom of the screen.

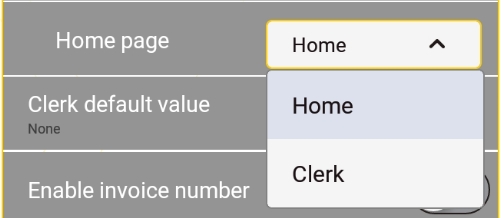
In the Application section, select the clerk identification homepage from the Home page list. The available choice are:
Home: The app displays the main transactions page.
Clerk: The app displays the clerk identification page.
Set a Default Clerk
If you do not want to enable clerk identification, you can assign a default clerk identifier on the terminal. If you use multiple terminals, this can serve as a way to identify which terminal processed a gift card transaction without requiring a clerk to identify themselves before processing a transaction.
To set the default clerk value:
On the main page, touch the ADMIN button at the bottom of the screen.

In the Application section, touch Clerk default value and enter the desired value in the field and touch OK.

Disable Clerk Identification
If you previously enabled clerk identification but no longer wish to use the feature, you can quickly disable clerk identification.
To disable clerk identification:
If the default Home page is set to Clerk, touch the Backspace key to access the main page.

On the main page, touch the ADMIN button at the bottom of the screen.

In the Application section, toggle the Enable clerk button to Off.

Invoice Numbering
The Freebees app allows you to enter the invoice number before processing a gift card transaction. If you enable this function, each transaction will require that you enter an invoice number before you can proceed.
When you enable the invoice number, you can choose to have the app require that operators input the invoice number manually, or you can set a default value that the app will increment with each new transaction.
Enable or Disable Invoice Numbering
If you want to enter the invoice number before you process a gift card transaction, you need to enable the invoice numbering function.
If you want to remove the requirement to enter an invoice number before processing a gift card transaction, you need to disable the function.
To enable or disable invoice numbering:

On the main page, touch the ADMIN button at the bottom of the screen.
In the Application section, toggle the Enable invoice number button to On to enable the function, or toggle Enable invoice number to Off to disable the function.

Configure Default Invoice Numbering
If you enable invoice number entry prior to a gift card transaction, you can configure a default value for invoice numbering that increments automatically with each new gift card transaction.
To configure the default invoice number to use for gift card transactions:
On the main page, touch the ADMIN button at the bottom of the screen.

In the Application section, touch Invoice number default value and enter your preferred default invoice numbering format in the field and touch OK.

Enable Last Transaction
The Freebees app allows you to display a Last Transaction button on the home page if you want to quickly access a summary of the most recently processed transaction. When enabled, touching the Last Transac button on the home page displays a summary of the last gift card transaction performed on the terminal. You can then choose to print the merchant or customer copy of the transaction receipt as well as cancel the transaction.

You can disable this function if you do not want to have the Last Transaction button appear on the app's main page.
To enable or disable displaying the last transaction:
On the main page, touch the ADMIN button at the bottom of the screen.

In the Application section, toggle the Enable last transaction button to On to enable the function, or toggle Enable invoice number to Off to disable the function

Last updated
Was this helpful?

