Application Configuration
The PayFacto Gift application can run independently of the payment application running on your terminal or POS. If you are using PayFacto Gift as a standalone application, there are application and terminal settings you may want to configure to meet your business requirements.
These settings include:
Invoice Numbering
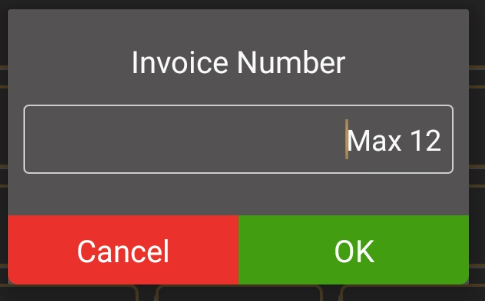
For bookkeeping purposes, invoices are numbered. The numbering can be done manually or automatically. By default, the terminal numbers the invoices automatically, in sequence. If you disable automatic invoice numbering, the terminal prompts the operator to manually input an invoice number (maximum of 12 numeric characters); you cannot process a redemption transaction without an invoice number.
To enable/disable automatic invoice numbering:
Touch the Action button on the main screen.

Touch Settings.

Enter the Admin password and touch OK.
In the General section, toggle Automatic Invoice Number to On (to the right) to enable automatic invoice numbering or toggle to Off (to the left) to enter the invoice number manually for every redemption transaction.

,Touch the Back icon to return to the main screen.

DataCandy Settings
The DataCandy Settings section of the Settings page are generally configured prior to delivery or as part of the application’s setup process. They should not require modification. If your terminal is having problems communicating with the DataCandy server, you may need to adjust one or more of the fields contained in this section. Refer to the DataCandy email for the values.
NOTE: You should not change any of these fields unless instructed to do so by PayFacto or DataCandy support.
The available fields include:
Production URL: Touch this toggle switch to On (to the right) to enable the terminal to communicate with the DataCandy server. When toggled to Off (to the left), the terminal cannot communicate with the DataCandy server.
URL: The address of the DataCandy server.
WSN: The WorkStation Number; a unique value for each terminal.
Merchant ID: The information in this field should correspond to the Merchant ID sent to you by DataCandy. If the Merchant ID value does not match the one from in the DataCandy email, make the necessary corrections.
Merchant password: The information in this field should correspond to the Merchant password sent to you by DataCandy. If the Merchant password value does not match the one from in the DataCandy email, make the necessary corrections.
Version: This is a static value that should not be changed; it should always be 2010-01-06.
Access key: The information in this field should correspond to the Access key sent to you by DataCandy. If the Access key value does not match the one from in the DataCandy email, make the necessary corrections.
App Version: This field displays the current version of the Gift PayFacto powered by DataCandy app installed on the terminal; the field is read-only and cannot be modified.
IMPORTANT: Changing these fields to any value other than those provided by DataCandy or PayFacto will prevent your terminal from processing gift cards.
To change DataCandy settings:
Touch the Action button on the main screen.
Touch Settings.
Enter the Admin password and touch OK.
Scroll to the DataCandy Settings section.
Confirm that the Production URL toggle switch is set to On (to the right).

Confirm that the URL field is set to https://secure.datacandy.com/.

If the value is different, touch the field, enter the correct value, and touch OK.
Confirm that the Merhcant ID field corresponds to the Merchant ID from the DataCandy email.

If the value is different, touch the field, enter the correct value, and touch OK.
Confirm that the Merchant password field corresponds to the Merchant password from the DataCandy email.

If the value is different, touch the field, enter the correct value, and touch OK.
Confirm that the Access key field corresponds to the Access key from the DataCandy email.

If the value is different, touch the field, enter the correct value, and touch OK.
Touch the Back icon to return to the main screen.

Was this helpful?