Loading...
Loading...
Loading...
Loading...
Loading...
Loading...
Loading...
Loading...
Loading...
Some of the steps to restore from an earlier backup are very similar to taking a backup. For the purpose of this walkthrough, we assume that the backup file is being restored on a new system where nothing was previously configured.
Simply create an empty folder anywhere on a local drive on your system. Use a meaningful name for the folder.
For example, C:\VeloceBackup will be used for these instructions.
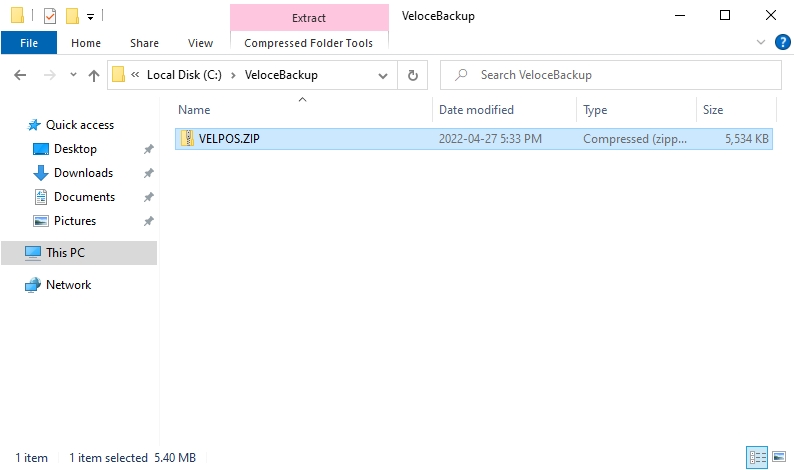
Copy the file called VELPOS.ZIP in the folder that was created for that purpose.
Login to the Veloce Back-Office.
Start the Setup / Utilities module.
Click the System Config. link. (or use the Configuration > System Configuration menu item)
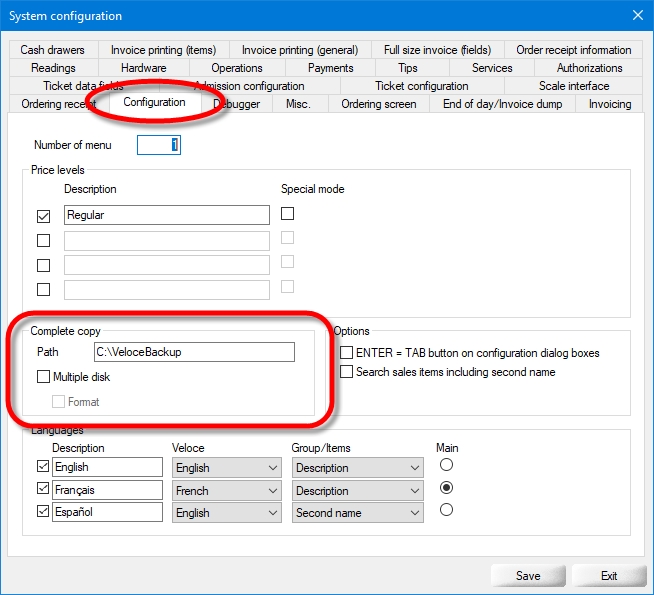
Click on the Configuration tab and locate the Complete Copy section.
In the Path field, type in the full path to the backup folder you create earlier, which was C:\VeloceBackup in our earlier example.
Click the Save button to commit changes.
Login to the Veloce Back-Office.
Start the Setup / Utilities module.
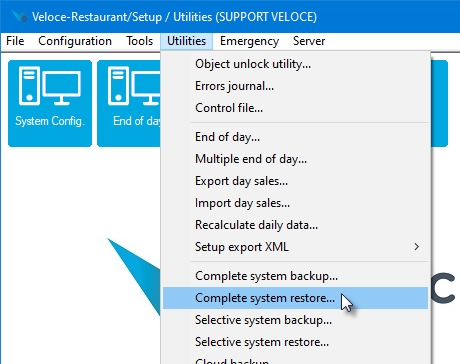
Click the Utilities menu and select the Complete System Restore... option.
A warning will appear on the screen, explaining that your Veloce system will be unavailable while the restore process takes place. Also, any data that is currently in your Veloce system will be lost and replaced with data from the backup file.
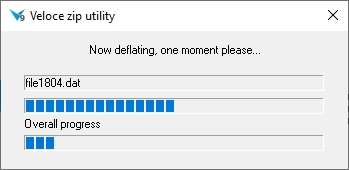
Click Yes to proceed, and a progress bar will appear.
After the restoration process is complete, the Veloce Server will restart itself and the system will be in the exact same state as it was when the backup was originally taken.
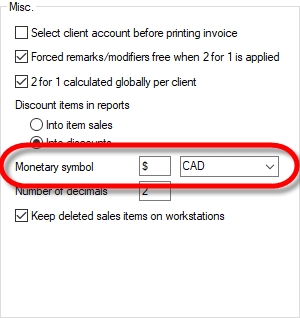
Currency options include the monetary symbol to be used, the number of decimals, and applicable rounding options.
To define the monetary symbol (£, $, €, ¥):
Login to the Veloce Back-Office.
Start the Setup / Utilities module.
Click the System Config. link. (or use the Configuration > System Configuration menu item)
Click on the Invoicing tab.
In the Misc. section of the Invoicing tab, locate the Monetary Symbol field. Type in whichever symbol is required.
BSD
Bahamian Dollar
CAD
Canadian Dollar
CUC
Cuban Convertible Peso
CUP
Cuban Peso
EUR
Euro
GBP
British Pound
USD
US Dollar
The monetary symbol defined here will appear at the POS, on printed invoices, readings and back-office reports.
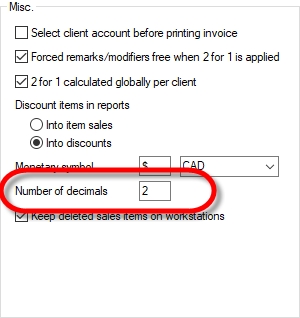
Veloce supports currencies with up to 2 decimal places. To define the number of decimals to use:
Login to the Veloce Back-Office.
Start the Setup / Utilities module.
Click the System Config. link. (or use the Configuration > System Configuration menu item)
Click on the Invoicing tab.
In the Misc. section of the Invoicing tab, locate the Number of Decimals field. Type any number between 0 and 2. (Japanese Yen and Chinese Yuan has 0 decimals while all North American and European currencies have 2 decimals.
IMPORTANT! Currencies requiring 3 or more decimals are not supported. This means that currencies like the Jordan and Tunisian Dinars cannot be used with Veloce.
Also select the actual currency from the drop-down list to the right of the currency symbol:


While Veloce provides full support for English and French only, it is possible to configure sales items, divisions, big divisions, screens, etc, with an alternate language. For instance, you could have second names in Spanish and have employees see that at the POS, while printing checks in English. here are detailed instructions for doing just that:
Login to the Veloce Back-Office.
Open the Setup/Utilities module.
Click the System Config. link. (or use the Configuration > System Configuration... menu option)
Click on the Configuration tab.
Enable the third language profile by ticking the checkbox to the left.
Type a Description for this language profile. To setup Spanish, this should be named Español.
In the Veloce column, select English, so that all elements that cannot be translated to Spanish will be displayed in English (and not in French).
In the Group/Items column, select the Second Name option. this will cause employees using this language profile to see the second name when these elements are used at the POS.
If you want your employees to see Spanish descriptions on the POS interface but the items printed on guest checks need to be in English, set the Main radio button to English.
If you want your employees to see Spanish descriptions on the POS interface and you also want items to be printed in Spanish on the guest check, set the Main radio button to Español.
Select the most appropriate language profile for each back-Office user. Remember that it's really the setting in the "Veloce" drop-down box of each profile that will determine the language of the Back-office user interface. Any third-language option has no effect on the Back-Office whatsoever.
Login to the Veloce Main Back-Office.
From the Main Back-Office Window, click the Tools menu and select the Users... option.
Select a user account from the list.
In the Configuration tab, set the Language drop-down list to the desired language profile.
Logon to the Veloce Main Back-Office.
Start the Point of Sale Control module by clicking the corresponding icon.
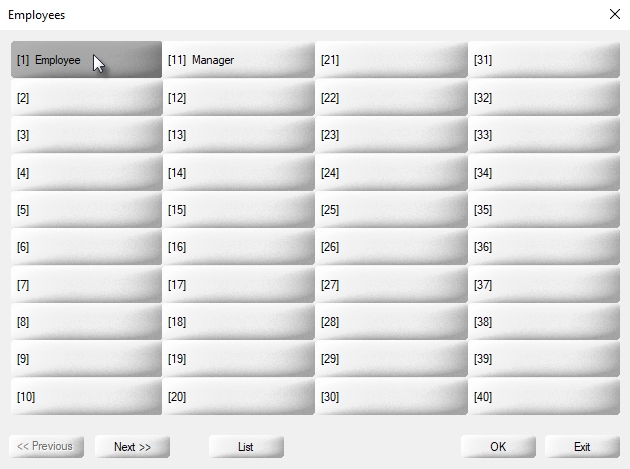
Click the Employees menu and select the Personal Files... option.
Select an employee file from the list by clicking on it.
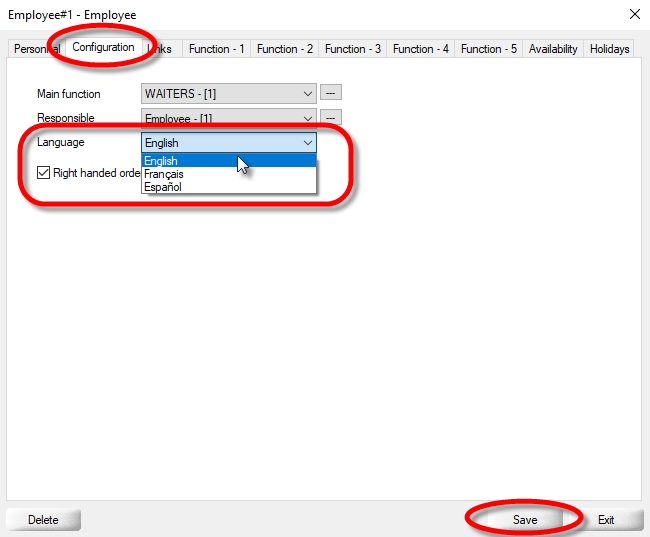
On the Configuration tab, you will see a Language drop-down list. Select the Español option .
Most of the elements that have a free text description also have a free text "Second Name". These include but are not limited to:
Sales Items
Divisions
Big Divisions
Item Screens
Popup Windows
Groups & Keys
Buttons
etc...
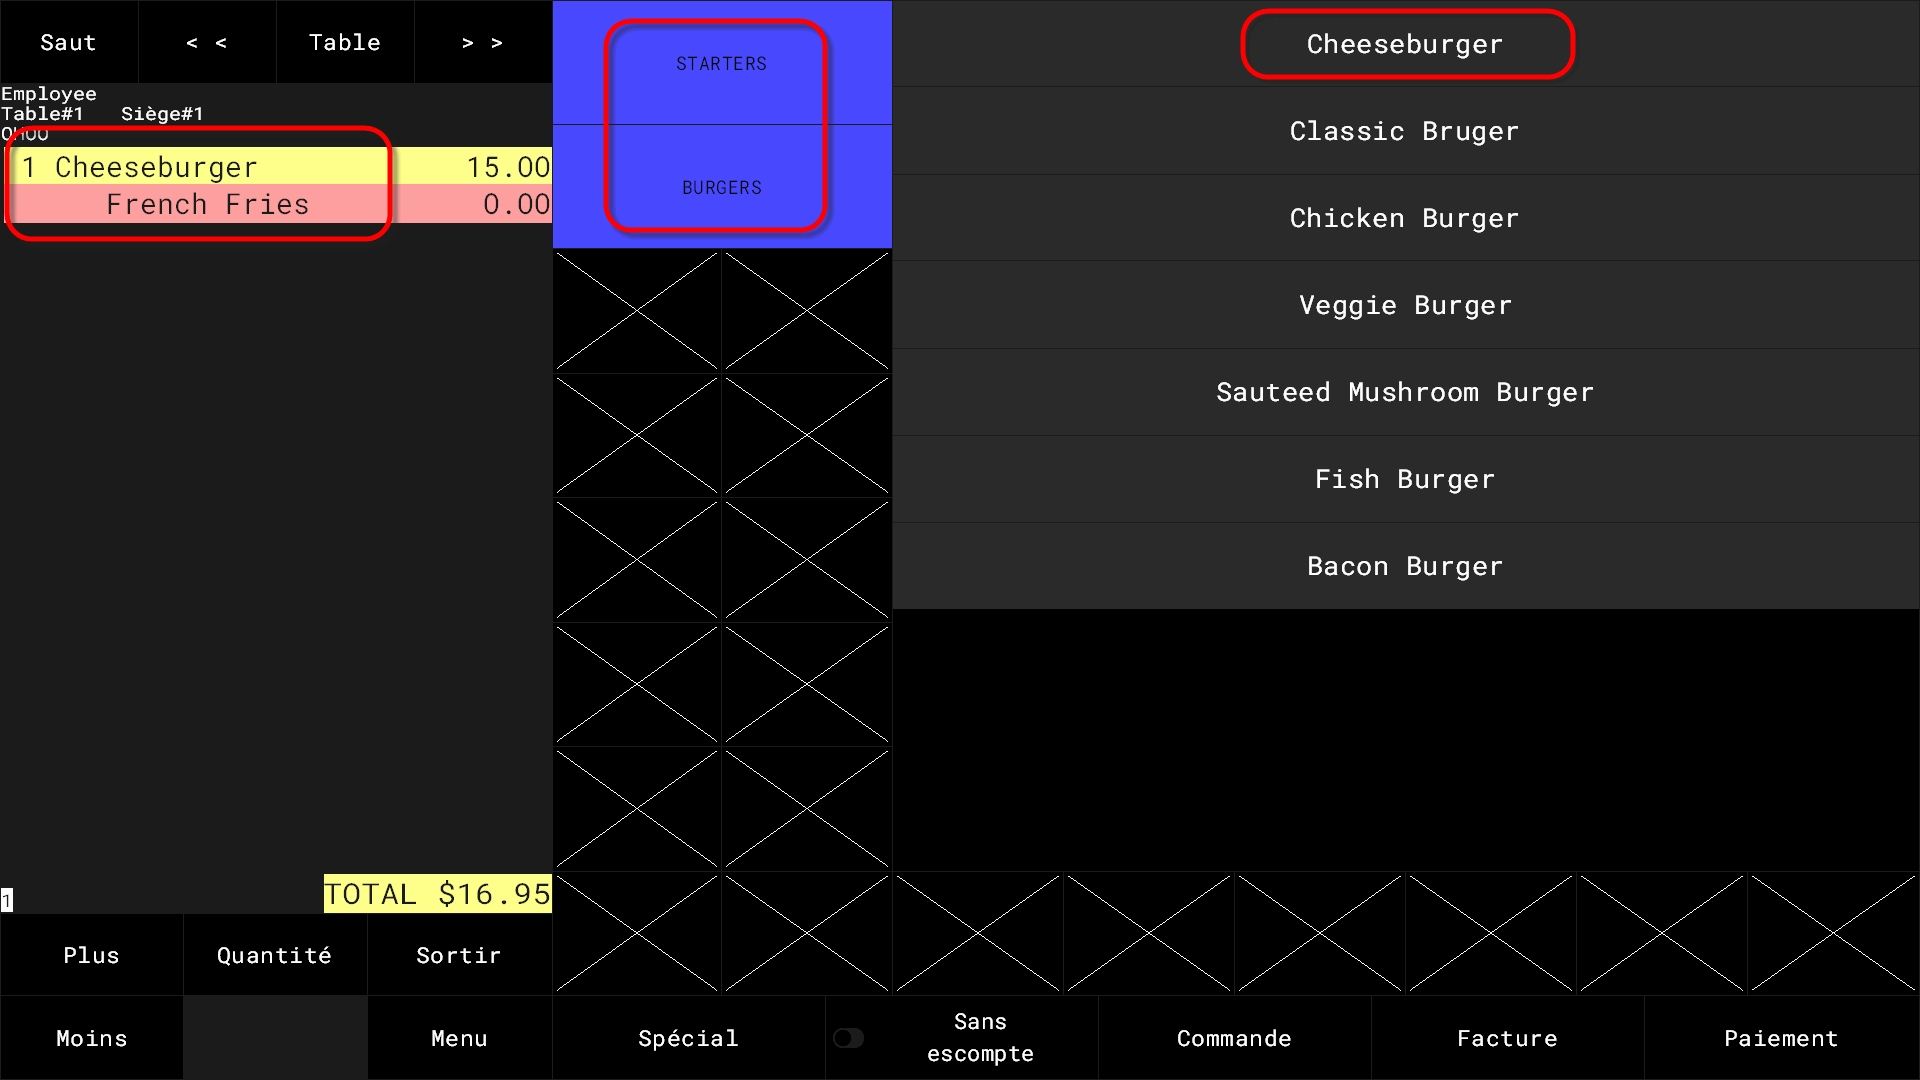
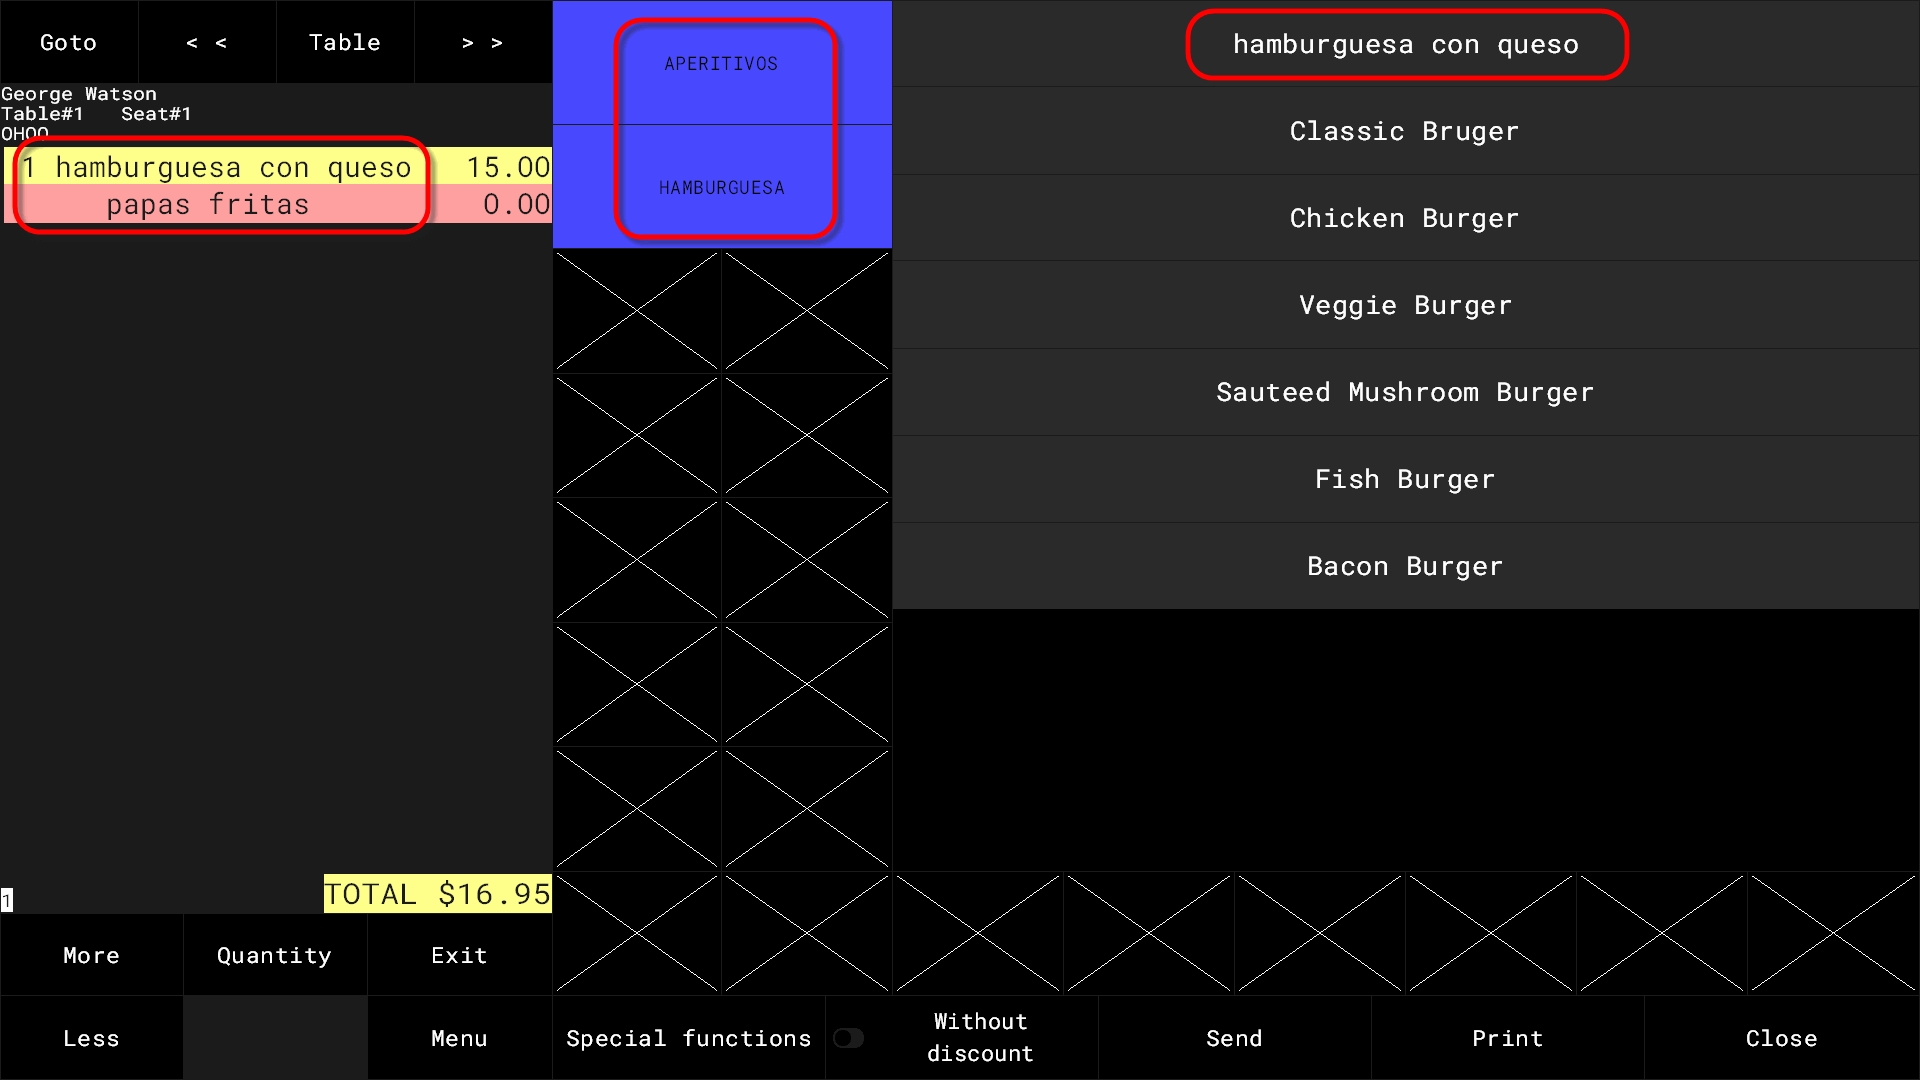
Check out the results at the POS:
Price levels are useful to create a pricing structure for sales items. This allows merchants to sell the same item at different prices based on any criterion they may choose. For instance, any given item could have a different price based on whether the item is ordered at the Dining Room, from the Take-Out counter, through Delivery, or if the customer is a special VIP member.
Veloce supports up to 4 price levels. Price Levels can also be combined with modes to create an even more detailed price structure.
Login to the Veloce Back-Office
Open the Setup/Utilities module
Click the System Config. link. (or use the Configuration > System Configuration... menu option)
Click on the Configuration tab. The Price Levels are near the top of the window:
Enable the checkbox next to each price level to use it. If a price level is not needed, leave its checkbox blank.
Type a meaningful description for each price level.
...
Click the Save button to save changes and exit.
Click the Exit button to close this window without saving changes.
The price levels will be displayed as headers in the Prices section, in the configuration screen of sales items.
Time format can only be changed between 12h and 24h formats. It cannot be further customized.
To select between 12h and 24h formats:
Login to the Veloce Back-Office.
Start the Setup / Utilities module.
Click the System Config. link. (or use the Configuration > System Configuration menu item)
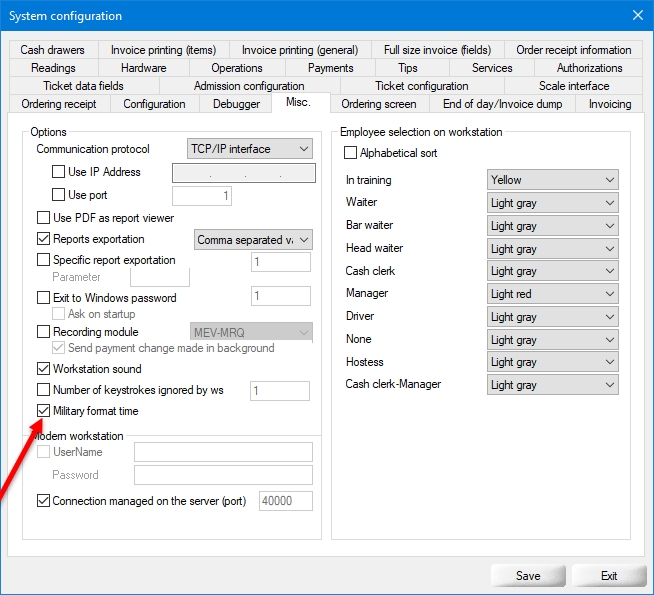
Click on the Misc. tab.
Locate the Military Format Time checkbox, at the bottom of the Options section.
Enable this option to select 24h format. Disable it to select 12h format.
There are no date format settings in Veloce. the date format used at the POS and in reports is determined by Windows regional settings of the PC where the Veloce Server is installed.
Veloce supports two languages for its Back-Office User Interface and POS:
English (Canada)
French (Canada)
However, all elements which have free text descriptions also have a second name field which can be used as a third language at the POS. For instance, you could have the main POS interface in English, but have all item screens, items, divisions, etc, appear in Spanish for employees using the POS, while having the final invoice still print in English or French.
Login to the Veloce Back-Office.
Open the Setup/Utilities module
Click the System Config. link. (or use the Configuration > System Configuration... menu option)
Click on the Configuration tab. The language options are located at the bottom of that page.
By default, only English is configured, which also makes it the default (main) language.
Enable the language profile(s) that will be available throughout your system by ticking the corresponding checkbox to the left. At least one profile needs to be enabled.
Type in the description you wish to use for this language. This description is used on the language selection screen at logon and when creating back-office users or POS employee files. For instance, you could decide to name the third profile "Español", which would show up in these various drop-down lists afterwards.
Select the Veloce built-in language to use. Only French or English are available. This selection applies to the Veloce Back-Office user interface and the default POS user interface.
Select whether Veloce should display the default Description or the Second Name of groups and items when the corresponding language is active. Note that this only affects the point of sale and printed invoices. The back-office itself is not affected by this selection.
NOTE: The Second Name is actually an alternate description that can be given to any item, groups, divisions, big divisions, etc. By typing these alternate descriptions in a third language, you can effectively create a system that will partially work in that third language, although the main user interface will always remain in English or French.
Select which language will be used by default throughout the system. For instance, if English is set as the main language, the point of sale's interface will be displayed in English by default, until an employee with a different language profile logs on. For the back-office, it means that the login screen would always be in English, although a user with a French language profile could still logon and use the Back-Office in French.
Additionally, this setting will determine whether your sales items will print on the guest check using the main description or the second name.
The topics of Back-Office users and POS Employees will be covered more in depth later. However, it makes sense to touch on it right now, in order to make more sense of the Veloce language settings and the impact it will have on programming items later.
To select the default language of a Back-Office user:
Logon to the Veloce Main Back-Office.
Click on the Tools menu and select the Users... option.
Select a user from the list by simply clicking on it.
On the Configuration tab, you will see a Language drop-down list. Select the desired language from that list, or use the Choice option.
NOTE: Selecting a specific language will force that user to use the selected language. Using the Choice option will present the user with a list of available languages at every logon.
To select the default language of a POS employee:
Logon to the Veloce Main Back-Office.
Start the Point of Sale Control module by clicking the corresponding icon.
Click the Employees menu and select the Personal Files... option.
Select an employee file from the list by clicking on it.
On the Configuration tab, you will see a Language drop-down list. Select the desired language from that list and click the Save button.


Setup / Utilities is a core module that is included with every Veloce license. It contains localization options to customize available languages, date and time formats and currency symbols. This module is also used to perform various daily operations, such as end-of-day and taking backups.
Here are a few tasks that are done from the Setup Utilities module:
Manage your Veloce license
Perform a manual End-of-Day
Take backups of your Veloce system
Configure your local currency (symbol and number of decimals)
Set date and time formats
Configure language profiles
Configure various hardware options
Start / Stop the Veloce Server
Consult the error journal
Configure the number of available menus
etc...
Many more tasks and options are managed from this module, which will be discussed in this chapter.










Taking backups at regular intervals is the best way to protect your Véloce system against data loss.
Veloce offers automated cloud backups, where a complete backup of the Veloce configuration and sales data is taken every day. While this solutions provides worry-free and hands-free backups for end-users, it may not cover all the needs of support technicians, professional services and Veloce distributors.
You can take manual backups anytime, at various stages of the programming process. These backups can then be used as models to speed up the configuration process for other restaurants in the same chain or other restaurants with similar business models. They can also be used to present different programming options to customers.
Simply create an empty folder anywhere on a local drive on your system. Use a meaningful name for the folder.
For example, C:\VeloceBackup will be used for these instructions.
Login to the Veloce Back-Office.
Start the Setup / Utilities module.
Click the System Config. link. (or use the Configuration > System Configuration menu item)
Click on the Configuration tab and locate the Complete Copy section.
In the Path field, type in the full path to the backup folder you create earlier, which was C:\VeloceBackup in our earlier example.
Click the Save button to commit changes.
This is a remnant of a former era where backups that were considered "large" for the time could be fractioned among multiple high-density 1.44MB floppy disks. Use this option only if you have a floppy disk drive and consider using 1.44MB floppies as backups.
This option becomes available if Multiple Disk is also selected. It tells Veloce to format your 1.44MB floppy before writing data to it, overwriting any previous data found on that disk.
Login to the Veloce Back-Office.
Start the Setup / Utilities module.
Click the Utilities menu and select the Complete System Backup... option.
A warning will appear on the screen, explaining that your Veloce system will be unavailable while the backup process takes place.
Click Yes to proceed, and a progress bar will appear.
When the process finishes, you will have a file called VELPOS.ZIP in the folder selected for backups.
A backup file stored on the same drive as your Veloce system is completely useless if that drive fails. Therefore, the backup file needs to be copied elsewhere. Removable drives that can be stored in a safe place or cloud backup services are suitable for this purpose.
It is strongly suggested to create a folder structure with the restaurant name and backup dates to store files. This will avoid accidentally overwriting other backups.


