Some of the steps to restore from an earlier backup are very similar to taking a backup. For the purpose of this walkthrough, we assume that the backup file is being restored on a new system where nothing was previously configured.
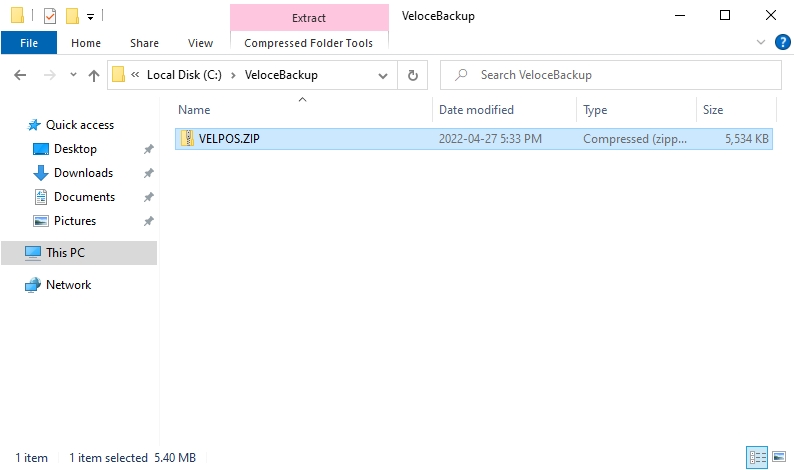
Simply create an empty folder anywhere on a local drive on your system. Use a meaningful name for the folder.
For example, C:\VeloceBackup will be used for these instructions.
Copy the file called VELPOS.ZIP in the folder that was created for that purpose.
Login to the Veloce Back-Office.
Start the Setup / Utilities module.
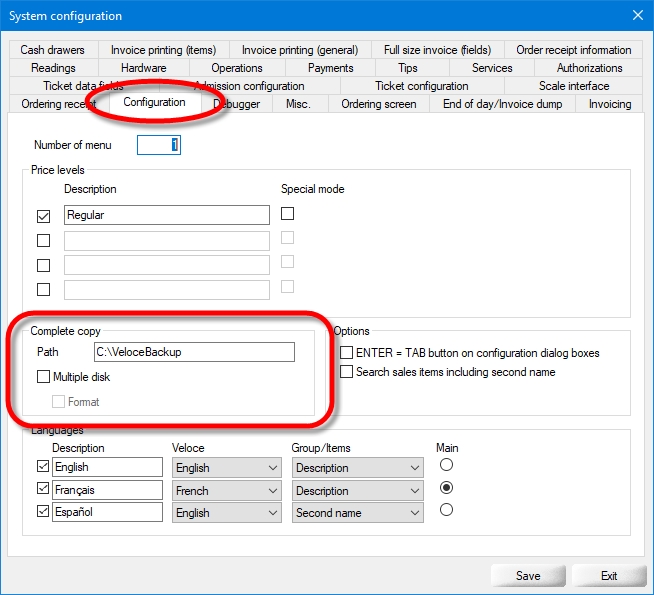
Click the System Config. link. (or use the Configuration > System Configuration menu item)
Click on the Configuration tab and locate the Complete Copy section.
In the Path field, type in the full path to the backup folder you create earlier, which was C:\VeloceBackup in our earlier example.
Click the Save button to commit changes.
Login to the Veloce Back-Office.
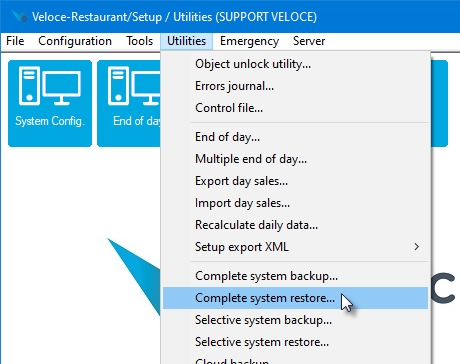
Start the Setup / Utilities module.
Click the Utilities menu and select the Complete System Restore... option.
A warning will appear on the screen, explaining that your Veloce system will be unavailable while the restore process takes place. Also, any data that is currently in your Veloce system will be lost and replaced with data from the backup file.
Click Yes to proceed, and a progress bar will appear.
After the restoration process is complete, the Veloce Server will restart itself and the system will be in the exact same state as it was when the backup was originally taken.


