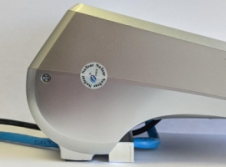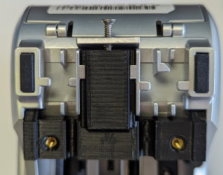
After you secure the T bracket to the terminal, you must insert the cables. This procedure explains how to install and secure the AC adapter and Ethernet cables; if you have additional cables, connect them to the appropriate port and use the same method to secure them in place.
Beginning with the AC adapter, inserting it in the terminal's cable guide on the left and connect the adapter to the Power port.
Insert the Ethernet cable in the terminal's cable guide on the right and connect it to the LAN port.
When the cables are properly seated in their ports, gently pull on the cables to remove any excess cable that is higher than the plane of the T bracket.
Place the 3-hole metal bracket over the cables, aligned with the screw holes in the T bracket and secure it in place using a Phillips head screwdriver to insert the two short screws.
Turn the terminal over and power on the terminal. The completed assembly should resemble the following:
The A80 cable attachment is anchored by a T bracket that keeps the attached cables from being accidentally disconnected .
With the terminal turned over, insert the T bracket into the guides on the underside of the A80 terminal.
Slide the T bracket up by pushing it from the bottom towards the top of the terminal.
To prevent the T bracket and cables from sliding off the terminal, you must next secure the T bracket to the terminal.
Place the short metal bracket at the top of the T bracket and insert the long screw at the opening near the top of the terminal.
When the end of the long screw comes out of the bottom of the T bracket, place the metal washer over the screw and then thread the thumb nut onto the end of the screw.
Using a Phillips head screwdriver, tighten the screw securely (but not excessively) into the thumb nut.
This guide will explain how to install the cable attachment bracket for the PAX A80 terminal (part number AZP-310006) designed to prevent the accidental disconnection of cables from the terminal.
IMPORTANT! This cable attachment bracket is only for use with PAX A80 terminals used in countertop environments. It is not compatible with the A80 extension pole for drive-through applications.
The topics covered in this guide include:
Before you can install the cable attachment to the PAX A80 terminal, you must prepare the terminal by doing the following:
Power off the terminal by pressing and holding the red X key on the physical keypad.
Turn the terminal over and remove all cables from the terminal's communication ports.


