In this task, we will configure Port Forwarding on a router/firewall device to allow SecureTable to communicate with the POS system through the STPI Client while delivery drivers are on their delivery routes. The device used in this tutorial is an Asus RT-AC66U B1 wireless router and firewall. While the exact settings and menus will differ between models and manufacturers, the general principles are the same.
If your restaurant's network is managed by a larger entity, such as a franchise head office or a network administrator, please communicate with them to inquire about setting up port forwarding. you can also provide your network administrator with the instructions below. They should be able to adapt them to your needs.
Port Forwarding is generally required when using SecureTable over mobile networks. If you don't use SecureTable over mobile networks, there is no need to configure port forwarding and you can skip this tutorial altogether. Also, some mobile carriers may offer special VPN access to your local network, which is a more secure alternative to port forwarding. Please inquire with your mobile carrier to see if they offer this option. If they do, Port Forwarding will not be required.
SecureTable is used over mobile networks mostly by delivery drivers. However, mobile network connectivity is also useful to cover gaps in a restaurant's WiFi coverage.
When SecureTable is used locally in the restaurant, payment terminals are able to communicate with the POS system through the STPI client directly over the local WiFi network. However, when drivers are out on the road, the payment terminals need to use mobile networks to access the Internet to authorize payments. Being on the "public" Internet, the payment terminal will not be able to communicate directly with the POS system to close the delivery orders. This is where Port Forwarding comes in. To connect to the POS system, the payment terminal needs to connect to the restaurant's router, which will then redirect the communication to the STPI Client via port forwarding.
An analogy often used to describe this is finding the bathroom inside your house. For anyone currently inside the house, finding the bathroom should be quite easy. However, for someone currently outside of the house, they first need to know your home address, then someone from inside the house needs to let them in and show them the way to the bathroom. This is essentially what happens when a payment terminal running SecureTable is being used on the road.
Before you begin the actual configuration, you need the following information:
Your router's public IP address.
Your router's private IP address.
Your router's username and password to access its configuration utility.
IP address and TCP port used by the STPI Secure Client.
Here are short instructions to find each piece of information:
This is the IP address that is given to your router by your Internet Service Provider (ISP). It is called a "public" address because it is facing the public Internet. You can easily find what is your public IP address by visiting the following site:
IP4.me is a simple site that will display your public IP address without any ads or unneeded information.
As its name suggests, the router's private IP address is invisible to the outside world. To find it, you need to be connected to your local network and follow these simple instructions:
Open a command prompt with administrative privileges. Do so by clicking the Windows Start menu and typing CMD. Then, select Run as Administrator under the Command Prompt app.
In the command prompt window, type ipconfig and press the ENTER key.
Look for the line that starts with Default Gateway, and take note of the IP address listed there. This is the private IP address of your router.
Every modern router has a configuration utility that is protected by a username and password. If you don't know what it is, either contact your network administrator or look for the default username and password in your device's documentation.
This is the IP address of the PC where STPI Secure has been installed. The TCP port number is normally configured during the installation. The default recommended value for the TCP port is 9999, but it could be configured differently during the installation process.
From a PC connected to the local network, open your favorite browser (Google Chrome, Microsoft Edge, Firefox, etc.) and type your router's private IP address in the address bar. Press ENTER on your keyboard.
The login screen for your router's configuration utility should be displayed. Type the username and password that will allow you to login to your device. This screen will differ depending on your device's manufacturer and model.
Your router's main configuration screen should be displayed.
Look for Port Forwarding settings. This is typically found in WAN settings, under Advanced settings. Again, this will be different based on your device's manufacturer and model. Please consult your device's documentation if you can't find the appropriate settings.
Enable Port Forwarding.
Add a port forwarding entry with the following parameters:
STPISecure
TCP Port number used by STPISecure. Default: 9999
Leave blank.
IP address of the PC where STPI Secure was installed.
TCP
Leave blank.
Save your settings.
Some router models may need to be rebooted. Please refer to your device's documentation to learn how to do this.
The task of configuring port forwarding on your router is now complete.
If you switched from using the SecureTable module to Secure Payment's standalone payment mode, you need to switch back when the communication issue with the POS is resolved.
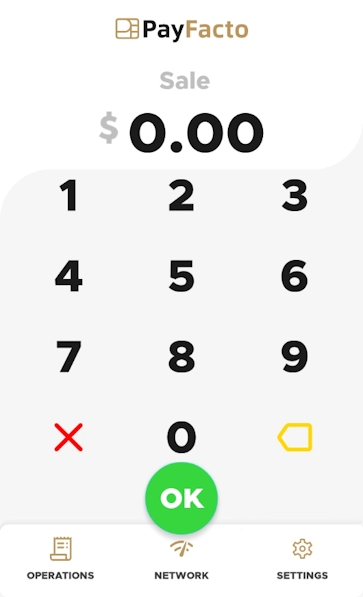
From the standalone payment main screen, touch the Settings button.
Enter the merchant password and touch Confirm.
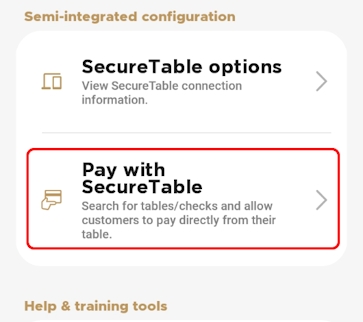
Scroll to the Semi-integrated configuration section and touch Pay with SecureTable.
The terminal returns to the SecureTable main screen
If you have more than one terminal, repeat steps 1 to 3 for each additional terminal where you want to switch back from standalone payment mode.
If you experience issues with the POS communicating with the payment terminal, you can temporarily switch from using the SecureTable module to Secure Payment's standalone payment mode. This mode allows you to process transactions directly on the terminal.
NOTE: You will need to enter any transactions processed in standalone payment mode into the POS system when the communication issue is resolved.
From the main screen, touch the Menu button.
Enter the merchant password and touch Confirm.
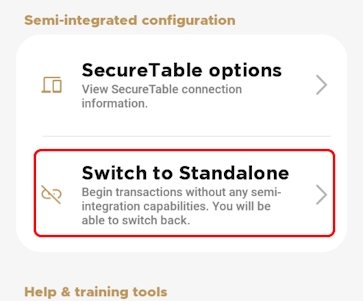
Scroll to the Semi-integrated configuration section and touch Switch to Standalone.
The Settings page closes and the terminal displays the standalone payment module.
If you have more than one terminal, repeat steps 1 to 4 for each additional terminal where you want to switch the terminal to standalone payment mode.
An Access Point Name (APN) is the name of a gateway between a GSM, GPRS, 3G or 4G/LTE mobile network and another computer network, frequently the public Internet. In simple terms, an APN is required for your mobile device to be able to access the Internet through the carrier's mobile network.
Most mobile devices (phones, tablets, etc.) supplied by common carriers come with the carrier's APN pre-configured, so most users don't need to worry about manually configuring an APN.
However, mobile devices provided by PayFacto are carrier-agnostic, so they can connect to your carrier of choice to access GSM, GPRS, 3G or 4G/LTE mobile networks for mobile payment processing. For this reason, the APN can't be configured in advance and therefore needs to be configured manually.
Before configuring an APN on your Android terminal, be sure to have a SIM card installed in your terminal. Please review the documentation specific to your terminal model to learn how to install a SIM card.
Exit any payment application that may be running on the terminal. You should now see the home screen of your terminal.
Touch the settings app icon to access the device's settings.
A password prompt will appear. Enter the device's password and touch the OK button.
NOTE: Settings passwords are changed before shipping to end-users. Passwords are unique to each terminal. Please review the documentation that came with your terminal to find your settings password.
In the Wireless & Networks section, touch the More... option.
Touch Cellular Networks.
Touch Access Point Names.
The first time you access this setting, the list of APN's should be empty. Touch the "+" sign at the very top of the list to add a new entry.
Configure the following settings:
Name
Give a meaningful name to this APN. This generally corresponds to your mobile network carrier name.
APN
This is the actual name of the gateway. This is provided by your mobile service carrier.
MCC
The default value for this setting is 302. Leave it to the default value unless otherwise specified by your mobile service carrier.
MNC
The default value for this setting is 760. Leave it to the default value unless otherwise specified by your mobile service carrier.
Other settings
The settings listed above are the minimal settings required to get an APN to work properly. Different carriers may require additional settings to be configured. Please inquire with your mobile service carrier.
Touch the 3 dots at the top-right of the screen and select Save.
The new APN will appear in the list.
Use the Back button to exit all the way back to the home screen.
To make sure that your APN and SIM card work properly, they need to be tested. Unfortunately, payment terminals don't have browsers which would allow for a quick and easy test, but here's a workaround:
Disabling WiFi will ensure that you are testing Internet connectivity through the mobile network only.
From the Home screen, swipe twice from the very top of the screen. This will show some quick settings for the terminal. Touch the Wi-Fi icon to disable your Wi-Fi connection.
While still in the settings screen, touch the Cellular Data icon. Then, make sure that the Cellular Data option is enabled.
Since the PAX Store requires Internet connectivity to allow you to download applications, you can use it to tell if your APN and SIM card are working properly.
Start the PAXSTORE by touching its icon on the home screen.
Once in the PAXSTORE, touch "All" near the top of the screen.
If the APN is correctly configured and that Internet access is working properly through the mobile network, you will see a list of applications that can be downloaded and installed:
If the APN is not configured correctly or if there is an issue with Internet connectivity through the mobile network, you will see a message saying "Network Unavailable" briefly displayed on the screen. Instead of the applications list, you will see a "Click to refresh" message and an empty box icon.
If Internet access is not working, please review your APN settings and try restarting your terminal. If Internet access through mobile networks still doesn't work, please call the PayFacto help desk or your mobile network carrier for assistance.
Now that Internet access through the mobile network is tested, don't forget to re-enable WiFi to keep data usage from the mobile network at a minimum.


