Loading...
Loading...
Loading...
Loading...
Loading...
Loading...
Loading...
Loading...
Loading...
Loading...
Loading...
Loading...
Loading...
You can configure your terminal to accept credit cards, debit cards, or both. If you select only one type of card, the terminal will not recognize the other type. For example, if you configure the terminal to accept only debit cards, when a customer tries to pay with a credit card, the terminal will display a message that it only accepts debit cards.
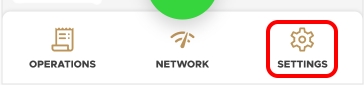
From the main screen, touch Settings.
Enter the merchant password and touch Confirm.
Scroll to the Configure application section.
Touch Terminal options.
In the General
By default, the Secure Payment application's payment module automatically assigns an invoice number for each transaction processed. You cannot process a transaction without an invoice number, which then appears on the transaction receipt. You can choose to disable automatic invoice numbering but the terminal will prompt the operator to input an invoice number manually (with a maximum of 12 numeric characters).
From the main screen, touch Settings.
Enter the merchant password and touch Confirm.
Scroll to the Configure application section.
Touch Terminal options.
Scroll to the General
By default, the Secure Payment application's payment module requires the Merchant password before you can exit. You can choose whether or not to require the Merchant password, depending on your preference.
From the main screen, touch Settings.
Enter the merchant password and touch Confirm.
Scroll to the Configure application section.
Touch Terminal options.
Scroll to the General
You can change the language that appears for terminal operations. The merchant language is the language used for the menus and commands and is separate from the language configured on the customer’s card. For example, your terminal’s merchant language could be English, but when a French speaking customer uses their card, the instructions appear in French.
You can configure the terminal to ask the customer if they want to pay with cash or with a card. When you enable the cash or card question, the operator enters the amount of the sale before passing the terminal to the customer. The customer then touches the payment method they want to use to continue the transaction.
By default, the cash or card question is disabled.
The Secure Payment application's payment module works with counter-top and mobile payment terminals. Many counter-top terminals use a wired (Ethernet) network connection but many also use a wireless (Wi-Fi) as a backup connection. Mobile terminals will connect to Wi-Fi and/or mobile (cellular) networks.
If the terminal is taking longer than expected to process transactions, you may want to check the terminal's network connection to ensure that everything is working correctly.
On the Accepted card type screen, touch the desired card types to accept for payments. The options are:
Credit / Debit
Credit only
Debit only
If you have more than one terminal, repeat steps 1 to 6 for each additional terminal where you want to set the terminal's accepted card type.
Enable the use of automatic numbering by toggling the Automatic invoice number switch to the right.
Disable the use of automatic numbering the Automatic invoice number switch to the left.
If you have more than one terminal, repeat steps 1 to 7 for each additional terminal where you want automatic or manual invoice numbering.
Enable the use of the Merchant password before closing the payment module by toggling the Ask password on exit switch to the right.
Disable the use of the Merchant password before closing the payment module by toggling the Ask password on exit switch to the left.
If you have more than one terminal, repeat steps 1 to 7 for each additional terminal where you want to set whether or not to use the Merchant password before exiting the application.
From the main screen, touch Settings.
Enter the merchant password and touch Confirm.
Scroll to the Configure application section.
Touch Terminal options.
In the Display section, touch Merchant Language.
On the Merchant Language screen, touch the desired language for the terminal's payment module. The options are:
English
French
The terminal returns to the main screen using the selected language.
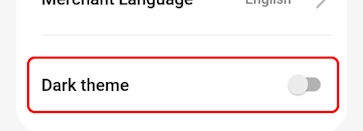
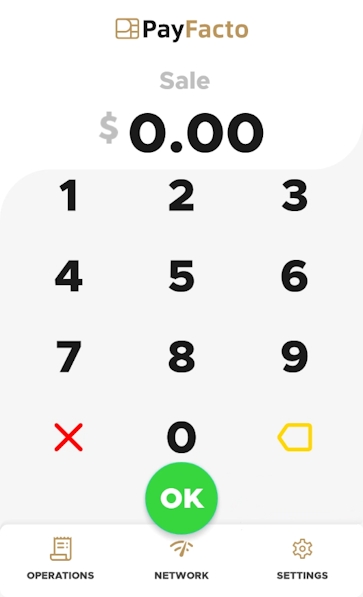
You can change the theme (color) of the terminal’s display to better match your business environment. By default, the terminal uses the light theme, but you can change it to the dark theme. The following are examples of the available themes:
Light theme
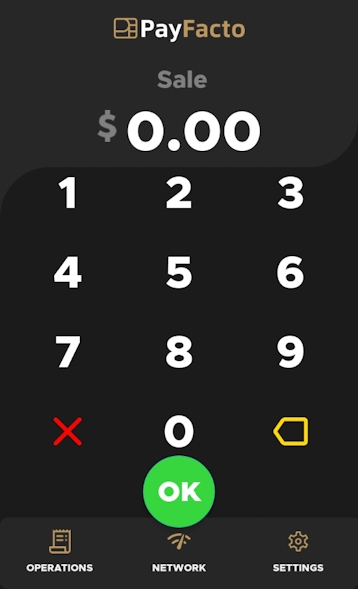
Dark theme
From the main screen, touch Settings.
Enter the merchant password and touch Confirm.
Scroll to the Configure application section.
Touch Terminal options.
In the Display section, toggle the Dark theme switch to the right to use dark mode or to the left to use light mode.
The terminal returns to the main screen using the selected theme.
From the main screen, touch Settings.
Enter the merchant password and touch Confirm.
Scroll to the Configure application section.
Touch Terminal options.
Scroll to the General section.
Enable the use of automatic numbering by toggling the Cash or card question switch to the right.
Disable the use of automatic numbering the Cash or card question switch to the left.
If you have more than one terminal, repeat steps 1 to 7 for each additional terminal where you want to set whether or not the terminal asks the customer for their payment method.
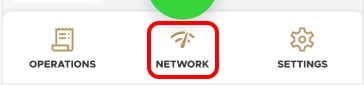
From the main screen, touch Network.
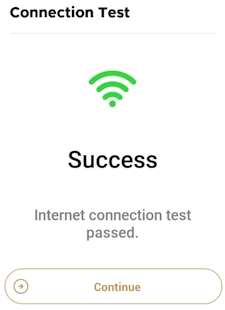
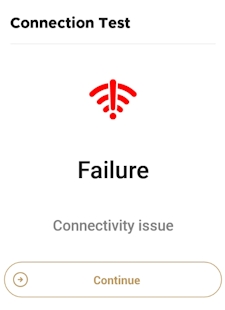
The Connection test screen appears and displays the results of the connection test.
If the Connection Test screen displays a Failure message, touch the Continue button and check the terminal's Wi-Fi settings as well as your router and then repeat the network connection test.
If the Connection Test screen displays a Success message, touch the Continue button to return to the Secure Payment application.
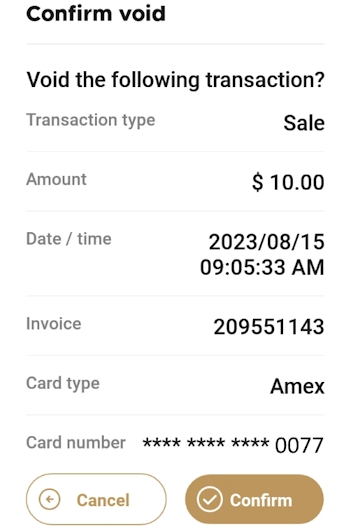
By default, the Secure Payment application's payment module displays a confirmation screen for void and pre-autrhorization completion transactions. This confirmation screen allows the operator to confirm the requested transaction.
Void Confirmation
Pre-auth Completion Confirmation
IMPORTANT! If you disable this function, the terminal will not display a confirmation screen before completing the transaction. If the terminal operator selects the wrong transaction to void or enters an incorrect amount to complete the pre-authorization, there will be no transaction confirmation.
From the main screen, touch Settings.
Enter the merchant password and touch Confirm.
Scroll to the Configure application section.
Touch Terminal options.
Scroll to the General
The Secure Payment application's payment module can be configured to start automatically when you turn the terminal on or restart it. This feature limits the risk of someone starting the wrong application if the terminal displays the main Android screen. By default, the auto start feature is enabled.
TIP: The auto start feature is helpful if you plan to use the function.
From the main screen, touch Settings.
Enter the merchant password and touch Confirm.
Scroll to the Configure application section.
Touch Terminal options.
Scroll to the General
You use the Host Options menu to download the terminal's configuration files containing the host parameters and security keys.
You should not initiate a terminal configuration download unless specifically instructed by PayFacto support.
From the main screen, touch Settings.
Enter the merchant password and touch Confirm.
In the Configure application section, touch Host options.
On the Host options screen, touch Download terminal configuration. The terminal displays a message after the files download successfully.
Display language and Theme settings
Select Accepted Card Type
Application Exit Password
Automatic Invoice Numbering
Confirmation Screen on Void or Pre-authorization Completion
Customer Payment Method Selection
Auto Start Secure Payment
Terminal Reboot
Terminal Reboot Time
Contactless Transactions
Automatic Report Printing
Test Network Connection
Download Terminal Configuration
Disable the confirmation for void and completion transactions by toggling the Void/Completion confirmation prompt switch to the left.
To re-enable the confirmation screen, toggle the Void/Completion confirmation prompt switch to the right.
If you have more than one terminal, repeat steps 1 to 7 for each additional terminal where you to disable (or re-enable) the confirmation for void and completion transactions.
Enable the automatic start of the Secure Payment application's payment module by toggling the Auto Start switch to the right.
Disable the automatic start of the Secure Payment application's payment module by toggling the Auto Start switch to the left.
If you have more than one terminal, repeat steps 1 to 7 for each additional terminal where you to set the how the Secure Payment application's payment module starts.
The Secure Payment application's payment module allows you to restart the terminal at a specified time, if desired. Restarting the terminal can help with performance by clearing any processes that might be running in the background at the same time as the application. By default, this function is disabled.
TIP: The automatic terminal reboot function is best paired with the automatic start feature. Refer to the procedure for more information.
From the main screen, touch Settings.
Enter the merchant password and touch Confirm.
Scroll to the Configure application section.
Touch Terminal options.
Scroll to the Administration section.
If you enable the terminal reboot function, you can set a specific time when the terminal reboot occurs. By default, the terminal reboot time is 1:00 AM, eastern time.
IMPORTANT! Make sure that you do not set the automatic terminal reboot to occur at the same time as the function. The automatic reboot should be 15-30 minutes before or after the automatic report printing to avoid having the reboot prevent printing the report(s).
From the main screen, touch Settings.
Enter the merchant password and touch Confirm.
Scroll to the Configure application section.
Touch Terminal options.
Scroll to the Administration section.
Set the hour and minute at which you want the terminal to reboot automatically.
Touch the Confirm button.
If you have more than one terminal, repeat steps 1 to 8 for each additional terminal where you have enabled the automatic terminal reboot and need to set the reboot time.
The Secure Payment application's payment module performs a settlement of all the business day's transactions automatically at the end of your business day, also known as closing the batch of transactions. This consollidates all your sales and reimbursement transactions and begins the funding process, which enables you to receive your funds in your merchant bank account with as little delay as possible.
After the settlement completes, you have the choice of whether to have the terminal print a report that provides visibility on your day's transactions. The following topics explain how to configure the automatic printing of reports:
When the terminal settles the day's batch of transactions, you can choose to have the terminal print a detailed or summary transaction report. You can also choose to not have the terminal print any reports, but this may make it more difficult to compare your sales with the deposits in your merchant bank account.
By default, the automatic printing of a summary transaction report is enabled on the terminal.
From the main screen, touch Settings.
Enter the merchant password and touch Confirm.
Scroll to the Configure application section.
Touch Application options.
Scroll to the Auto-print
When you enable the automatic printing of transaction reports, you can choose the time when the report prints. By default, the automatic report printing occurs at 7:00 PM eastern time. If your business day ends later than 7:00PM eastern, you can adjust the time for the printing of the transaction report(s).
From the main screen, touch Settings.
Enter the merchant password and touch Confirm.
Scroll to the Configure application section.
On the Auto-print time screen, set the hour and minute when you want the terminal to print the transaction report(s).
Touch the Confirm button.
If you have more than one terminal, repeat steps 1 to 8 for each additional terminal where you want to print a report automatically.
When you enable the automatic printing of transaction reports, you can choose to print a summary report (enabled by default), a detailed report, or both.
From the main screen, touch Settings.
Enter the merchant password and touch Confirm.
Scroll to the Configure application section.
Touch Application options.
Scroll to the Auto-print
Although the automatic printing aof a summary transaction report is enabled by default on the terminal, you can disable the function if desired.
From the main screen, touch Settings.
Enter the merchant password and touch Confirm.
Scroll to the Configure application section.
Touch Application options.
Scroll to the Auto-print
If your terminal supports contactless payment technology, you can configure the feature with the following topics:
Most modern payment terminals support and accept payment cards that use contactless technology, where you present or "tap" the card on the reader to transmit the card information. By default, contactless transactions (sales and refunds) are enabled on the terminal.
From the main screen, touch Settings.
Enter the merchant password and touch Confirm.
Scroll to the Configure application section.
Touch Application options.
In the Contactless
Each payment processor/card brand has their own touch/tap payment technology. The terminal supports all major technologies. When you enable contactless transactions, you can select which technologies you will accept. The available technologies include:
Visa PayWave
MMCL / PayPass
Interac Flash
AMEX ExpressPay
TIP: As a security measure, we recommend that you disable any contactless technology you do not accept; this will prevent a client from attempting to use a card from a payment processor or brand you do not have an agreement with.
From the main screen, touch Settings.
Enter the merchant password and touch Confirm.
Scroll to the Configure application section.
Touch Application options.
In the Contactless
If you have more than one terminal, repeat steps 1 to 5 for each additional terminal to configure its supported contactless technologies.
If desired, you can disable contactless transactions if you do not want to offer this option to your customers.
From the main screen, touch Settings.
Enter the merchant password and touch Confirm.
Scroll to the Configure application section.
Touch Application options.
In the Contactless
Enable the automatic reboot of the payment terminal by toggling the Terminal reboot switch to the right.
Disable the automatic reboot of the payment terminal by toggling the Terminal reboot switch to the left.
Refer to the Terminal Reboot Time procedure to set the time when your payment terminal reboots.
If you have more than one terminal, repeat steps 1 to 8 for each additional terminal where you to set the terminal reboot status.
Touch Reboot time.
Toggle the Auto-print switch to the right.
If you have more than one terminal, repeat steps 1 to 6 for each additional terminal where you want to print a report automatically.
Scroll to the Auto-print section.
Touch Auto-print time.
To print the detailed report, toggle the Auto-print detail report switch to the right.
To print the summary report, toggle the Auto-print summary report switch to the right.
To disable printing of either report, toggle the desired switch to the left.
If you have more than one terminal, repeat steps 1 to 8 for each additional terminal where you want to print the report(s) automatically.
Toggle the Auto-print switch to the left.
If you have more than one terminal, repeat steps 1 to 6 for each additional terminal where you want to disable the automatic printing of reports.
If you have more than one terminal, repeat steps 1 to 5 for each additional terminal where you want to offer contactless transactions.
JCB JSpeedy
Discover DPAS
If you have more than one terminal, repeat steps 1 to 5 for each additional terminal where you to disable contactless transactions.
Enabled
Disabled