Loading...
Loading...
Loading...
Loading...
Loading...
Loading...
Loading...
Loading...
Loading...
Loading...
Loading...
The Freebees app can operate in a fully integrated environment with either Maitre'D or Veloce as the POS solution. Select the POS you are working with for details on how to use Freebees gift cards with that system:
When working in a Maitre'D environment, the POS and payment terminal communicate automatically, ensuring that there is no input error for the total amount. When Maitre'D communicates the purchase amount to the terminal, the terminal uses the SecurePay or SecureTable application to display the sale amount and, when a gift card is identified as the payment method, it will automatically switch to the Freebees app.
IMPORTANT! The procedure described below is for a purchase (redemption) using a gift card. Any other transaction using a gift card must be processed using the Freebees application in standalone mode.
On the Maitre'D workstation, print the guest check(s).
Bring the guest check(s) with the payment terminal to the table.
Identify which check you want to process and the desired payment method.
Pass the payment terminal to the customer.
For a customer who wishes to pay with a gift card, direct them to touch the green Gift Card button on the terminal screen.
The Freebees main screen appears, allowing you to scan, swipe or manually enter the card number.
NOTE: If the customer swipes the gift card without touching the Gift Card button, the terminal will ask if the payment method is a gift card; touch Yes and the procedure will continue as indicated.
After the server authorizes the transaction, the terminal displays the authorization number and the new card balance.
Print the customer copy of the transaction receipt and return the card, the check, and the transaction receipt to the customer.
On the Maitre'D workstation, print the guest check and close the order.
For a customer who wishes to pay with a gift card, select card as the payment method.
When the purchase total appears on the terminal, direct the customer to swipe their gift card or manually enter the card number.
After the server authorizes the transaction, the terminal displays the authorization number and the new card balance.
Print the customer copy of the transaction receipt and hand it with the check to the customer.
When working in a Veloce environment, the POS and payment terminal communicate automatically, ensuring that there is no input error for the total amount. Veloce communicates the purchase amount to the terminal, the terminal uses the Veloce application to display the sale amount, where the operators selects Freebees as the payment method.
IMPORTANT! The procedure described below is for a purchase (redemption) using a gift card.
To process a purchase (redeem) with Veloce:
On the Veloce workstation, select the check(s) to pay.
When the guest indicates they want to pay with a gift card, select Freebees Gift card as the payment method.
Read the card by scanning, swiping, or manually entering the card number.
When the terminal confirms that the card is valid, the current balance appears.
Confirm that the payment is using a gift card by touching Yes.
After the server authorizes the transaction, the terminal displays the authorization number and the new card balance.
Print the customer copy of the transaction receipt and return the card, the check, and the transaction receipt to the customer.
If you already have your POS/payment solution installed and are adding gift card support, or want to add Freebees gift card support, you need to install and configure the application on your terminal.
This section will explain how to install and configure the Freebees app on your PAX payment terminal:
If the Freebees app is not already installed on your payment terminal. use the following procedure to download and install the app.
NOTE: The Freebees app is only certified for use on Android-based PAX payment terminals at this time.
On your payment terminal, locate the PAXSTORE icon.
Touch the PAXSTORE icon to launch the PAX app store.
Touch the search field and use the keyboard to enter Freebees.
When the Freebees Gift and Loyalty app appears, touch the GET button or the download icon.
The app downloads and installs automatically on the terminal.
You can touch the OPEN button to launch the app or return to the terminal's main window.
If the Freebees app was not installed prior to receiving your payment terminal(s), you need to configure the settings to ensure proper communication with the server that authorizes gift card transactions.
IMPORTANT! When configuring the Freebees app, make sure you have the Partner ID, Location ID, and Security key at hand to enter your individual merchant information. You should have received this information from PayFacto or Freebees. If you do not have this information, please contact support before proceeding.
Touch the Freebees Gift and Loyalty app icon on the terminal's main screen.
Touch the ADMIN button at the bottom of the screen.
Scroll down to locate the Configuration section.
Select Production from the Mode list.
If you have multiple payment terminals using the Freebees app, you can enter a unique identifier for each terminal using the Workstation parameter; touch Workstation and enter your terminal's identifier in the field and touch OK. By default, the Workstation is set to 0.
Touch Partner ID and enter your partner identification in the field and touch OK.
Touch Location ID and enter your location identifier in the field and touch OK.
Touch Security key and enter your security key in the field and touch OK.
This guide will explain how to process Freebees gift cards using the PayFacto payment application in standalone mode or through SecurePay, SecureTable, or Veloce.
NOTE: The Freebees app is only certified for use on Android-based PAX payment terminals at this time.
When working in a semi-integrated environment, the POS and payment terminal communicate automatically, ensuring that there is no input error for the total amount. When the POS communicates the purchase amount to the terminal, the terminal uses the PayFacto payment application to display the sale amount and, when a gift card is identified as the payment method, it will automatically switch to the Freebees app.
IMPORTANT! The procedure described below is for a purchase (redemption) using a gift card. Any other transaction using a gift card must be processed using the Freebees application in
On the POS workstation, print the guest check.
Present the guest check with the payment terminal to the customer.
Pass the payment terminal to the customer.
For a customer who wishes to pay with a gift card, direct them to touch the green Gift Card button on the terminal screen.
The Freebees main screen appears, allowing you to scan, swipe or manually enter the card number.
NOTE: If the customer swipes the gift card without touching the Gift Card button, the terminal will ask if the payment method is a gift card; touch Yes and the procedure will continue as indicated.
After the server authorizes the transaction, the terminal displays the authorization number and the new card balance.
Print the customer copy of the transaction receipt and return the card, the check, and the transaction receipt to the customer.
This section describes how to perform gift card transactions when using the terminal in standalone mode, which means that the terminal does not communicate with a Point Of Sale (POS) system. This configuration is common for merchants who have separate systems to calculate the sales (POS or cash register) and process transactions (payment terminal). Standalone mode requires the operator to enter the amount of the transaction on the payment terminal and the customer confirms the amount of the transaction.
Some merchant configurations use solutions where the POS sends the transaction information to the payment terminal. Semi- and full integrated modes do not require the operator to input the transaction amount on the payment terminal, as the POS and payment terminal are able to communicate the transaction amount and the server response without operator intervention.
All gift card transactions in standalone mode begin with reading the card, whether by scanning or swiping the card or by manually entering the card number. The methods available to read the card depend on your payment terminal and thefor the Freebees app. The available input methods are:
(if the gift card has a magnetic strip)
After the terminal reads the card and verifies the card with the authorization server, the terminal returns one of two possible results:
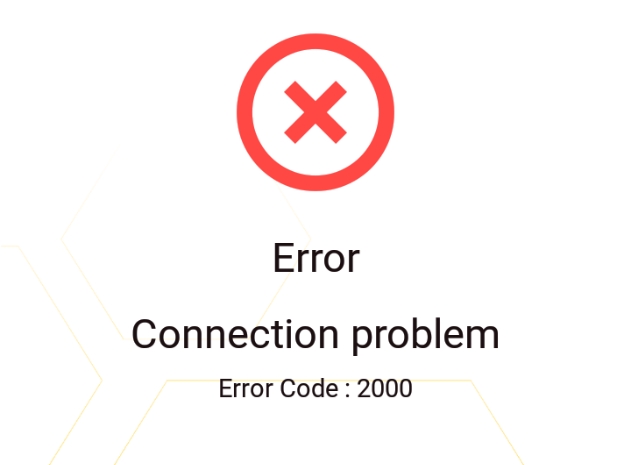
Error message: Indicates either a connection problem or an invalid/inactive gift card
Valid card: Displays current card balance, allowing you to select a transaction
Error Message
Valid Card
Take the gift card from the client.
Turn the card over to display the bar code printed on the back.
In the Freebees app, touch the Scan button.
Position the terminal so the green cross is over the card's bar code.
Take the gift card from the client.
In the Freebees app, touch the Swipe button.
Swipe the card through the terminal's magnetic strip reader as shown on the terminal screen.
Take the gift card from the client.
Turn the card over to display the card number printed on the back.
In the Freebees app, touch the Manual Entry button.
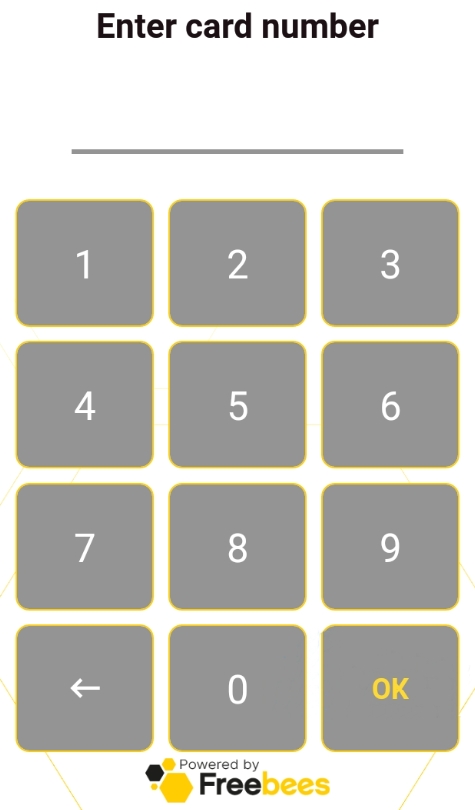
On the Enter card number screen, use the keypad to enter the card number and then touch OK.
One of the most common gift card transactions is to redeem some of the card's value in exchange for products or services. When you redeem funds from a Freebees gift card, the terminal displays a unique authorization number for the transaction. This authorization number is required if a customer wants to refund a transaction later.
When the terminal confirms that the card is valid, the current balance appears.
Touch the Redeem button.
Enter the purchase amount in the Enter amount to redeem field and touch OK.
After the server authorizes the transaction, the terminal displays the authorization number and the new card balance.
Touch the Print customer copy button and hand it to the customer.
If desired, touch the Print merchant copy button to retain a copy of the transaction receipt.
Touch the Done button to return to the main screen.
When a card balance gets low, customers can add funds to their card balance rather than let the balance go to zero ($0.00).
When the terminal confirms that the card is valid, the current balance appears.
Touch the Load button.
Enter the amount to add to the card balance in the Enter amount to load field and touch OK.
After the server confirms that the funds have been added to the card balance, the terminal displays the authorization number and the new card balance.
Touch the Done button to return to the main screen.
There may be times when a customer presents a gift card with a very low balance. When the card balance reaches a certain level, you can empty the card for a customer. Emptying a card is similar to redeeming funds, but instead of purchasing a product or service, you hand the cash balance back to the customer.
IMPORTANT! In Quebec, you can only empty a gift card if the balance is below $5.00 If you try to empty a card with a balance over $5.00, an error message appears indicating that the minimum balance exceeds the amount to empty the card.
When the terminal confirms that the card is valid, the current balance appears.
Touch the Empty button.
Touch OK to confirm that the customer wants to empty the card.
After the server authorizes the transaction, return the cash balance to the customer.
Touch the Done button to return to the main screen.
Gift cards are pre-loaded with an amount, but the balance cannot be used until a merchant activates the card. A new, inactive card will not display a balance when read by a terminal, it displays a message that the card is inactive.
Begin by taking the new card from the customer and process the customer's payment for the value of the gift card.
When the terminal confirms that the card is available for activation, touch the Activate button.
NOTE: If the card has previously been activated, the terminal will display an error message indicating that the card is already active.
Touch OK to confirm the card activation.
After the server confirms the card's activation, the terminal displays a confirmation message the card balance.
Touch the Done button to return to the main screen.
It is possible that a customer requests a refund for a purchase made with a gift card. The request for a refund can be for the entire purchase or only a portion of the transaction. When this occurs, you can refund the transaction which returns the requested amount of the original transaction to the gift card balance.
NOTE: To refund any amount of a gift card transaction, the customer must have the original transaction receipt with the confirmation number from the original transaction.
When the terminal confirms that the card is valid, the current balance appears.
Touch the Refund Transaction button.
Enter the transaction amount to refund in the Enter amount to refund field.
Enter the original transaction confirmation number in the Enter authorization number and touch OK.
After the server authorizes the transaction, the terminal displays the authorization number and the updated card balance.
Touch the Done button to return to the main screen.
If you make an error when processing a gift card transaction, you can cancel the transaction which serves to void the entire transaction, allowing you to begin again. Cancelling a transaction is different from a gift card refund because the entire amount of the transaction is reversed, regardless of the transaction type (redemption, load, empty, activate), whereas the refund applies only to a redemption (for the entire transaction amount or only a portion of it).
There are two ways to cancel a gift card transaction:
If the transaction to cancel was the most recent gift card transaction, use the Last Transaction button on the main screen.
If the transaction to cancel was not the most recent gift card transaction, use the Cancel Transaction button after reading the gift card.
NOTE: To cancel a gift card transaction, the customer must have the original transaction receipt with the confirmation number from the original transaction.
To cancel the last gift card transaction:
On the main page, touch the Last Transaction button.
On the Last transaction summary page, touch the Cancel this transaction button.
On the Cancel Transaction screen that appears, touch OK to confirm the cancellation.
After the server authorizes the cancellation, the terminal displays the authorization number and the new card balance; touch Done.
NOTE: After you use the Cancel this transaction button, it no longer appears when you touch the Last Transaction button on the main page.
To cancel a previous gift card transaction:
When the terminal confirms that the card is valid, the current balance appears.
Touch the Cancel Transaction button.
Enter the original transaction confirmation number in the Enter authorization number and touch OK.
After the server authorizes the cancellation, the terminal displays the authorization number and the new card balance; touch Done.
You can configure the Freebees Gift and Loyalty app to meet your specific business needs. This section explains how to configure the different application settings.
The Freebees Gift and Loyalty app can display instructions and messages in English or French. By default, the app uses the terminal's configured language, but you can select a specific language if desired.
On the main page, touch the ADMIN button at the bottom of the screen.
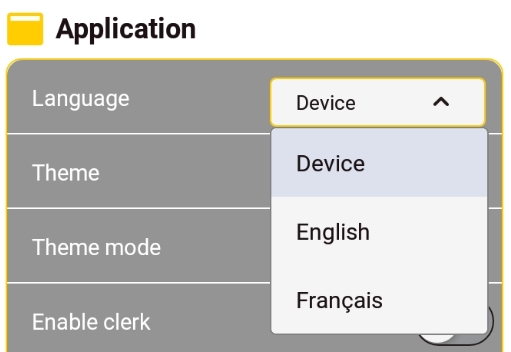
In the Application section, select the language to use from the Language list. The available options are:
Device: The app uses the terminal's configured language.
English: The app displays instructions and messages in English.
French: The app displays instructions and messages in French.
You can change the appearance of the Freebees application to match your business theme/appearance. By default, the app uses the terminal's configured appearance, but you can select a specific mode (dark or light) if desired.
On the main page, touch the ADMIN button at the bottom of the screen.
In the Application section, select the desired custom theme from the Theme list (if a custom theme is available).
NOTE: If you wish to have a custom theme, you must contact Freebees to create and activate the custom theme.
To select between dark and light themes, select the theme mode to use from the Theme mode list. The available options are:
Device: The app uses the terminal's configured appearance.
Dark: The app uses a dark mode as its display.
Light: The app uses a light mode as its display.
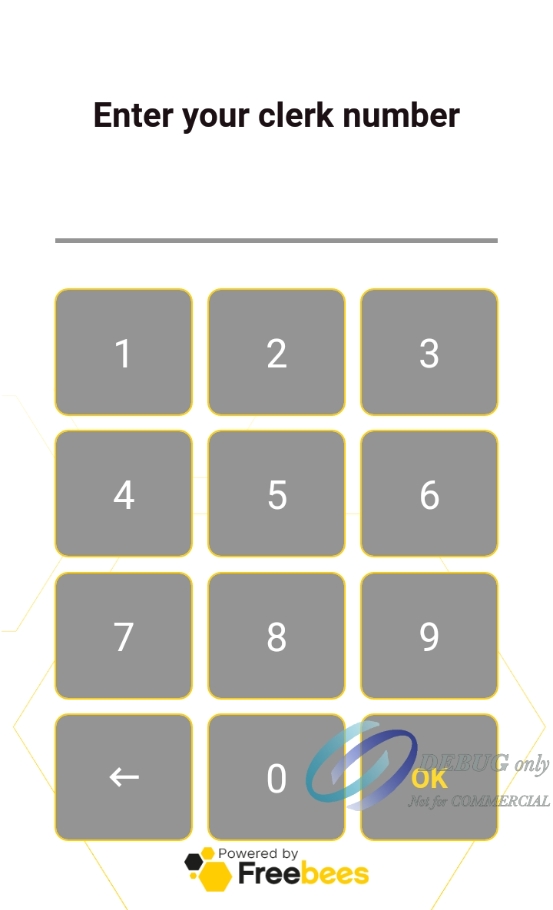
The Freebees Gift and Loyalty app allows you to identify the clerk before processing a gift card transaction. When you enable clerk identification, all operators must enter their clerk number prior to processing a gift card transaction.
This section explains how to enable and configure clerk management for the app. The topics include:
When you enable clerk identification, each terminal operator must enter their clerk number before they can process a gift card transaction. When you enable clerk identification, you need to assign a numerical identifier (between 1 and 4 characters) for each terminal operator.
If you have multiple payment terminals with the Freebees Gift and Loyalty app and you want to enable clerk identification on each terminal, you must enable and configure the clerks on each terminal individually.
If your terminal payment application uses operator identification, you can assign the same identifiers (up to 4 characters) in the Freebees app.
To enable clerk identification:
On the main page, touch the ADMIN button at the bottom of the screen.
In the Application section, toggle the Enable clerk button to On. A new menu option appears.
When you enable clerk identification, you can choose to have the app display the main page for transactions or the clerk identification page, where operators enter their identifier before accessing the main transactions page.
On the main page, touch the ADMIN button at the bottom of the screen.
In the Application section, select the clerk identification homepage from the Home page list. The available choice are:
Home: The app displays the main transactions page.
Clerk: The app displays the clerk identification page.
If you do not want to enable clerk identification, you can assign a default clerk identifier on the terminal. If you use multiple terminals, this can serve as a way to identify which terminal processed a gift card transaction without requiring a clerk to identify themselves before processing a transaction.
On the main page, touch the ADMIN button at the bottom of the screen.
In the Application section, touch Clerk default value and enter the desired value in the field and touch OK.
If you previously enabled clerk identification but no longer wish to use the feature, you can quickly disable clerk identification.
If the default Home page is set to Clerk, touch the Backspace key to access the main page.
On the main page, touch the ADMIN button at the bottom of the screen.
In the Application section, toggle the Enable clerk button to Off.
The Freebees app allows you to enter the invoice number before processing a gift card transaction. If you enable this function, each transaction will require that you enter an invoice number before you can proceed.
When you enable the invoice number, you can choose to have the app require that operators input the invoice number manually, or you can set a default value that the app will increment with each new transaction.
If you want to enter the invoice number before you process a gift card transaction, you need to enable the invoice numbering function.
If you want to remove the requirement to enter an invoice number before processing a gift card transaction, you need to disable the function.
To enable or disable invoice numbering:
On the main page, touch the ADMIN button at the bottom of the screen.
In the Application section, toggle the Enable invoice number button to On to enable the function, or toggle Enable invoice number to Off to disable the function.
If you enable invoice number entry prior to a gift card transaction, you can configure a default value for invoice numbering that increments automatically with each new gift card transaction.
To configure the default invoice number to use for gift card transactions:
On the main page, touch the ADMIN button at the bottom of the screen.
In the Application section, touch Invoice number default value and enter your preferred default invoice numbering format in the field and touch OK.
You can disable this function if you do not want to have the Last Transaction button appear on the app's main page.
On the main page, touch the ADMIN button at the bottom of the screen.
In the Application section, toggle the Enable last transaction button to On to enable the function, or toggle Enable invoice number to Off to disable the function
The Freebees app processes gift card transactions as well as offering a This section explains how to enable and configure the app to process gift card transactions. Topics covered are:
For merchants that want to accept Freebees gift cards, you need to enable the gift card feature on your terminal before you can begin processing transactions using gift cards. By default, the gift card function is enabled when you install the Freebees app.
On the main page, touch the ADMIN button at the bottom of the screen.
In the Giftcard section, toggle the Enable Giftcard button to On.
To disable the gift card feature, toggle the Enable Giftcard button to Off.
When you enable the gift card function, you need to configure certain options to set which transactions you will accept with gift cards.
On the main page, touch the ADMIN button at the bottom of the screen.
In the Giftcard section, Touch Enabled functions to expand the configurable options.
NOTE: By default, all configurable options for the gift card function are enabled when you activate the gift card feature. If you disable one or more of these features, you risk that customers may accumulate rewards faster than anticipated.
Enable or disable the gift card functions to meet your business needs. The configurable options are:
Redeem: When enabled, this option allows customers to purchase goods and/or services using some or all of the available balance on their gift card.
Load: When enabled, this option allows customers to add money to their gift card balance.
Empty: When enabled, this option allows customers to request that the balance on the card be given in cash.
IMPORTANT! In Quebec, customers can only empty a card if the balance is below $5.00.
Activate: When enabled, this option allows you to activate a card, which unlocks the card's original value as the opening balance.
NOTE: Gift cards that have not been activated cannot be used for transactions. When you activate a card, the Freebees server registers the card's number as valid and eligible for transactions.
Cancel: When enabled, this option allows you to cancel a gift card transaction.
Refund: When enabled, this option allows you to refund a gift card transaction, putting the original sale amount back on to the card's balance.
When you enable the gift card function, you can choose to show or hide function buttons that are not used as part of the gift card transactions. By default, the app displays all buttons, whether or not they are used for the selected function.
On the main page, touch the ADMIN button at the bottom of the screen.
In the Giftcard section, toggle the Show disabled functions button to On.
To hide disabled function buttons, toggle the Show disabled functions button to Off.
When you install the Freebees app on your payment terminal, the app detects the terminal's abilities to read a gift card. This section explains how to configure the input methods for your terminal to read Freebees gift cards.
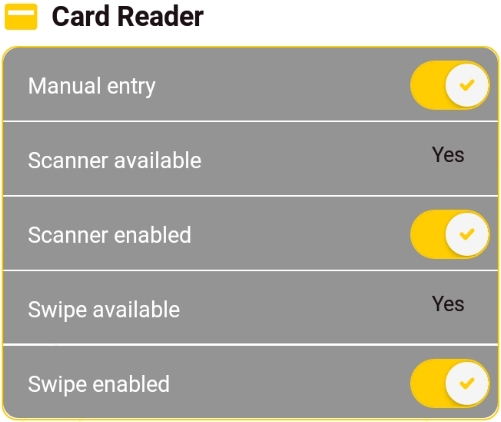
There are multiple ways to input a gift card with your payment terminal. The Freebees app supports manual card entry (card number input using the terminal's keyboard), scanning the gift card with the terminal camera/scanner, and magnetic strip swiping. The Freebees app can detect the input methods compatible with your terminal and will display Yes or No for the different input methods, as shown in the example below:
By default, all supported card reading options are enabled.
On the main page, touch the ADMIN button at the bottom of the screen.
,In the Card Reader section, toggle the different options to On or Off, depending on how you want to input customer gift cards. The available card reading options are:
Manual entry: When enabled, allows you to enter the gift card number using the terminal's keyboard.
Scanner enabled: When enabled, allows you to scan the bar code on the back of the gift card.
Swipe enabled: When enabled, allows you to swipe the gift card's magnetic strip.
NOTE: If your terminal does not support scanning and/or swiping, you will not be able to toggle the card reading method to On.
The Freebees app allows you to set a PIN as a security measure to ensure that nobody can process a transaction without inputting the PIN first. The following sections will explain the different security PIN options available:
If you want to secure the Freebees app from unauthorized use, you can enable PIN security, which requires that operators to enter a 4-digit security code before processing a transaction.
IMPORTANT! If you forget the security PIN, you will be unable to process a gift card or loyalty transaction and you will have to uninstall then reinstall and configure the app.
On the main page, touch the ADMIN button at the bottom of the screen.
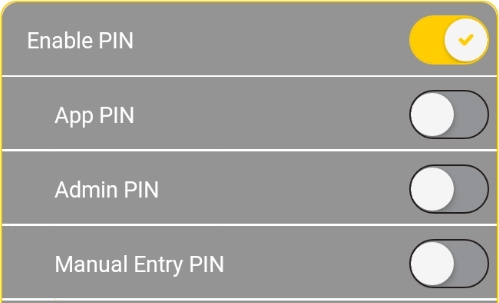
In the Security section, toggle the Enable PIN button to On. Security PIN options appear below the toggle button and the Enter a new PIN page appears.
On the Enter a new PIN page, enter a 4-digit PIN and touch OK.
On the Confirm PIN page, re-enter the PIN to confirm and touch OK.
When you enable PIN security for the Freebees app, you can configure when a security PIN is required to offer additional security.
IMPORTANT! If you forget the security PIN, you will be unable to process a gift card or loyalty transaction and you will have to uninstall then reinstall and configure the app.
On the main page, touch the ADMIN button at the bottom of the screen.
In the Security section, toggle the security PIN options you want to enable or disable. By default the security PIN options are disabled. The available options include:
App PIN: When enabled, this requires an operator to enter the security PIN before starting or using the Freebees app.
Admin PIN: When enabled, this prevents a user from accessing the ADMIN button to access the app's settings without entering the security PIN first.
Manual Entry PIN: When enabled, this options prevents an operator from manually entering a card number without first entering the security PIN.
If you want to change the security PIN, you can quickly reset it to a new 4-digit code. Changing the security PIN on occasion is considered good "security hygiene" as a way to prevent the terminal and the Freebees app from unauthorized use.
IMPORTANT! If you forget the new security PIN, you will be unable to process a gift card or loyalty transaction and you will have to uninstall then reinstall and configure the app.
On the main page, touch the ADMIN button at the bottom of the screen.
In the Security section, touch Reset PIN the Enter old PIN page appears.
On the Enter old PIN page, enter the current security PIN and touch OK. The Enter a new PIN page appears.
On the Enter a new PIN page, enter a 4-digit PIN and touch OK.
On the Confirm PIN page, re-enter the PIN to confirm and touch OK. The security PIN is reset to the new value.
If you previously enabled a security PIN code and wish to stop requiring the PIN to process transactions, you can disable the security feature.
To disable a security PIN:
On the main page, touch the ADMIN button at the bottom of the screen.
In the Security section, toggle the Enable PIN button to Off.
On the PIN page, enter the current security PIN and touch OK. The security PIN function is disabled.
Touch the Back button to return to the Freebees main screen.
by scanning, swiping, or manually entering the card number.
by scanning, swiping, or manually entering the card number.
by scanning, swiping, or manually entering the card number.
by scanning, swiping, or manually entering the card number.
by scanning, swiping, or manually entering the card number.
by scanning, swiping, or manually entering the card number.
The Freebees app allows you to display a Last Transaction button on the home page if you want to quickly access a summary of the most recently processed transaction. When enabled, touching the Last Transac button on the home page displays a summary of the last gift card transaction performed on the terminal. You can then choose to print the merchant or customer copy of the transaction receipt as well as .
Main Transactions Page
Clerk Identification Page
The Freebees app supports loyalty/reward programs as well as gift cards. If you have a loyalty program, you need to enable and configure the function as explained in the following sections:
NOTE: If you do not currently have a loyalty program and you wish to add one, you must contact Freebees to add the loyalty program to your account.
If you have added a Freebees loyalty program to your merchant account, you need to enable the loyalty feature on your terminal before customers can begin redeeming any rewards.
On the main page, touch the ADMIN button at the bottom of the screen.
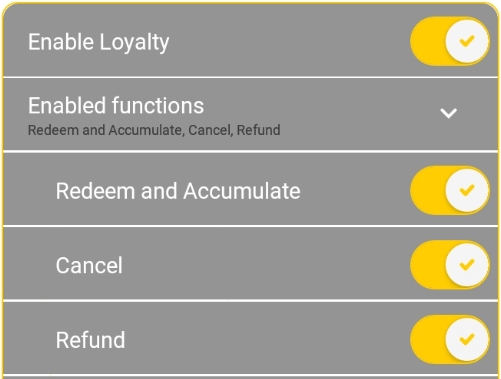
In the Loyalty section, toggle the Enable loyalty button to On. Loyalty function options appear below the toggle button.
To disable the loyalty feature, toggle the Enable loyalty button to Off.
When you enable the loyalty function, you need to configure certain options to set which transactions affect the loyalty program.
On the main page, touch the ADMIN button at the bottom of the screen.
In the Loyalty section, Touch Enabled functions to expand the configurable options.
NOTE: By default, all configurable options for the loyalty function are enabled when you activate the loyalty feature. If you disable one or more of these features, you risk that customers may accumulate rewards faster than anticipated.
Enable or disable the loyalty functions to meet your business needs. The configurable options are:
Redeem and Accumulate: When enabled, this options allows customers to accumulate loyalty/reward units and redeem the accumulated units to purchase goods.
Cancel: When enabled, this option allows you to cancel a transaction that would otherwise accumulate on a loyalty/reward card.
Refund: When enabled, this option allows you to refund a transaction that would otherwise accumulate on a loyalty/reward card.
When you enable the loyalty function, you can choose to have the Freebees app calculate the tax automatically after you enter the subtotal amount for the purchase.
NOTE: If you enable tax calculation, you need to use the Configure Tax Calculation Options procedure to set the total tax percentage.
On the main page, touch the ADMIN button at the bottom of the screen.
In the Loyalty section, toggle the Calculate tax button to On. Tax calculation options appear below the toggle button.
To disable the tax calculation feature, toggle the Calculate tax button to Off.
When you enable tax calculation for the loyalty/reward program, you must configure the total tax percentage that is added to the subtotal for the purchase and select whether the purchase subtotal can be edited before completing the transaction.
IMPORTANT! If your location collects more than one sales tax, you need to enter the amount of all applicable taxes.
On the main page, touch the ADMIN button at the bottom of the screen.
In the Loyalty section, touch Tax percentage and enter the total tax percentage in the field and touch OK.
If you want to allow the subtotal to be modified before completing the transaction, toggle the Subtotal edit button to On.
To disable the ability to edit the subtotal, toggle the Subtotal edit button to Off.
When you enable the loyalty function, you can choose to show or hide function buttons that are not used as part of the loyalty program. By default, the app displays all buttons, whether they are used or not for the selected function.
To show or hide disabled function buttons:
On the main page, touch the ADMIN button at the bottom of the screen.
In the Loyalty section, toggle the Show disabled functions button to On.
To hide disabled function buttons, toggle the Show disabled functions button to Off.
This section will explain how to enable and configure the various printing options for the Freebees app.
If your payment terminal does not have an integrated printer, the printing options will not be available, and the Printer section of the app settings will display whether a printer is available or not by displaying Yes or No for the Printer available function, as shown in the example below:
Topics covered in this section include:
If your payment terminal has an integrated printer, you can choose whether to print transaction receipts or not. If you disable printing, customer will have no physical record of their purchase and they will be unable to request a refund without the confirmation code that is printed on the receipt by default.
On the main page, touch the ADMIN button at the bottom of the screen.
In the Printer section, toggle the Printer enabled button to On. Printing options appear below the toggle button.
To disable printing, toggle the Printer enabled button to Off.
NOTE: When you disable printing, the app hides all printing options but their settings are retained the next time you enable printing on the terminal.
When you enable printing of transaction receipts, you need to configure the different options from the menus that appear when you toggle Printer enabled to On.
On the main page, touch the ADMIN button at the bottom of the screen.
In the Printer section, toggle the different options to On or Off, depending on your business needs.
The available printing options are:
Print balance: When enabled, prints the remaining card balance on the transaction receipt.
Print merchant coupon: When enabled, prints the merchant copy of the transaction receipt.
Print customer coupon: When enabled, prints the customer's copy of the transaction receipt.
IMPORTANT! If you disable this function, the customer will not have any physical proof or the confirmation code of their transaction.
Print errors: When enabled, prints any error message related to the transaction.
Quality: Select the print quality for the transaction receipts. The options are:
Low: Lightest printout, prints faster.
Standard: Normal printout setting and speed.
High: Darkest printing, prints slower.
When you enable printing, the Freebees app can print additional information at the top of each transaction receipt. Although this uses more paper, it allows you to display your merchant name, address, and two additional lines of text.
On the main page, touch the ADMIN button at the bottom of the screen.
In the Printer section, toggle the Header enabled button to On. Header text field options appear below the toggle button.
To disable header printing, toggle the Header enabled button to Off.
When you enable the printing of header text on your transaction receipts, you can include up to 5 lines of text with a maximum of 40 characters per line.
TIP: You should prepare your message on a piece of paper in advance, to ensure that you have the correct number of characters per line.
On the main page, touch the ADMIN button at the bottom of the screen.
Scroll to the Printer section; below the Header enabled toggle button, touch Merchant name, enter your text in the field, and touch OK.
Touch Merchant address 1, enter your text in the field, and touch OK.
If necessary, touch Merchant address 2, enter your text in the field, and touch OK.
If necessary, touch Extra line #1, enter your text in the field, and touch OK.
TIP: You can use the Extra Line #1 and Extra line #2 to display additional information about your business, including telephone number, business hours, and more.
If necessary, touch Extra line #2, enter your text in the field, and touch OK.
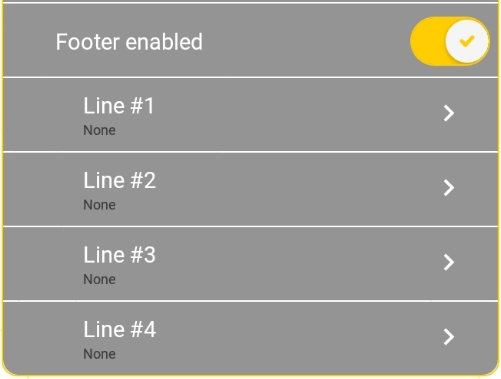
When you enable printing, the Freebees app can print additional information at the bottom of each transaction receipt. Although this uses more paper, it allows you to display up to four additional lines of text that can include operating hours, website address, telephone number, and more.
On the main page, touch the ADMIN button at the bottom of the screen.
In the Printer section, toggle the Footer enabled button to On. Footer text field options appear below the toggle button.
To disable footer printing, toggle the Footer enabled button to Off.
When you enable the printing of footer text on your transaction receipts, you can include up to 4 lines of text with a maximum of 40 characters per line.
TIP: You should prepare your message on a piece of paper in advance, to ensure that you have the correct number of characters per line.
On the main page, touch the ADMIN button at the bottom of the screen.
Scroll to the Printer section; below the Footer enabled toggle button, touch Line #1 and enter your footer text in the field and touch OK.
Repeat step 2 for each additional line of footer text you wish to add, by touching Line #2, Line #3, and Line #4 the text you enter for these fields will appear on all the transaction receipts.


