Taxes are an important component of any POS system. Taxes need to be calculated accurately so that customers can be informed of the taxes they pay with their purchases. These calculations are also essential to the production of reports and payment of these taxes to the local fiscal authorities. Improperly configured taxes can incur heavy penalties for merchants, so special care needs to be given to the configuration of taxes.
When setting up taxes in Veloce, following a logical sequence will make the work easier. It will also avoid having to go back-and-forth between various configurations to achieve the desired result.
The general steps are:
Research and understand local tax laws.
Create tax categories in Veloce.
Create taxes in Veloce.
Assign taxes to Sales Items or Divisions in Veloce.
This is the first and most important step. Understanding the local tax regulation will ensure that taxes will be configured properly in Veloce. The Veloce tax calculation engine is powerful and flexible. To be able to select the appropriate options for your region, you first need to understand the regulation thoroughly. Here are some general guidelines:
Some jurisdictions have federal taxes, provincial or state taxes, liquor taxes and even special taxes on sodas or sweetened beverages. Some areas apply taxes on food items, while others don't. Some areas have variable tax rates based on whether the food is consumed on-premises (dine-in) or off-premises (take-out).
Taxes can be added to the price of an item (add-on tax) or can be included in the list price of the item (inclusive tax). It is also important to understand how rounding works. Most areas calculate rounding to the nearest cent ($0.01) while some simply truncate everything after the second decimal.
Once you understand how taxes work in your area, you need to determine how taxes will be grouped for reporting purposes. Taxes are grouped together using Tax Categories in Veloce. Every tax needs to belong to a tax category. Here are some common tax category examples:
Federal Tax
Provincial Tax
State Tax
Liquor Tax
Create each tax in Veloce. Each tax will be assigned to a tax category and configured according to local tax laws.
Each Sales Item and Division in Veloce can be configured with all available taxes. This provides maximum flexibility so that Veloce can be adapted to any tax regulation on all markets.
IMPORTANT! Taxes need to be created before any sales items. This will allow you to select relevant taxes during the sales items creation process, instead of having to go back on every single item after the fact. This is a huge time-saver when creating a new Veloce database.
Once you understand how taxes work in your area, you need to determine how taxes will be grouped for reporting purposes. Taxes are grouped together using Tax Categories in Veloce. Every tax needs to belong to a tax category. Here are some common tax category examples:
Federal Tax
Provincial Tax
State Tax
Liquor Tax
Food Tax
A maximum of 5 Tax Categories can be created in Veloce:
Login to the Veloce Back-Office.
Start the Point of Sale Control module.
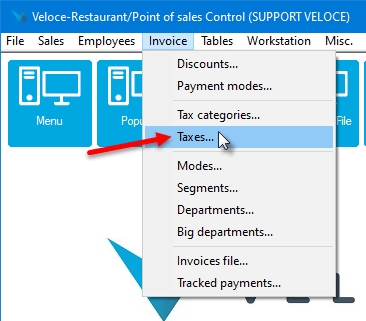
Click on the Invoice menu and select the Tax Categories... option.
The Tax Categories list appears. Click an existing category to modify it or click an empty placeholder to create a new one.
The Tax Category configuration screen appears.
Type a meaningful name for this tax category. It will be displayed in tax reports.
This is used with the Québec Sales Recording Module only. Type 1 for Federal Tax and 2 for Provincial Tax.
Used for VelPOS only - This is the letter that will appear next to each item that will identify which tax applies.
You can group two categories together by enabling this option and selecting another tax category from the drop-down list.
Click the Delete button to remove this Tax Category.
Click the Save button to save changes and exit.
Click the Exit button to close this window without saving changes.
Repeat these steps to create required categories.
Before creating axes in Veloce, make sure that Tax Categories were created, as each tax created in Veloce needs to belong to a Tax Category.
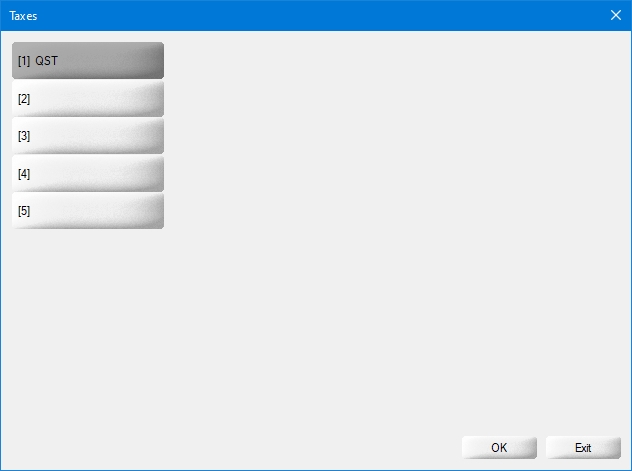
Up to 5 taxes can be created in Veloce.
Login to the Veloce Back-Office.
Start the Point of Sale Control module.
Click on the Invoice menu and select the Taxes... option.
Click on the Rate tab:
This section contains settings that are currently applicable.
Type in the percentage of tax to apply to taxable items. The rate can be anything from 0% to 100%, with a precision up to 5 decimal places.
Type in the minimum sales amount to reach for this tax to apply. If the sales amount is lower than the amount entered in this field, Veloce will not calculate taxes on this sale.
Type in the Maximum sales amount to reach for this tax to apply. If the sales amount is higher than the amount entered in this field, Veloce will not calculate taxes on this sale.
Use this option for items that are not taxable if purchased in specific quantities. For instance, if an item is taxable when purchased alone, but becomes non-taxable if 6 of the same item are purchased together. For this example, put 6 in the field.
This section contains information on future tax parameters. Use this section if an upcoming tax modification is expected in the near future. This will ensure that the new parameters automatically come into effect at the prescribed date.
Select the date at which the new tax parameters will become effective.
Type in the new percentage of tax that will apply to taxable items. The rate can be anything from 0% to 100%, with a precision up to 5 decimal places.
Enable this option for taxes with special application rules, such as British Columbia's Provincial Sales Tax applicable to soda beverages. In the text field next to the checkbox, type a meaningful name for the exception.
Enter the percentage of the combo or main item price that will be used for the calculation of the BC Soda Beverage Tax.
Enter the maximum amount that will be used as a base sale price for the calculation of the PST applicable to Soda Beverages in the Canadian province of British Columbia.
Select this option if the item prices includes all applicable taxes. For instance, if an item is sold for $10.00 including taxes, Veloce will make the necessary calculation to figure out the base item price and the correct amount for each applicable tax which will bring the total to $10.00.
Click the Delete button to remove this Tax.
Click the Save button to save changes and exit.
Click the Exit button to close this window without saving changes.
Repeat these steps to create all necessary taxes.
The Tax list appears. Click an existing tax to modify it or click an empty placeholder to create a new one.
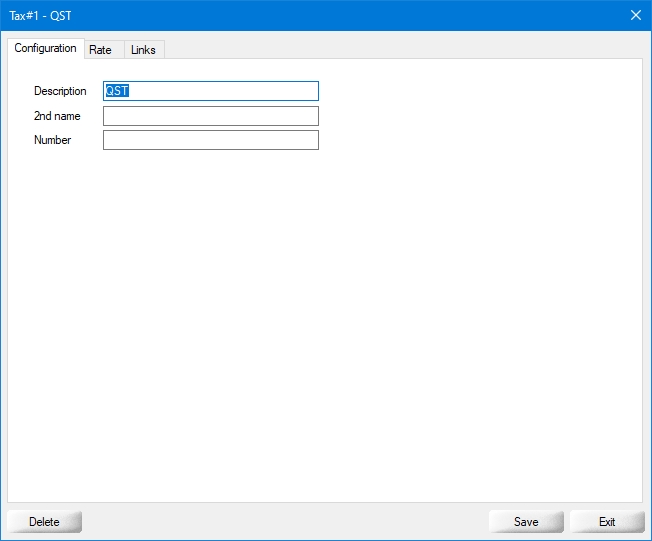
The selected tax opens on the Configuration Tab:
Type the tax description as it will appear on guest checks, receipts and reports.
Type an alternate description to be used on guest checks and receipts.
Type the tax identification or registration number, which will be printed on guest checks and receipts.
Select the Tax Category that this tax is part of.
...
...
...
...
Enable this option to apply this tax on tips and gratuity.
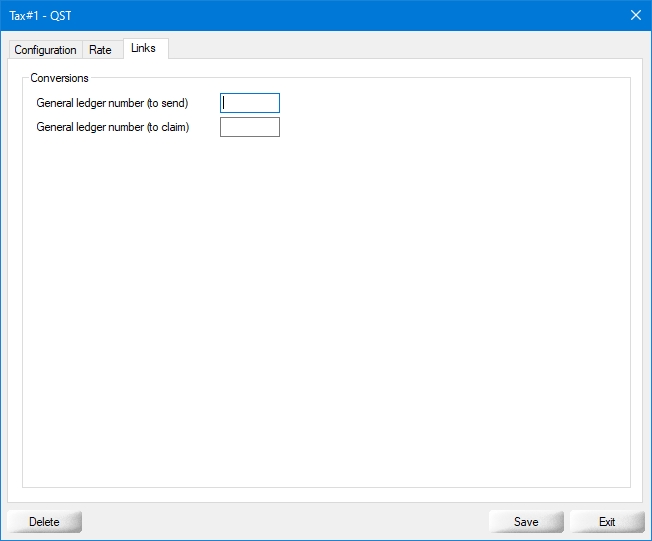
Enable this option if this tax can be applied on the tax amount from another tax.
Enable this option if the amount from this tax can be taxed by other taxes.
Enable this option if taxes should be calculated after the application of discounts. For example, if and item is normally sold for $10.00, but has a 50% discount, the tax will be calculated on $5.00. If this option is disabled, the tax will be calculated on the original price of $10.00, regardless of any discounts.