Loading...
Loading...
Loading...
Loading...
Loading...
Loading...
Loading...
Loading...
Loading...
Loading...
Loading...
Loading...
Loading...
Loading...
Loading...
Loading...
Loading...
Loading...
Hardware
Minimum
Recommended
Operating System
Android 10*
Android 11 or later
CPU (SoC)
Samsung Exynos 9611 or better
Qualcomm Snapdragon 662 or better
Unisoc Tiger T618 or better
Samsung Exynos 990 or better
Qualcomm Snapdragon 865 or better
RAM
4GB or more
6GB or more
Storage (Memory)
32GB or more
64GB or more
Screen Size
10'' or more
10'' or more
Screen Resolution
1080 x 1920 or better
1200 x 2000 or better
* While MPOS will continue to work on Android 10 for the time being, this operating system has reached its End-Of-Life and is no longer supported by Google. Before making a purchase decision, make sure that the operating system can be upgraded to a more recent version (Android 11 or later) that is supported by Google.
Samsung
Galaxy Tab A7
SM-T500
SM-T505 (LTE)
10.4''
Snapdragon 662
4GB
32GB
Samsung
Galaxy Tab A8
SM-X200
SM-X205 (LTE)
10.5''
Unisoc Tiger T618
4GB
32GB
Samsung
Galaxy Tab S6 Lite (2020)
SM-P610
SM-P615 (LTE)
10.4''
Exynos 9611
4GB
4GB
64GB
128GB
Samsung
Galaxy Tab S6 Lite (2022)
SM-P613
SM-P619 (LTE)
10.4''
Snapdragon 720G
4GB
4GB
64GB
128GB
Samsung
Galaxy Tab S7
SM-T870
SM-T875 (LTE)
SM-T876B (LTE/5G)
11''
Snapdragon 865 5G+
6GB
8GB
8GB
128GB
256GB
512GB
Samsung
Galaxy Tab S7+
SM-T970
SM-T976B (LTE/5G)
12.4''
Snapdragon 865 5G+
6GB
8GB
8GB
128GB
256GB
512GB
Samsung
Galaxy Tab S7 FE
SM-T730
SM-T733
SM-T736B (5G)
12.4''
Snapdragon 778G 5G
Snapdragon 778G 5G
Snapdragon 750G 5G
4GB
6GB
8GB
64GB
128GB
256GB
Samsung
Galaxy Tab S8
SM-X700
SM-X706 (5G)
11''
Snapdragon 8 Gen 1
8GB
8GB
12GB
128GB
256GB
256GB
Samsung
Galaxy Tab S8+
SM-X800
SM-X806 (5G)
12.4''
Snapdragon 8 Gen 1
8GB
8GB
12GB
128GB
256GB
256GB
Samsung
Galaxy Tab S8 Ultra
SM-X900
SM-X906 (5G)
14.6''
Snapdragon 8 Gen 1
8GB
8GB
12GB
16GB
12GB
16GB
128GB
256GB
256GB
256GB
512GB
512GB
Samsung
Galaxy Tab Active Pro
SM-T540
SM-T574 (LTE)
10.1''
Snapdragon 670
4GB
64GB
Related Topics
The following pre-requisites must be met before the Advanced POS User Interface can be used:
Maitre'D version 7.08.000.410 or later.
Valid Maitre'D Software-as-a-Service (SaaS) license with Embedded Maintenance Program (EMP).
License option for at least one Mobile POS. See Add-on Option to Existing License.
Maitre'D POS Bridge (See Install POS Bridge)
Maitre'D Communication Server (See Maitre'D Communication Server)
Hardware
Minimum
Recommended
Operating System
Android 10*
Android 11 or later
CPU
Samsung Exynos 9611 or better
Qualcomm Snapdragon 662 or better
Unisoc Tiger T618 or better
Samsung Exynos 990 or better
Qualcomm Snapdragon 865 or better
RAM
4Gb or more
6Gb or more
Storage
32Gb or more
64Gb or more
Screen Size
10'' or more
10'' or more
Screen Resolution
1080 x 1920 or better
1200 x 2000 or better
* While MPOS will continue to work on Android 10 for the time being, this operating system has reached its End-Of-Life and is no longer supported by Google. Before making a purchase decision, make sure that the operating system can be upgraded to a more recent version (Android 11 or later) that is supported by Google.
Hardware
Minimum
Recommended
Operating System
iOS 14
iOS 14 or later
CPU
Apple A10X Fusion or better
Apple A12 Bionic or better
RAM
3Gb or more
3Gb or more
Storage
32Gb or more
64Gb or more
Screen Size
10'' or more
10'' or more
Screen Resolution
1080 x 1920 or better
1200 x 2000 or better
Any iPad Pro tablet.
Ipad Air 3 or later models.
Related Topics
Before using the Maitre'D Mobile POS, make sure that the Mobile POS option is activated on your Maitre'D license:
Logon to the Maitre’D Back-Office with appropriate credentials. (Distributor or System Owner)
On the Main Back-Office screen, click on the File menu and select the Licenses… option.
The Installed Licenses window will appear.
Make sure that the Mobile POS option is present. The number next to Mobile POS is the maximum number of mobile POSes that can be used at the same time on your Maitre'D POS System.
Click the Close button to close this window and return to the Maitre'D Back-Office.
If the Mobile POS option is missing, please contact your Maitre'D Sales Representative to purchase it, and then follow the procedure to activate your newly purchased option here:
Add-on Option to Existing License
Related Topics
Typical Android or iOS tablets purchased in the general market don't have receipt printers. For this reason, Maitre'D has the ability to leverage the printing capabilities of other POS workstations for use by Mobile POS tablets.
Logon to the Maitre’D Back-Office with appropriate credentials. (Distributor or System Owner)
Start the Point of Sale Control module.
Click on the View menu and select the Options... option.
The Point of Sale Control module's options window opens on the Configuration branch.
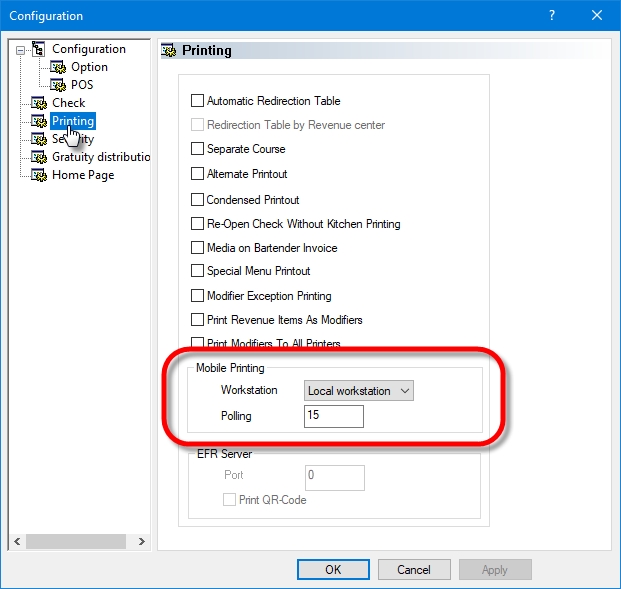
Click on the Printing branch.
Configure these options from the Mobile Printing section:
From the drop-down list, select the workstation that is responsible for handling print jobs send by mobile devices. Select a fixed workstation equipped with a receipt printer.
NOTE: Make sure that the selected workstation is always "on", otherwise the print jobs sent by mobile devices will not be processed.
Also, the selected workstation and attached printer(s) should be readily accessible to employees, as this is where guest checks will be printed.
Set the polling interval (in seconds) at which the workstation will check for print jobs from mobile devices. The recommended value is 15 seconds.
NOTE: The recommended setting for the Polling Interval is 15 seconds. This value provides a good balance between printing delays and processing overhead. Lower values will make the printing delay shorter, but may hinder the workstation's overall performance for other tasks.
Click OK to save changes.
Related Topics
Mobile POS workstations require some specific settings in Point of Sale Control > Workstation > Options.
Logon to the Maitre’D Back-Office with appropriate credentials. (Distributor or System Owner)
Start the Point of Sale Control module.
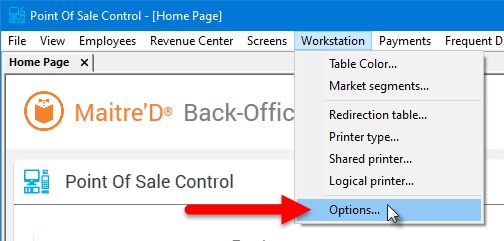
Click on the Workstation menu and select the Options... option.
The list of available workstations will be displayed. Select the workstation for which will be used as a Mobile POS and click the Modify button.
The workstation's properties open on the Workstation branch.
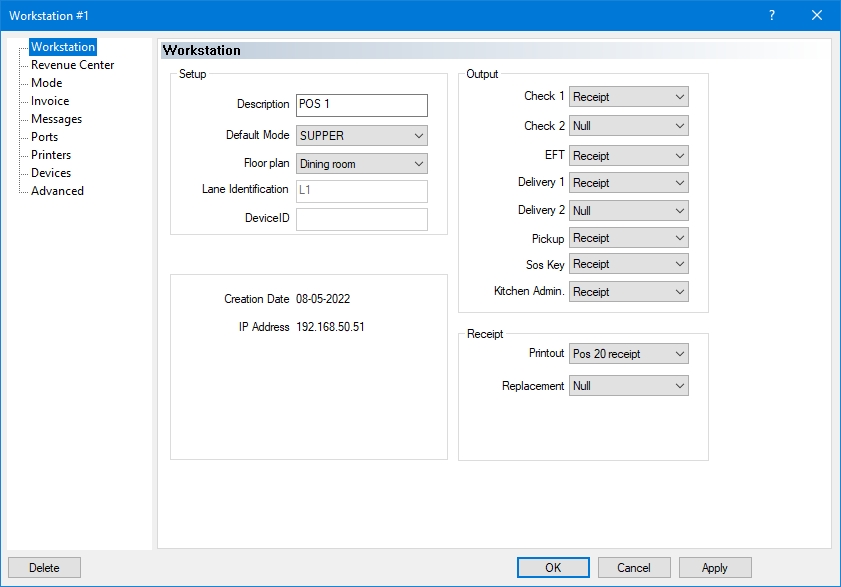
Since Mobile devices can't print on their own, set all Outputs and Receipt printouts to NULL.
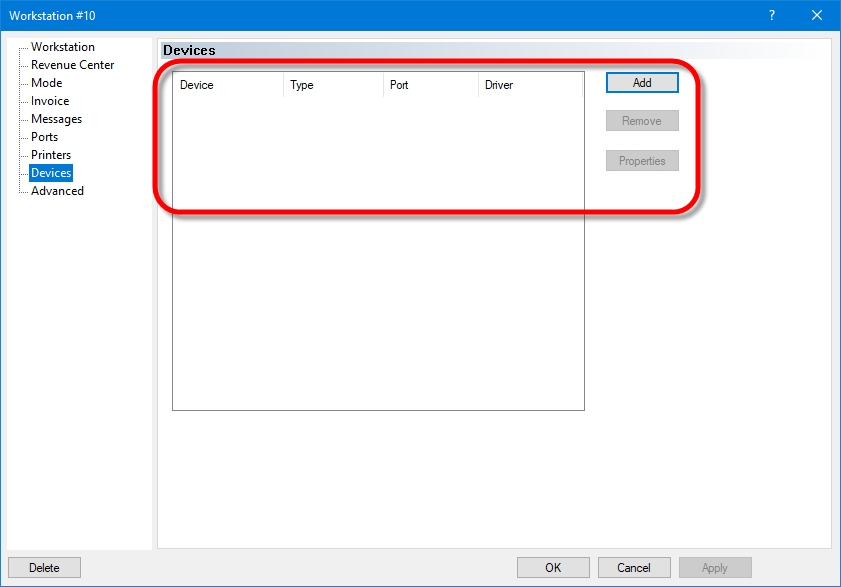
In the Devices tab, make sure there are no devices setup. The device list should be empty.
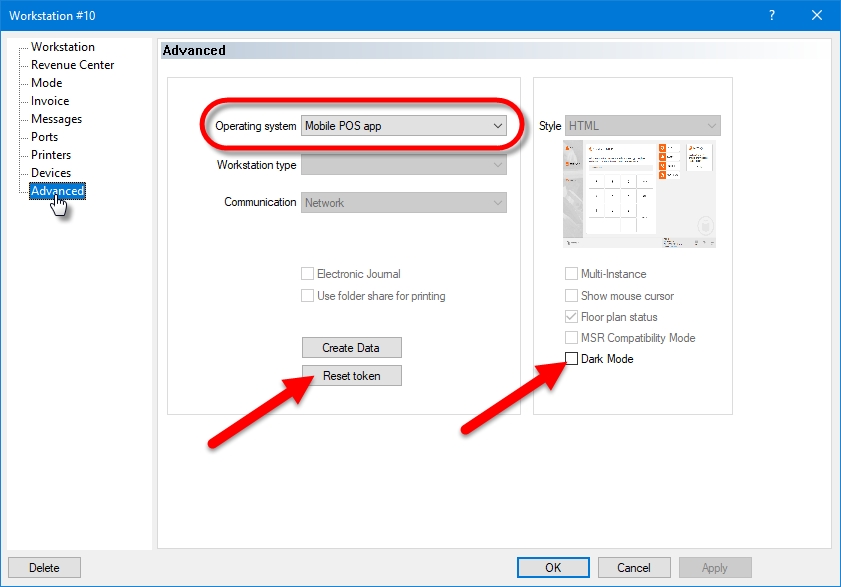
Click on the Advanced tab.
From the drop-down list, select the Mobile POS app option.
Enable this option to use this mobile POS with the Dark user interface. If this option is disabled, this mobile POS will use the Light user interface.
NOTE: Contrary to the Advanced User Interface (HTML POS), there is no toggle switch to change between Dark mode and Light mode on the Mobile POS app. This change can only be made from the Maitre'D Back-Office.
When the Mobile POS application connects to the Maitre'D Back-Office for the first time, a token is created to speed up subsequent connections. If you experience connection issues, resetting the token will delete the current connection token and force a new one to be created. This should resolve any authentication issues.
Once this mobile POS is configured, click OK to save changes and return to the list of workstations.
Repeat this process for all Mobile POS workstations.
Related Topics
The Maitre’D Mobile app allows merchants to take their POS directly to the table and place customer orders.
Orders are sent directly to the kitchen and servers can treat customers on the spot in real-time at the tableside.
MD Mobile keeps Maitre'D at the servers' fingertips using lightweight handheld tablets, no wasted time on taking notes and running back and forth to the POS frees up staff to focus on delivering faster, more accurate, and better customer service.
Related Topics
Install POS Bridge
Verify POS Bridge Installation
Update POS Bridge
Setup Mobile Printing
Mobile Workstation Settings
The Maitre'D Communication Server Service is installed and activated by default on all Maitre'D installations using version 7.08.000.000 or later. The following explains how to verify that the Maitre'D Communication Server Service is up-and-running on your Windows 10 computer.
Right-click the Windows Start button and select the Run option.
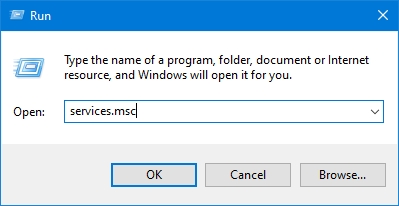
The Run dialog box opens. Type services.msc and click OK.
The Windows Services window opens. Locate the Maitre'D 7 Communication Server service in the list.
Make sure that the service's status is Running, and that the Startup Type is Automatic.
This confirms that the Maitre'D 7 Communication Server service is installed and running properly.
Related Topics
Downloading User Interface assets will force the Mobile POS application to download images and other graphical assets from the Maitre'D Back-Office to allow them to be displayed on the Mobile POS application.
If you choose not to download User Interface assets, the Mobile POS application will still be perfectly usable. However, buttons which normally have icons or images on a regular POS will simply not have images on the Mobile POS application.
Advanced POS UI
Mobile POS without assets
Start the Mobile POS application and let it connect to the Maitre'D Back-Office normally. Then, press the Workstation UI button.
The Android system will ask you to grant access to photos and medias to MPOS. Press Allow.
Assets will be downloaded. Depending on the WiFi speed and the amount of assets to be downloaded, this could take up to a minute.
Once the download is completed, the Mobile POS will be at the login screen.
Graphical assets are now included in the POS user interface.
Related Topics
This article describes the basic layout of the Maitre'D MPOS application.
Use the "9-dots" button to show or hide the side menu bar.
Use the Update button to force this POS to check the Maitre'D Back-Office for changes and download any updates.
Use the Workstation UI button to download User Interface (UI) assets from the Maitre'D Back-Office, such as images and graphics.
Use the Configuration button to change the IP address of the Maitre'D Back-Office or the POS number. This can also be used to desynchronize this POS from the Maitre'D Back-Office. This will free up a POS number for use by another tablet.
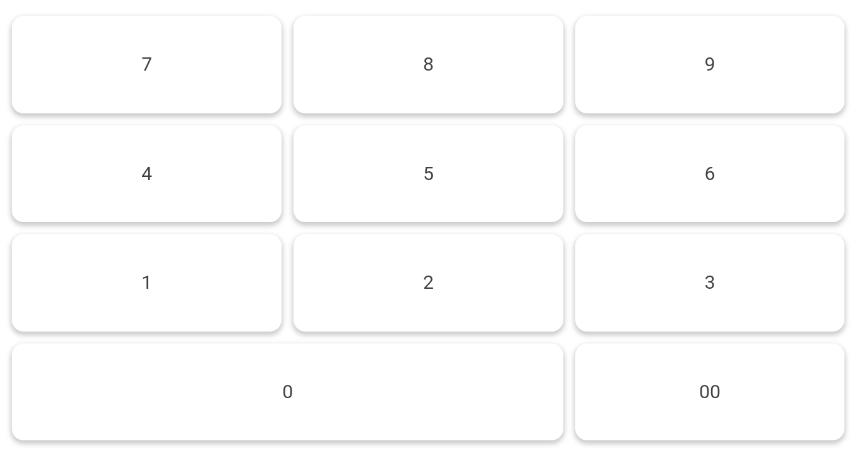
Use the keypad to enter employee numbers, table number or check numbers.
Use the Back button to correct mistakes.
Use the Exit button to return to the previous screen.
Use the Enter button to confirm the employee, table or check number after typing it in.
The Enter key on the right-hand side of the screen has the same function as the Enter key on the keypad.
Type an employee number followed by the Reading key to view that employee's open tables and financial report.
Related Topics
You can verify that the Maitre'D POS Bridge was installed properly by following this procedure:
Click on the Windows Start button and select Settings (by the cog wheel).
The Windows Settings screen will open. Click Apps - Uninstall, defaults, optional features.
The Apps & Features screen will be displayed. Scroll down the list of installed apps and look for Maitre'D POS Bridge.
The fact that the Maitre'D POS Bridge application is listed here means that it is installed. Clicking on it will reveal more details. Make sure that the installed version corresponds to your version of the Maitre'D Back-Office software.
Follow this procedure to make sure that the Maitre'D POS Bridge service is up-and-running. Also make sure that the service is configured to start automatically when Windows starts.
Right-click the Windows Start button and select the Run option.
The Run dialog box opens. Type services.msc and click OK.
The Windows Services window opens. Locate the Maitre'D POS Bridge service in the list.
Make sure that the service's status is Running, and that the Startup Type is Automatic.
The Maitre'D POS Bridge service is installed and running properly.
Related Topics
Before starting the Maitre'D MPOS application, make sure that:
The Maitre'D Back-Office Server is up-and-running.
The Maitre'D 7 Communication Server service is running on the Maitre'D Back-Office. (See Maitre'D Communication Server)
The Maitre'D POS Bridge service is running on the Maitre'D Back-Office. (See Verify POS Bridge Installation)
Start the application using the MPOS icon on your Android or iOS device.
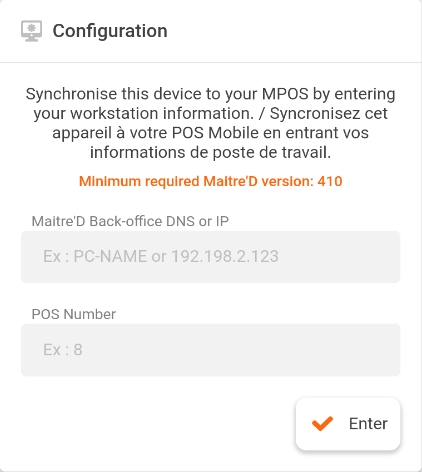
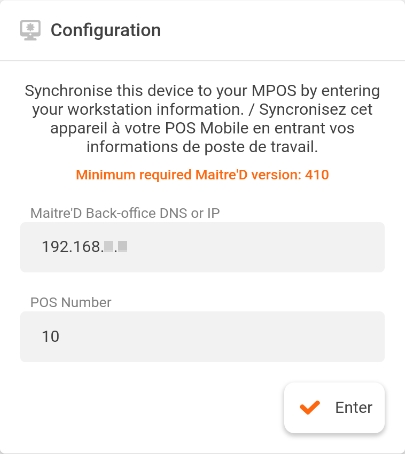
The first time the application is started, it will ask for the Maitre'D Back-Office DNS Name or IP address and the POS Number.
Type the DNS name of the PC where the Maitre'D Back-Office is installed, or its IP address.
Type the POS number you wish to use for this device. The corresponding POS must be configured as a mobile device in the Maitre'D Back-Office, under Point of Sale Control > Workstation > Options... > [POS #] > Advanced > Operating System.
Once the information is filled in, press the Enter button.
The application will connect to the Maitre'D Back-Office.
Once connected to the Maitre'D Back-Office, the POS Login screen will appear.
Related Topics
When the Maitre'D Back-Office software is updated to a new version, the POS Bridge Service may not get updated automatically. If this happens, the POS Bridge Service may be updated manually.
Logon to the Maitre’D Back-Office with appropriate credentials. (Distributor or System Owner)
On the Main Back-Office screen, click on the Help menu and select the About Maitre'D Back-Office… option.
The Maitre'D "About Back-Office" box will be displayed. Take note of the Maitre'D version number.
Click on the Windows Start button and select Settings (by the cog wheel).
The Windows Settings screen will open. Click Apps - Uninstall, defaults, optional features.
The Apps & Features screen will be displayed. Scroll down the list of installed apps and look for Maitre'D POS Bridge.
The fact that the Maitre'D POS Bridge application is listed here means that it is installed. Click on it once to reveal more details. Take note of the version number. It should correspond exactly to your current Maitre'D version number. If it doesn't, your POS Bridge Service needs to be updated.
The manual update process for POS Bridge is started the same way as the initial installation process:
Logout of the Maitre'D Back-Office. Close any open Maitre'D module(s).
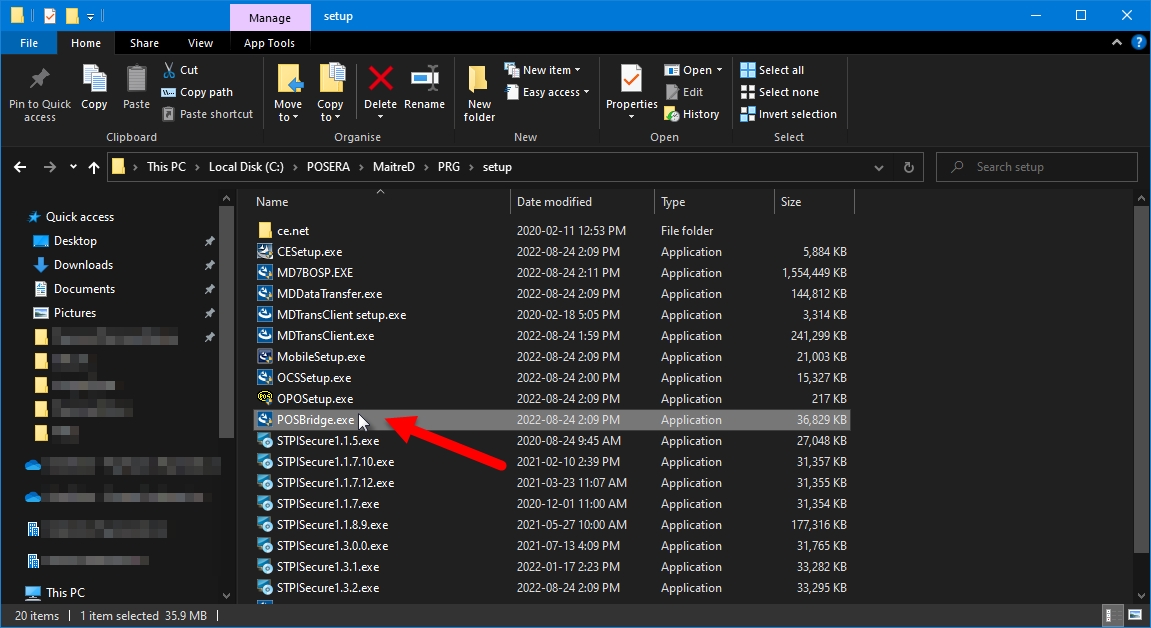
Using File explorer, browse to C:\POSERA\MaitreD\PRG\Setup\. Locate the file called POSBridge.exe and double-click on it to launch the installer.
You may see a User Account Control (UAC) warning. Click Yes.
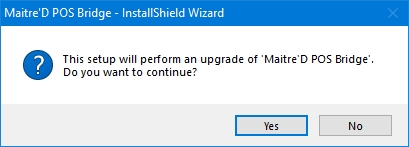
The InstallShield Wizard will start. The older version of POS Bridge will be detected, and you will be asked to update it. Click Yes to proceed.
The InstallShield wizard will prepare the installation.
Since the existing POS Bridge installation is being updated, only updated files will be copied. Click Next >.
Files will be updated. This process is fully automated and should only take a few seconds.
The InstallShield wizard will inform you that the update is complete. Click Finish.
Once the installation is completed, double-check that Maitre'D POS Bridge is installed properly by following the method explained below:
Verify POS Bridge Installation
NOTE: Following an update to the POS Bridge, the computer does not need to be restarted. A computer restart is only necessary after the initial installation.
Before any Mobile POS can be used, the POS Bridge must be installed on the Maitre'D Back-Office PC:
Logout of the Maitre'D Back-Office. Close any open Maitre'D module(s).
Using File explorer, browse to C:\POSERA\MaitreD\PRG\Setup\. Locate the file called POSBridge.exe and double-click on it to launch the installer.
You may see a User Account Control (UAC) warning. Click Yes.
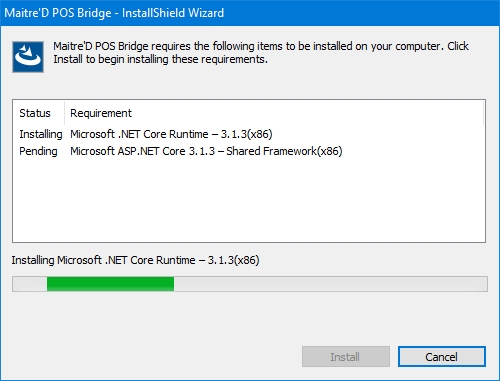
The InstallShield Wizard will start by checking for pre-requisites. If some required components are missing, you will be asked to install them. Click the Install button to proceed:
Missing components will be installed automatically.
The InstallShield Wizard will prepare the installation.
The InstallShield Wizard welcome screen will appear. Click Next >.
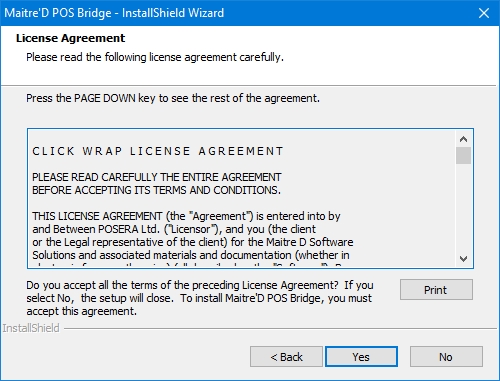
Read the License Agreement and click Yes to accept it. If you click No, the installation will be cancelled.
Select the install destination. By default, files will be installed to C:\POSERA\POS Bridge\. It is highliy recommended to use the default settings. Do not change this setting unless you know exactly what you are doing. Click Next > to proceed.
Files will be installed. This operation should take only a few seconds and is fully automated.
You will be prompted to restart your computer. Save your work and close any open files, then select Yes, I want to restart my computer now. Click Finish to restart your computer.
IMPORTANT! The computer must be restarted. This will ensure that the necessary services are started properly. If the computer is not restarted, POS Bridge will not work and your Mobile POS will not work either.
Related Topics
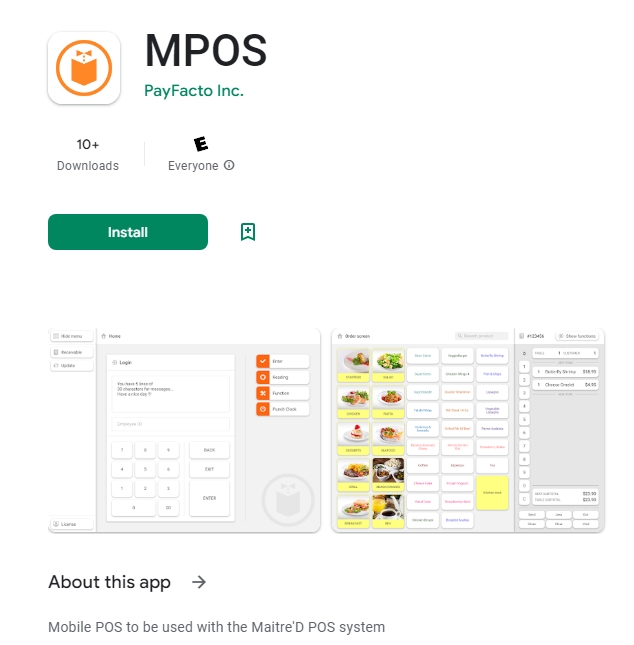
The Maitre'D Mobile POS (MPOS) application is available on Google Play.
From your Android device, you may search for the application manually on Google Play, or use the link or QR code provided below.
From the MPOS application page on Google Play, simply press the green Install button.
From the MPOS application page on Google Play, press the green Open button.
You may also use the icon in your installed apps:
Related Topics
Android
Initial Configuration
Basics
Download UI Assets
