Loading...
Loading...
Loading...
Loading...
Loading...
Loading...
Loading...
Loading...
Loading...
Loading...
Loading...
Loading...
The following pre-requisites must be met before the Advanced POS User Interface can be used:
Maitre'D version 7.08.000.430 or later.
Valid Maitre'D Software-as-a-Service (SaaS) license with Embedded Maintenance Program (EMP).
See for .
Microsoft Windows 10 or later, both for the Maitre'D Back-Office and POS workstations.
Please consult for detailed patch level and supported editions.
The Maitre'D Advanced POS UI comes with a selection of generic, royalty-free images and graphics for your convenience. You can also use your own custom images in most common formats. If you wish to use custom-branded images, have them in-hand before configuring the Maitre'D Advanced POS UI.
The Maitre'D Advanced POS UI supports the following image formats:
Scalable Vector Graphics (*.svg)
Portable Network Graphic (*.png)
Joint Photographic Experts Group (*.jpg or *.jpeg)
To facilitate reading and interpretation of hardware requirements, they are broken down in 3 tiers:
The minimum requirement is the bare minimum that will allow the Maitre'D Advanced POS User Interface to operate adequately, without any consideration for possible expansion or "future-proofing".
The recommended hardware configuration should yield adequate performance in most situations and provide headroom for future expansion of the system.
The hardware configuration for large sites should yield adequate performance in restaurants using 20 or more POS workstations. This requirement also applies to restaurants with high volume of orders, where the number of POS workstations may not be as high as 20, but where the POS Workstations are in near-constant use.
Hardware
Minimum
Recommended
High Volume
Operating System
Windows 10 Pro, IoT, Enterprise
Windows 11
Windows 10 Pro, IoT, Enterprise
Windows 11
Windows 10 Pro, IoT, Enterprise
Windows 11
CPU
Intel Celeron J1900
or better
Intel Celeron J4105
or better
Intel Core i3 2100 series
or better
Logon to the Maitre’D Back-Office with appropriate credentials. (Distributor or System Owner)
Start the Point of Sale Control module.
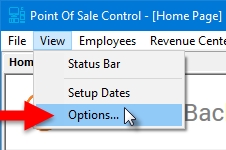
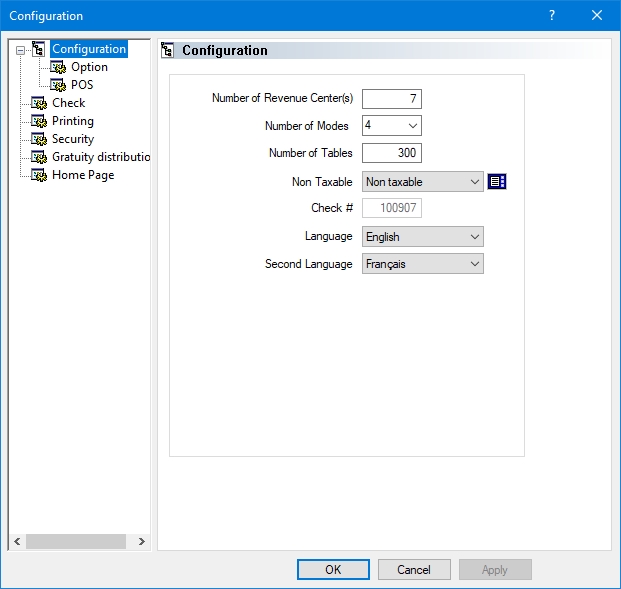
Click on the View menu and select the Options... option.
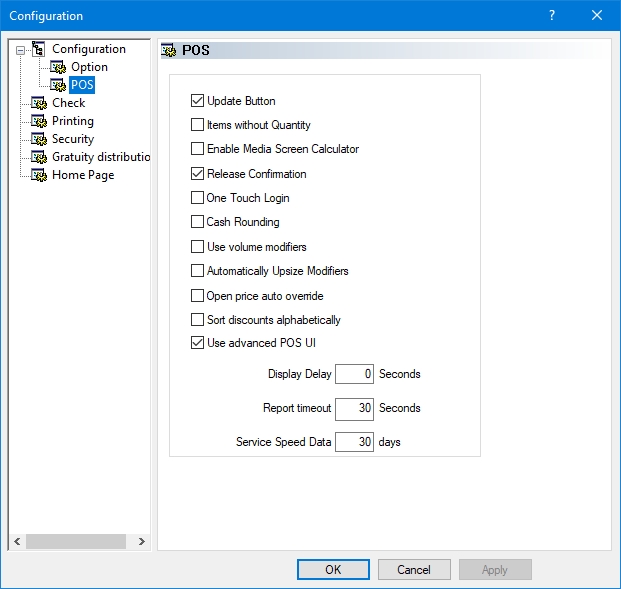
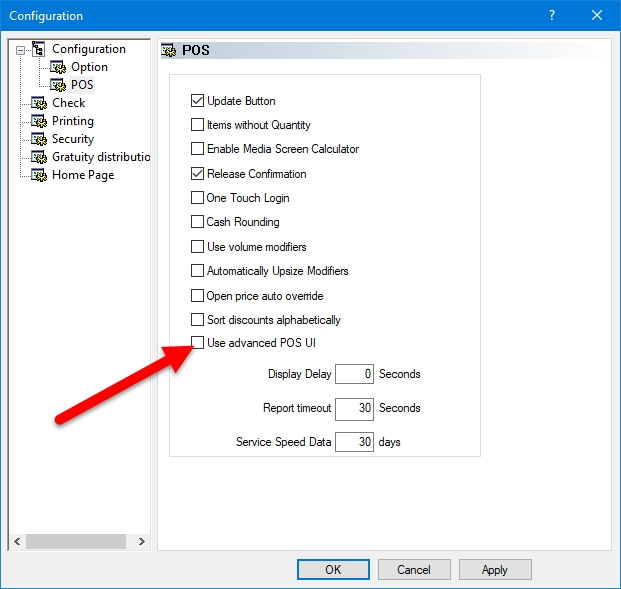
The Point of Sale Control module's options window opens on the Configuration branch.
Click on the POS sub-branch and enable the Use advanced POS UI option.
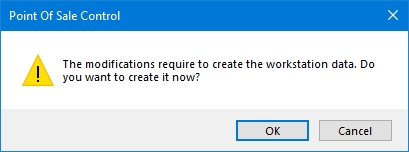
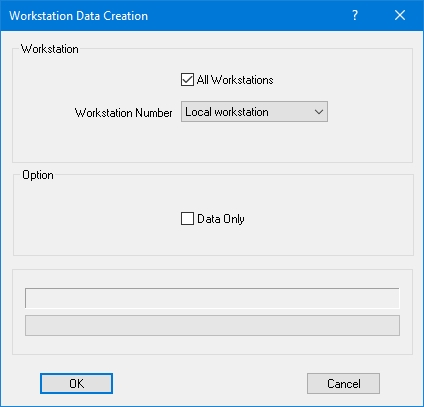
Click OK. You will be asked to create the workstation data. Click OK to proceed. The entire process could take from a few seconds to a few minutes, depending on your system's performance and the number of workstations on your Maitre'D license.
The options window will close, and you will be back to the Point of Sale Control module.
At this point, the POS workstations should automatically restart with the Advanced POS User Interface.
Legacy POS User Interface
Advanced POS User Interface
RAM
4Gb
8Gb
8Gb
Storage (free space)
1Gb
1Gb
1Gb
Graphics
DirectX 11 compatible or later
DirectX 11 compatible or later
DirectX 11 compatible or later
Display
1024 x 768
1024 x 768 or better
1024 x 768 or better
Network
Gigabit
Gigabit
Gigabit or better
Pointing Device
Resistive touch screen
Projected Capacitive touch screen
Projected Capacitive touch screen

This article describes how to use the Advanced POS User Interface in left-handed mode. This configuration is applied at the employee level, which means that every employee can use the POS in left-handed or right-handed mode, according to their personal preference.
By default, the POS User Interface is configured in right-handed mode, as approximately 90% of the world's population is right-handed. This procedure shows how to configure the POS User Interface to left-handed mode for a single employee. Repeat this procedure for every left-handed employee.
Logon to the Maitre’D Back-Office with appropriate credentials. (Distributor or System Owner)
Start the Point of Sale Control module.
Click on the Employees menu and select the Employees... option.
The list of employees will be displayed. Select an employee from the list and click the Modify button.
The employee's properties will open on the Setup branch.
Click on the Option sub-branch, located under POS Operation. Enable the Left handed option and click OK to save changes and close this window.
You will be back at the employee's list. Repeat this process for all left-handed employees.
Close the list of employees when done. You may also close the Point of Sale Control Module and logout of the Maitre'D Back-Office.
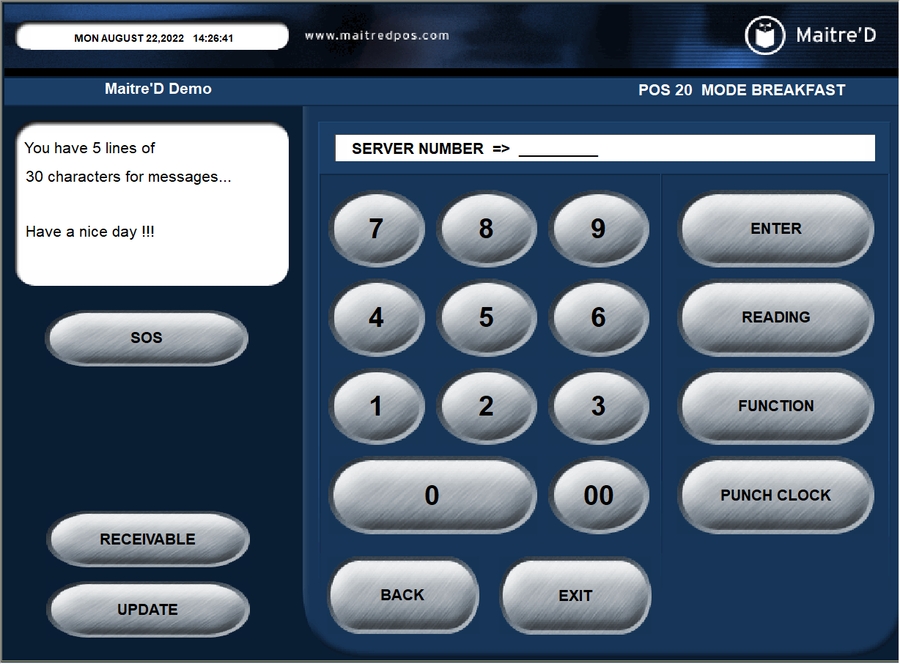
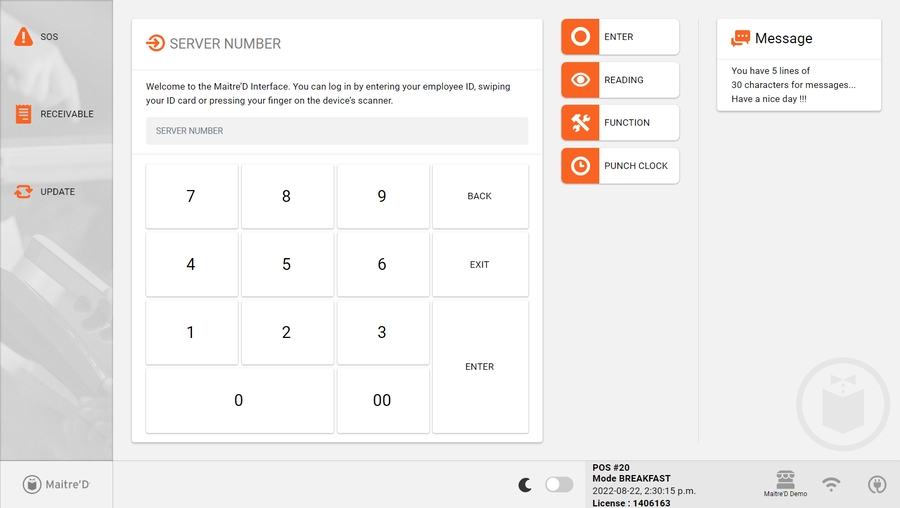
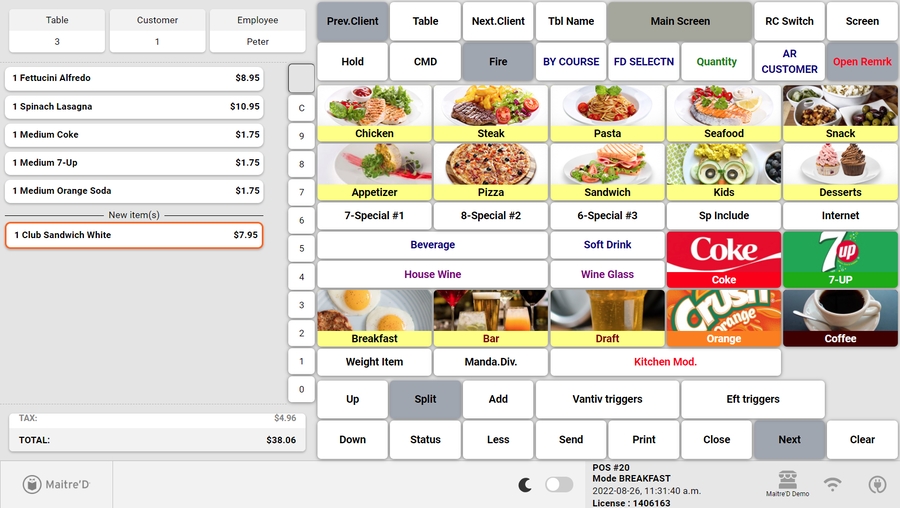
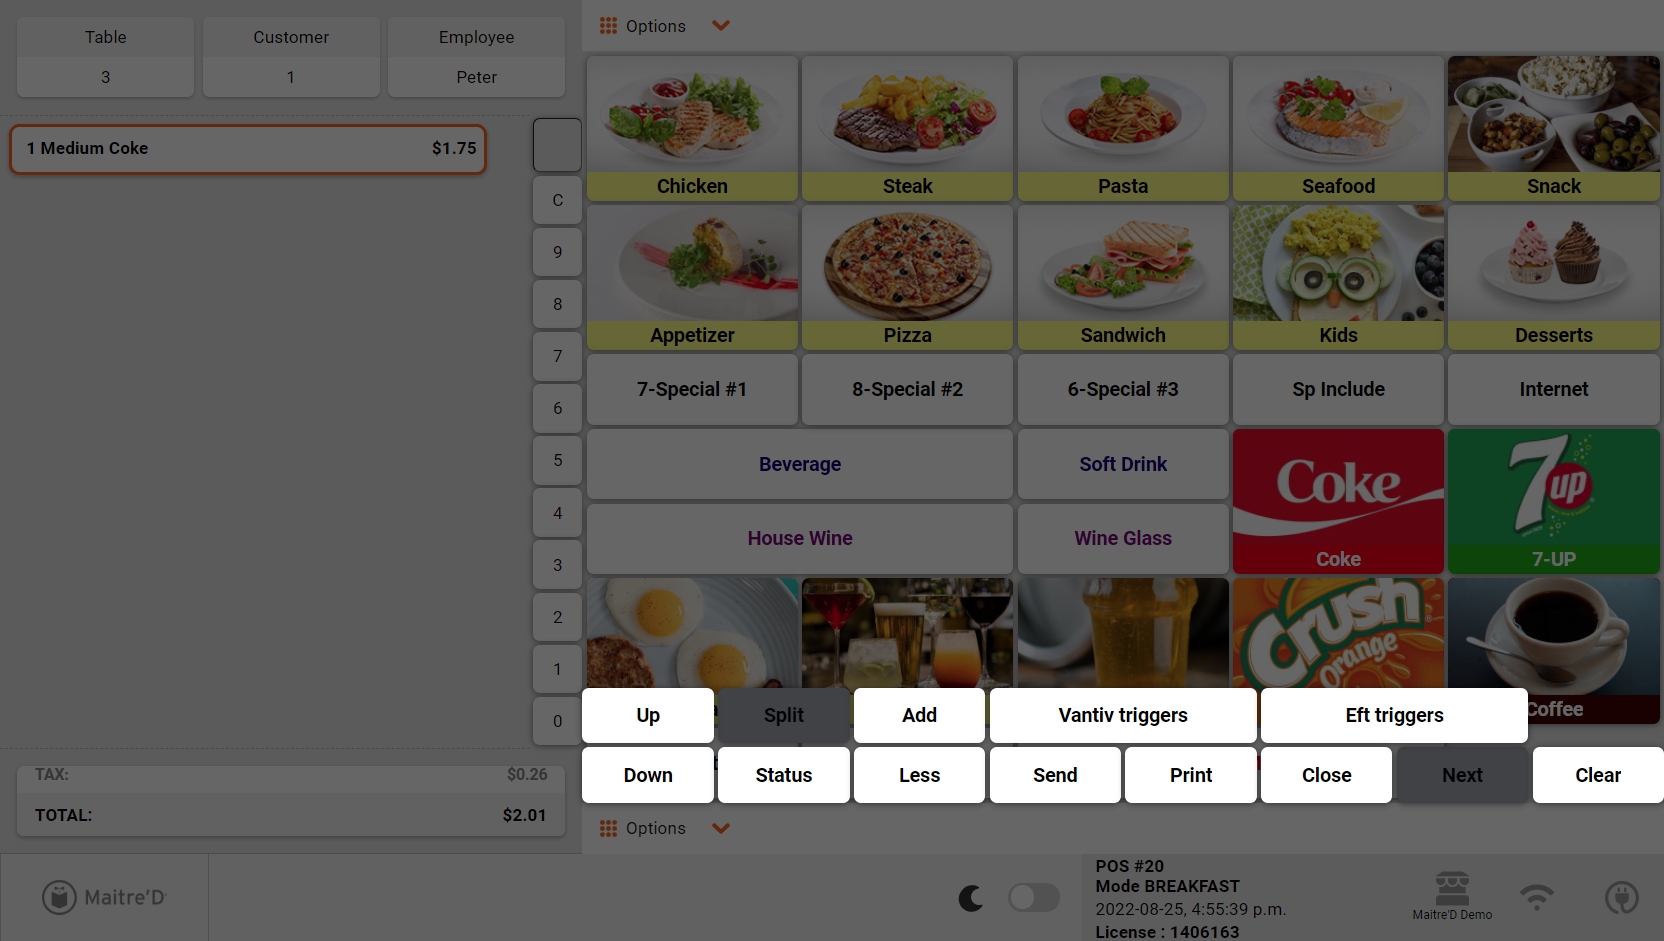
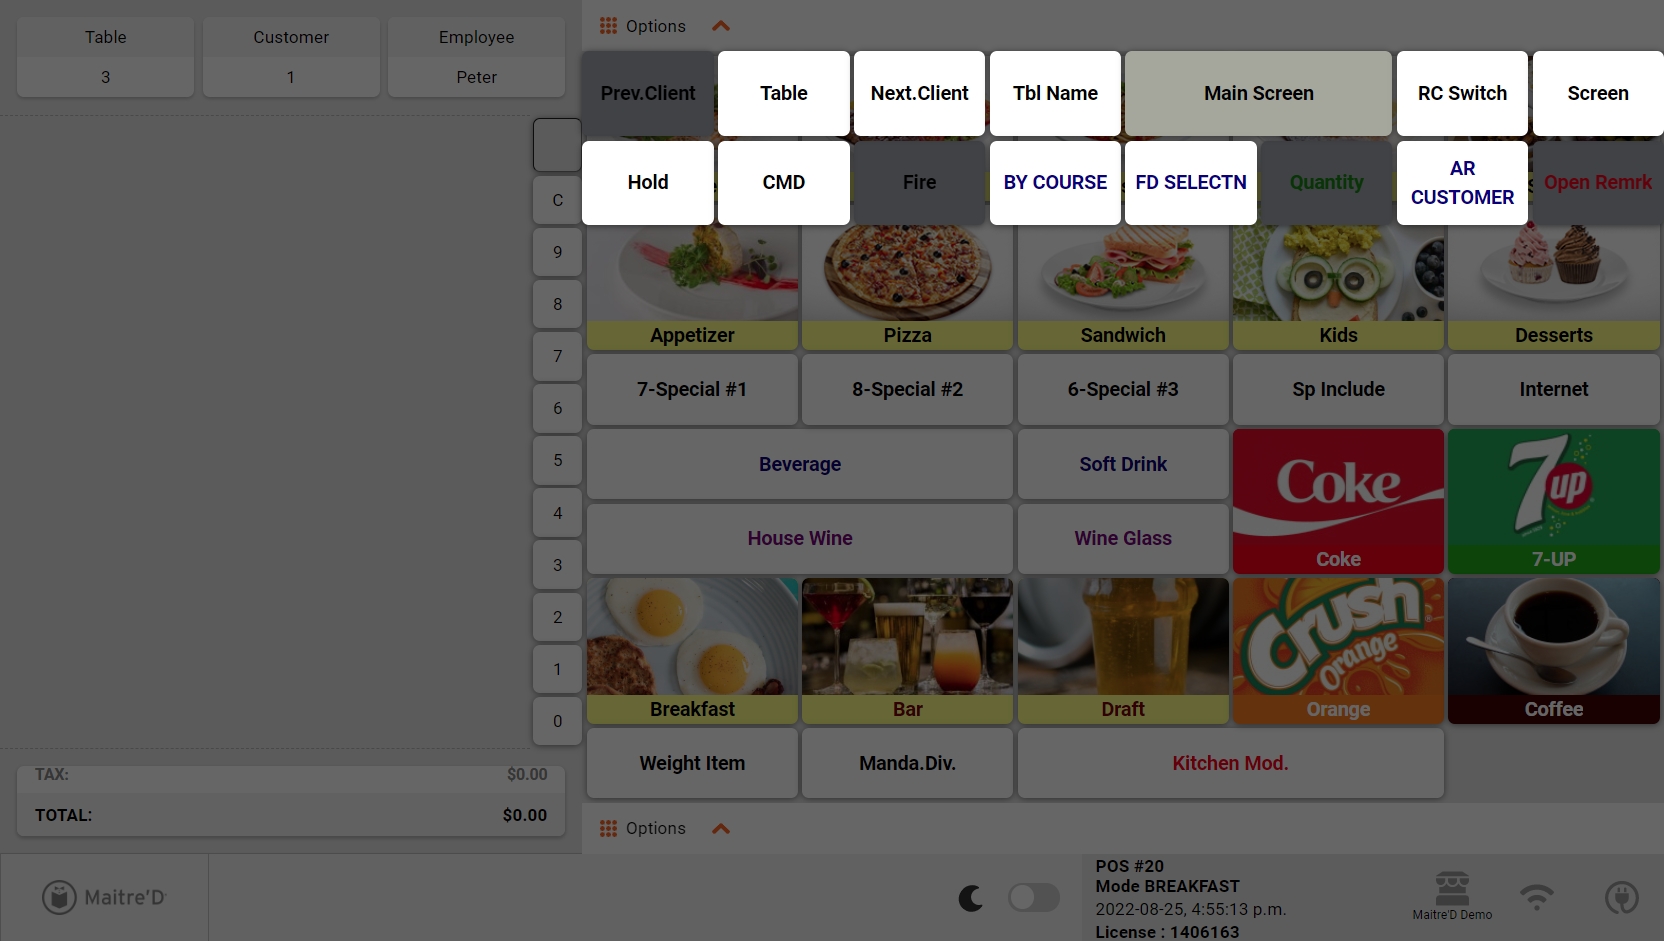
The next time these employees use the POS, they will automatically be using the left-handed interface. The screenshots below illustrate the difference between right-handed and left-handed interfaces.
Right-Handed POS Interface (Default)
Left-Handed POS Interface
When preferential screens are created and later modified, it is possible to accidentally have buttons that overlap each other. This wasn't much of an issue with the Legacy POS User Interface, but this can lead to random crashes or even the POS not starting at all with the Advanced POS UI.
Logon to the Maitre’D Back-Office with appropriate credentials. (Distributor or System Owner)
Start the Point of Sale Control module.
Click on the Screens menu and select Preferential Screen setup...
The list of available Preferential Screens is displayed.
Select an existing preferential screen and click the Modify button to edit its properties.
The preferential Screen Editor will appear (Legacy UI mode).
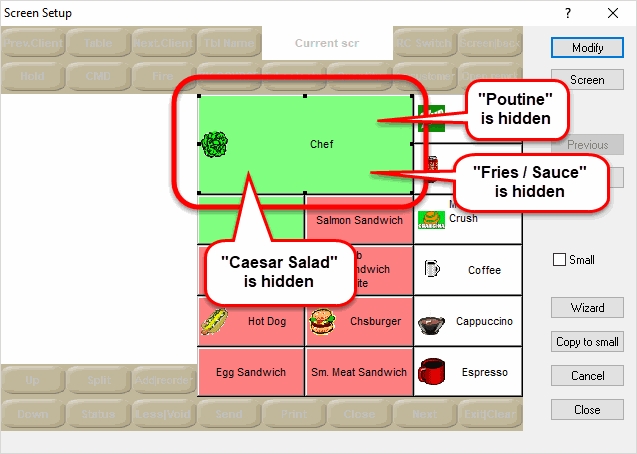
Overlapping buttons can happen when enabling the Right Expand or Bottom Expand options next to existing buttons. Buttons to the right and below the expanded button still exists, but are now hidden by the expanded button. This will cause unexpected behaviour with the Advanced POS User Interface.
To fix the issue, you can disable the expand options and leave them disabled. You may also delete the hidden buttons before re-enabling the desired expand options.
Unfortunately, there is no easy way to spot overlapping buttons. The only way is to open the properties of each expanded button, disable the expand options and see if there were one or more buttons hiding behind it.
Overlapping buttons can also be found in Screen Layouts. The procedure to locate and fix them is exactly the same as for Preferential Screens.
This troubleshooting guide will be helpful if an existing Maitre'D database is upgraded to version 7.08.000.410 or later for use with the Advanced POS User Interface (HTML POS).
Legacy preferential screens and Sreen Layouts can have defects that would prevent the Advanced User Interface from working correctly. These defects may even prevent the Advanced POS from loading properly.
The POS will not start in Advanced POS UI mode, but does start in Legacy POS UI mode.
In advanced UI mode, the POS hangs, becomes unresponsive or crashes when specific screens are accessed.
In advanced UI mode, the POS hangs, becomes unresponsive or crashes when logging in with certain employees.
Some Preferential Screen or Screen Layout buttons look awkward, especially those located near the edges of the screen.
To resolve these issues, follow the steps below:
Temporarily revert to the Legacy POS User Interface. (See below)
Logon to the Maitre’D Back-Office with appropriate credentials. (Distributor or System Owner)
Start the Point of Sale Control module.
Click on the View menu and select the Options... option.
The Point of Sale Control module's options window opens on the Configuration branch.
Click on the POS sub-branch and disable the Use advanced POS UI option.
Click OK. You will be asked to create the workstation data. Click OK to proceed. The entire process could take from a few seconds to a few minutes, depending on your system's performance and the number of workstations on your Maitre'D license.
The options window will close, and you will be back to the Point of Sale Control module.
At this point, the POS workstations should automatically restart with the Legacy POS User Interface.


This article describes how to use the Dark Mode for the Advanced POS User Interface. By default, the Advanced POS User Interface uses Light Mode, which can be very bright in low-light conditions. The Dark Mode is available to reduce the amount of light emitted from the POS screen and reduce eye strain.
IMPORTANT! This feature is available in Maitre'D 7.08.000.440 or later.
By default, the Advanced POS User Interface uses Light Mode. This configuration is at the workstation level, therefore every workstation can be configured independently. Also, a manual override setting is available on the POS screen, allowing employees to toggle between Light and Dark modes on the fly.
Logon to the Maitre’D Back-Office with appropriate credentials. (Distributor or System Owner)
Start the Point of Sale Control module.
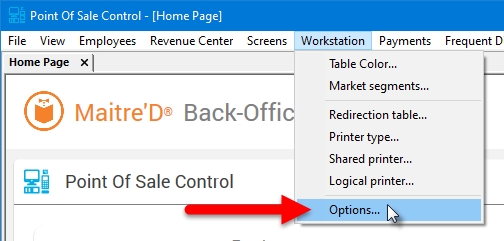
Click on the Workstation menu and select the Options... option.
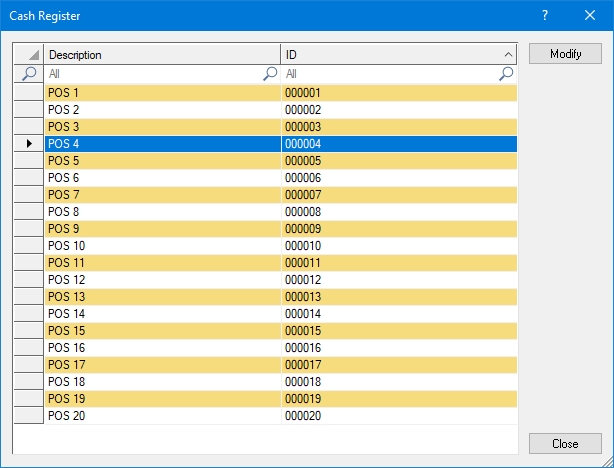
The list of available workstations will be displayed. Select the workstation for which you wish to assign redirection tables and click the Modify button.
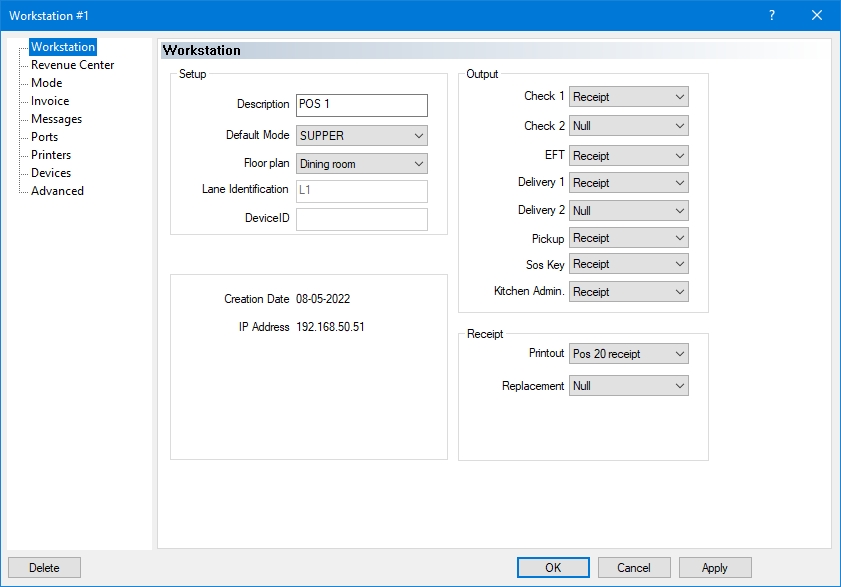
The workstation's properties open on the Workstation branch.
Click on the Advanced branch and enable the Dark Mode option.
IMPORTANT! This option determines the default behaviour of the workstation. With Dark Mode enabled, the workstation will always start in Dark Mode after a reboot or after recreating workstation data.
Users can always override this configuration by using the Light / Dark toggle switch as explained further below.
Click OK. The workstation options window will close and bring you back to the list of workstations.
Repeat this process as necessary for all workstations which needs to use Dark Mode by default.
Once all workstations have been configured, you may close the workstation's list, close the Point of Sale Control module, and logout of the Maitre'D Back-Office.
The workstations will automatically update to Dark Mode as configured:
Light mode
Dark mode
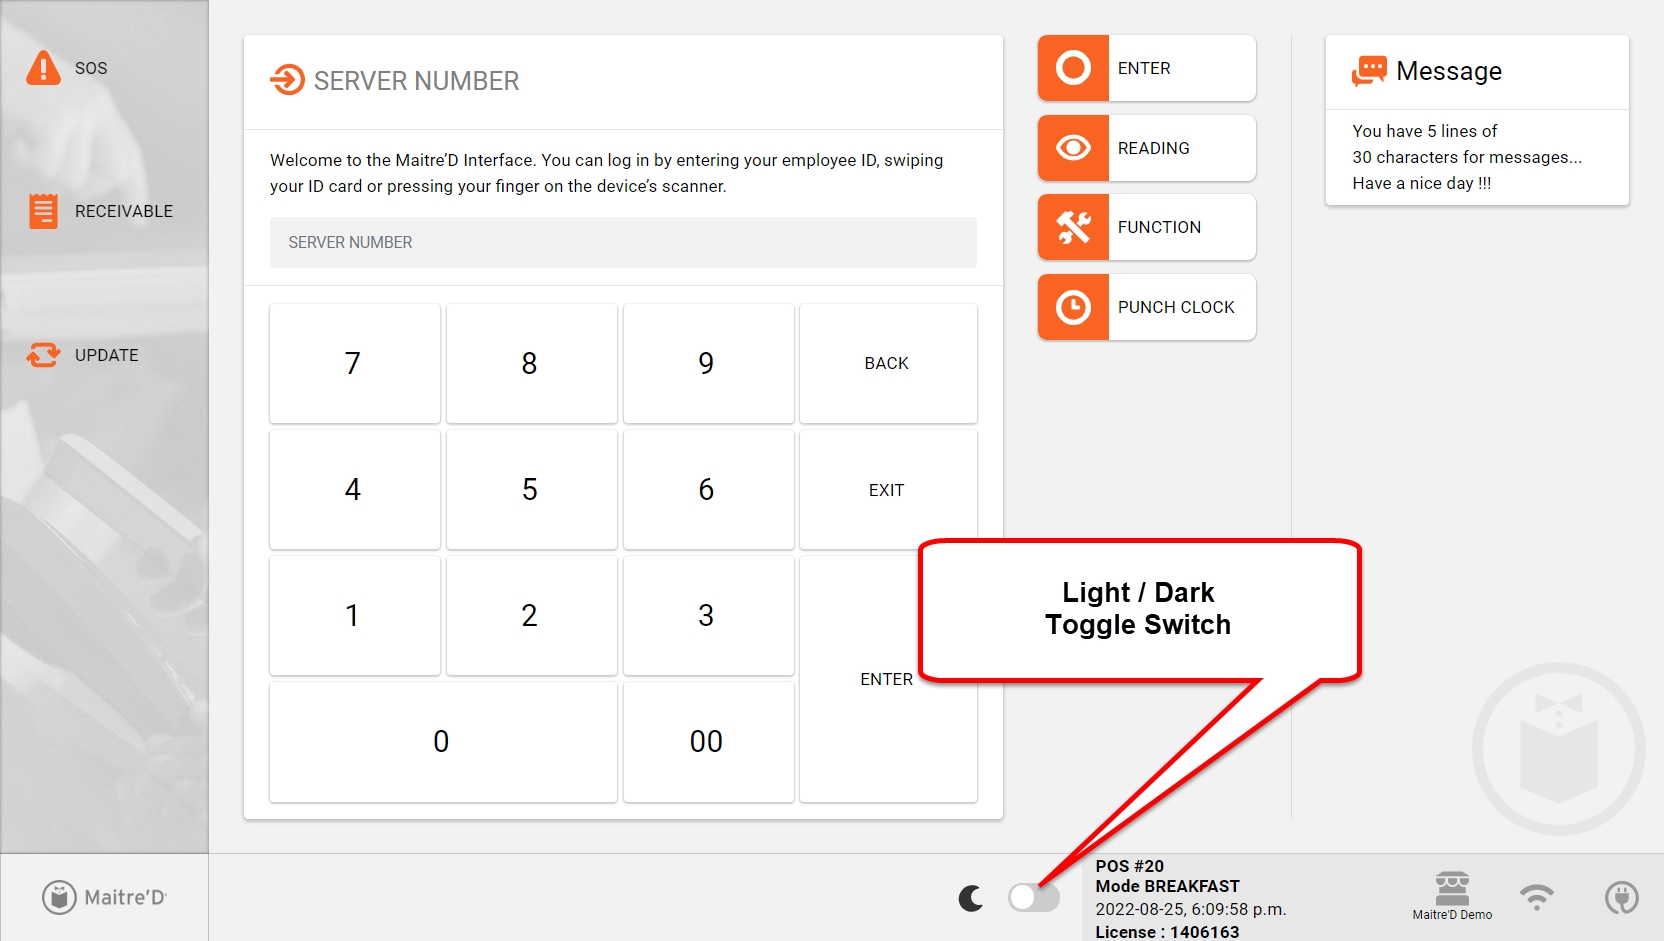
Changing to Dark Mode in the Maitre'D Back-Office determines the default behaviour of the workstation. However, it is always possible for the user to toggle between Light Mode and Dark mode based on personal preferences.
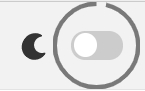
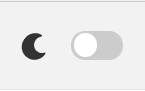
To toggle between Light and Dark modes, simply press and hold the toggle switch for 2 to 3 seconds. A circle animation will appear around the switch, and the display mode will change once the circle is completed.
Toggle in Light Mode
Press and hold
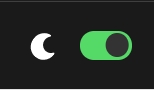
Toggle in Dark Mode
This article describes how to use the Hidden Screen Layout for the Advanced POS User Interface. By default, the Advanced POS User Interface uses a static screen layout which is always visible, similar to the one used with the Legacy POS User Interface. With the Hidden Screen Layout, the space normally taken by the screen layout can be used to accommodate larger preferential screen buttons.
By default, the Advanced POS User Interface uses a static screen layout. This configuration is global, therefore it will apply to all the workstations on your Maitre'D POS system. Here is how to enable the Hidden Screen Layout:
Logon to the Maitre’D Back-Office with appropriate credentials. (Distributor or System Owner)
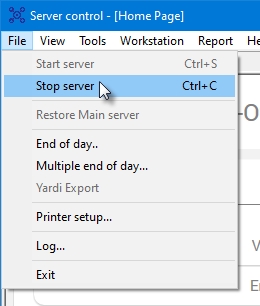
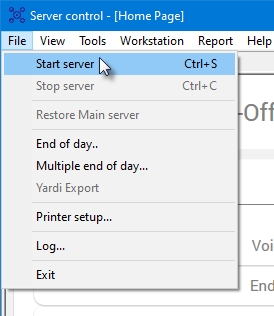
Start the Server Control module.
Click on the File menu and select the Stop Server option.
Once the server is stopped, close any open modules and logoff from the Maitre'D Back-Office.
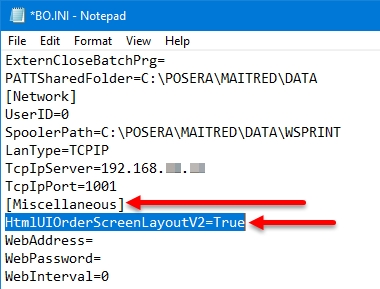
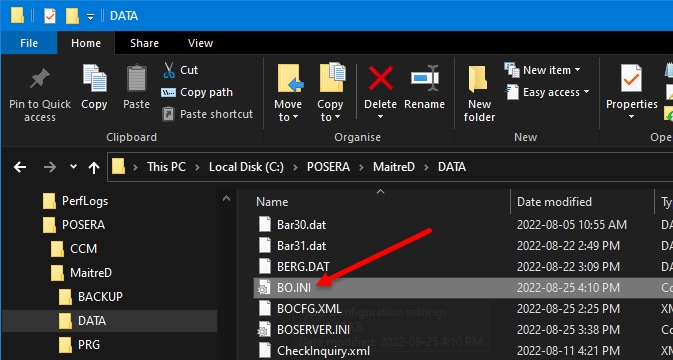
Using FIle Explorer, browse to C:\POSERA\MaitreD\DATA and locate the BO.INI file.
Open the BO.INI file using any text editor, such as Notepad or Notepad++.
Locate the [Miscellaneous] Section. Then, add the following line under the [Miscellaneous] section:
HtmlUIOrderScreenLayoutV2=True
Save your changes to the BO.INI file and close it.
You may also close the File Explorer window.
Logon to the Maitre’D Back-Office with appropriate credentials. (Distributor or System Owner)
Start the Server Control module.
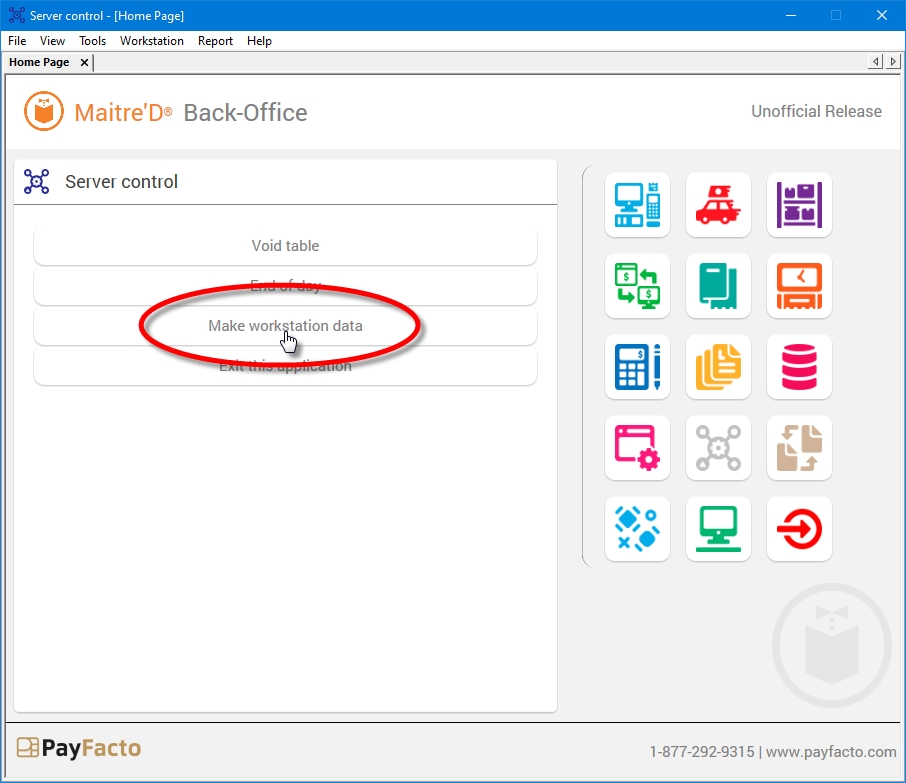
Click on the Make Workstation Data quick link.
Wait for the process to complete. The entire process could take from a few seconds to a few minutes, depending on your system's performance and the number of workstations on your Maitre'D license.
Click on the File menu and select the Start Server option.
Once the server is started, you may close any open modules and logoff from the Maitre'D Back-Office.
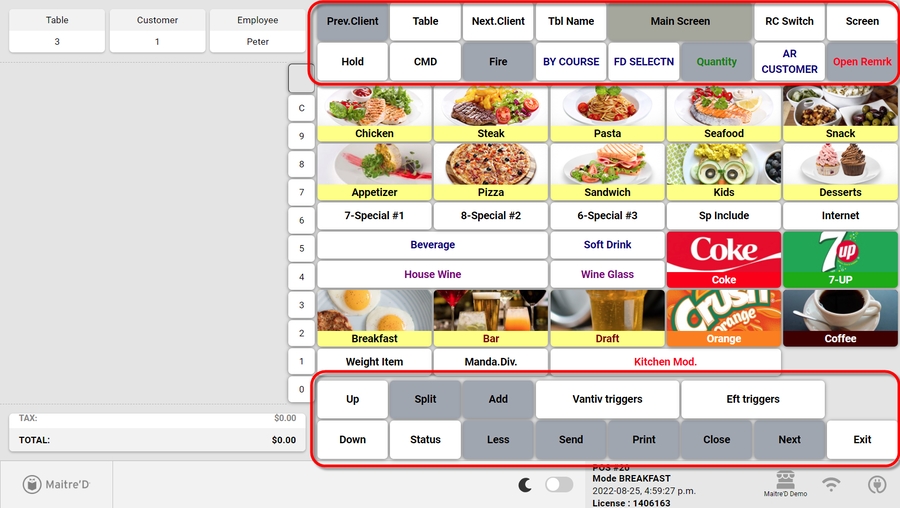
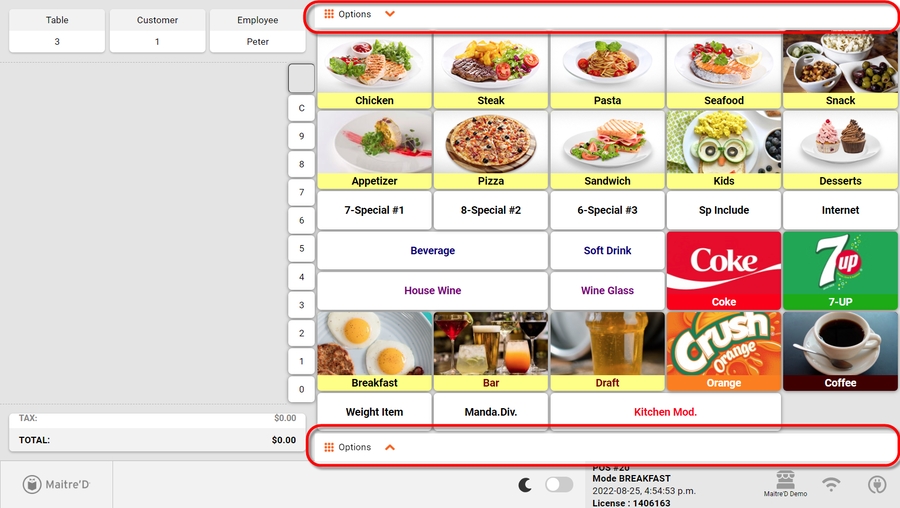
Start the POS Workstations. The screenshot below illustrate the difference between the Static and Hidden screen layout.
Advanced POS User Interface with Static Layout
Advanced POS User Interface with Hidden Layout
To access the top or bottom layout buttons on the Hidden Screen Layout interface, touch either the top or bottom Option keys, respectively. Layout buttons will appear as an overlay on top of the preferential screen buttons.
When preferential screens are created and later modified, it is possible to accidentally have buttons that expand beyond the screen boundaries. This wasn't much of an issue with the Legacy POS User Interface, but this can lead to random crashes or even the POS not starting at all with the Advanced POS UI.
Logon to the Maitre’D Back-Office with appropriate credentials. (Distributor or System Owner)
Start the Point of Sale Control module.
Click on the Screens menu and select Preferential Screen setup...
The list of available Preferential Screens is displayed.
Select an existing preferential screen and click the Modify button to edit its properties.
The Preferential Screen Editor will appear (Legacy UI mode).
On some occasions, it is possible to have buttons where the Right Expand or Bottom Expand options are enabled but grayed out because the button is on the edge of the screen.
This happens when copying or moving an already “expanded” button to the right or bottom edges of the screen. It can also happen if the screen's properties were changed. Here are a few tricks that can help in identifying problematic buttons:
If the screen has fewer than 50 buttons, increase the screen size to quickly spot expanded buttons and fix them before reverting to the original screen size.
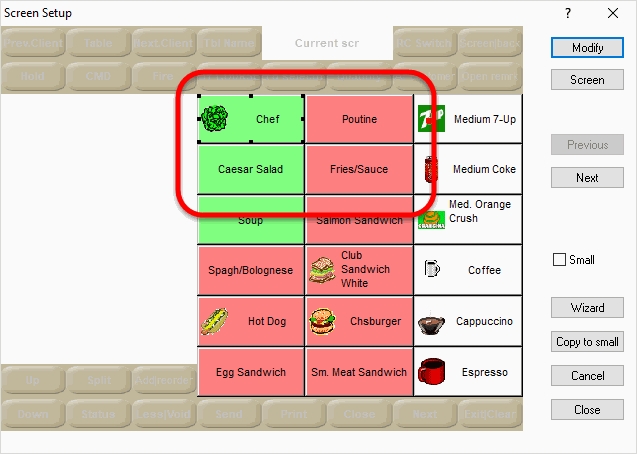
Here is an example with “Screen 18” where everything looks normal:
Increasing the number of buttons by switching to “Screen 36” shows that some expanded buttons were actually hiding on the edge of the screen:
50 is the maximum number of buttons that can fit on one screen. To quickly spot problematic buttons in this case:
Make a mental note of the buttons that are on the rightmost column and on the bottom row.
Click on the Screen button and change the screen to a smaller button count, for instance “Screen 36”.
Use the Previous and Next buttons to navigate across multiple pages of buttons. Look for any button that looks awkward. The text and graphics on problematic buttons will appear truncated or strangely formatted.
Fix the buttons by disabling the appropriate expanded options.
Revert the screen to its original size. Click the Close button to save changes.
The same issue can occur on Screen Layouts. However, there are no fancy tricks to detect out-of-bounds buttons.
Logon to the Maitre’D Back-Office with appropriate credentials. (Distributor or System Owner)
Start the Point of Sale Control module.
Click on the Screens menu and select Screens layout setup...
The list of available screen layouts is displayed.
Select an existing screen layout and click the Modify button to edit its properties.
The Screen Layout Editor screen will appear.
Unfortunately, there are no fancy tricks to detect problematic buttons on Screen Layouts. You need to double-click on each button that is located near an edge and look for grayed-out expand options:
Next, you will need to move the button (drag & drop) to an empty space that will allow it to expand properly. Then, you will be able to disable the Expand options and move the button back to where it was.
The Maitre'D Advanced POS User Interface supports the most modern image formats in order to provide outstanding high-resolution image quality and color reproduction.
The Maitre'D Advanced POS UI supports the following image formats:
Scalable Vector Graphics (*.svg)
Portable Network Graphic (*.png)
Joint Photographic Experts Group (*.jpg or *.jpeg)
PayFacto does not provide any form of assistance or training in the creation or manipulation of graphics or image files. The information below is provided to give users a better understanding of each supported image format and the circumstances under which each format is better suited.
SVG images are defined in a vector graphics format and stored in XML text files. SVG images can thus be scaled in size without loss of quality, and SVG files can be searched, indexed, scripted, and compressed. The XML text files can be created and edited with text editors or vector graphics editors, and are rendered by the most-used web browsers.
File size
SVG files are typically very small, since they are defined in XML text files. Also, being infinitely scalable, the file size will not change regardless of the image's actual size on the screen.
Scalability
SVG files can be scaled (resized) without any loss in quality. Compared to PNG or JPG, the SVG will not get "blockyness" as it is scaled up.
Consider the images below as examples. Feel free to resize your browser window and zoom in and out to see the effects of scaling. Notice how the SVG image (on the right) borders remain sharp and well-defined regardless of its size on the screen. At the same time, see how the PNG (on the left) becomes "blocky" and blurred as its size increases.
PNG file
SVG file
Editing
Editing svg files requires specialized tools which are designed to work with vector graphics, such as Adobe Illustrator, Inkscape or GIMP. Text editors such as Notepad++ may aslo be used, but this requires deep knowledge specific to the XML syntax of SVG files. In general, working with vector graphics is very different than rasterized images, so there could be a significant learning curve depending on your current knowledge and skill level.
not very suitable for pictures
SVG files are typically used for simple 2d graphics, such as logos and text. While it is possible to convert a picture from a rasterized format (JPG or PNG), there are no real advantages in doing so. In fact, this often results in a loss of quality and artefacts in the converted image. Converted images may look "cartoon-ish" and in worst cases may become blurred beyond recognition.
JPG file (original)
SVG file (Converted from JPG)
The PNG file format is widely used on websites to display high-quality digital images. Created to exceed the performance of GIF files, PNGs offer not just lossless compression, but also a much broader and brighter color palette. It’s a particularly popular file type with web designers because it can handle graphics with transparent or semi-transparent backgrounds. The file format isn’t patented, so PNGs can be opened using any image editing software without the need for licensing.
Picture quality
PNG's are suitable for high-quality pictures, like photographs of food products or sales items available on the menu.
Transparency
PNG's support transparency, so they can be placed against any background without looking awkward.
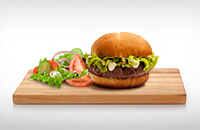
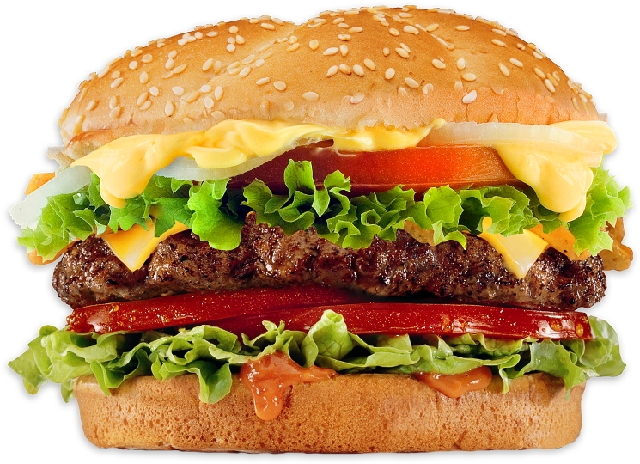
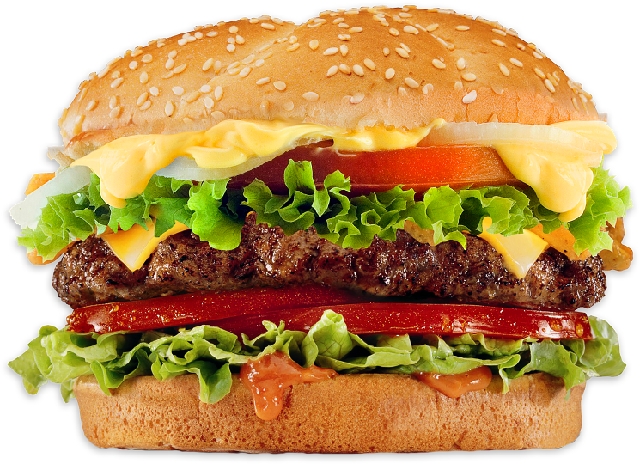
To illustrate the difference, consider the examples below. Both images are identical sizes (640 x 464 pixels). Both images were placed against the same dark gray background which extends 10 pixels past the image's boundaries on all sides (660 x 484 pixels)
the hamburger in the PNG file (on the left) was created against a transparent background, which blends in with the dark gray background we placed behind the image. The same image was then converted in jpg format and is displayed on the right. Since the jpg format does not support transparency, the image's background is displayed as white space around the hamburger, which contrasts with the dark gray background bleeding on all sides.
PNG file with transparency
JPG file (does not support transparency)
Editing
PNG's can be edited with a wide variety of free image editors, including Microsoft Paint, Paint.NET, GIMP and many others. The manipulation of PNG files is generally straightforward and most of the required skills can be acquired through free online tutorials.
Lossless compression
PNG files can be opened, edited and saved as many times as necessary without losing quality due to successive compression.
Not scalable
A low-resolution PNG file will not scale very well. To display a PNG on a large portion of a screen, a larger image is needed, which will dramatically increase the file size.
File size
At the same resolution and comparable image quality, a PNG will produce a larger file size than JPG.
JPEG is a commonly used method of lossy compression for digital images, particularly for those images produced by digital photography. The degree of compression can be adjusted, allowing a selectable tradeoff between storage size and image quality.
Picture quality
JPG's are suitable for high-quality pictures, like photographs of food products or sales items available on the menu.
File size
At the same resolution and comparable image quality, a JPG will produce a smaller file size than PNG.
Editing
JPG's can be edited with a wide variety of free image editors, including Microsoft Paint, Paint.NET, GIMP and many others. The manipulation of JPG files is generally straightforward and most of the required skills can be acquired through free online tutorials.
Not scalable
A low-resolution JPG file will not scale very well. To display a JPG on a large portion of a screen, a larger, higher resolution image is needed, which will dramatically increase the file size.
Transparency
JPG's don't support transparency.
Compression
Understanding the effects of compression on JPG files can be quite daunting. Every time a JPG file is opened, modified and saved, the file is re-compressed, resulting in a compounded loss of quality compared to the original image.


