Redirection Tables
Using Redirection Tables
Redirection Tables are used to route printouts so that they print at the appropriate printer in the restaurant. Printer routes can be set by mode. This means that a certain POS workstation can print at one printer in the morning during the breakfast period, and print at another printer during the lunch period or the dinner period.
Before setting up redirection tables:
make sure that Logical Printers, Physical Printers and Shared Printers are setup.
To make use of redirection tables, the option Automatic Redirection Table must be enabled in Point of Sales Control > View > Options > Printing.
Optionally, the option Redirection table by Revenue Center may be used to control redirection tables by Revenue Center instead of by Mode. This option is also located in Point of Sales Control > View > Options > Printing.
Logon to the Maitre’D Back-Office with appropriate credentials. (Distributor or System Owner)
Start the Point of Sale Control module.
Click on the Workstation menu and select the Redirection Table... option.
The list of available redirection tables will be displayed:
Select an existing Redirection Table and click the Modify button to edit its properties.
Click Add to create a new Redirection Table.
Click Close to exit and return to the Point of Sale Control module.
The Redirection Table's settings will be displayed:
Type a meaningful description for this redirection table.
Select a logical printer from the table and click the Modify button to edit its properties.
This column lists all available logical printers. The first two entries (Receipt and Default) cannot be modified, except for KDS IP Redirection and Inventory Location. The other entries in this list are configured in Point of Sale Control > Workstation > Logical Printer...
This column lists which shared printer is associated with each logical printer.
This column lists which KDS monitor is associated with each logical printer.
This column is only available if the Inventory Management module with the Multi-Location option is activated on the Maitre'D license. It lists the Inventory Locations from which inventory quantities should be depleted for each logical printer.
This column lists the internal ID associated with each logical printer.
Click OK to save changes and return to the list of Redirection Tables.
Click Delete to delete this Redirection Table. A confirmation dialog will be displayed before the redirection table is effectively deleted.
Click Cancel to exit this screen without making any changes.
Select a Logical Printer from the list and click the Modify button to change its properties.
This field displays the name of the Logical Printer being modified.
From the drop-down list, select the Shared Printer to use with this Logical Printer.
From the drop-down list, select the KDS Monitor to use with this Logical Printer.
If required, enter the IP address to use for redirections.
If the Inventory Management module with the Multi-Location option is available, select the location from which Inventory Quantities will be depleted when using this Logical Printer.
Click OK to save changes and return to the redirection table. The changes will appear on the screen:
Repeat steps 6 and 7 for each Logical Printer.
Once all the Logical Printers have been configured, click OK to save changes and return to the list of redirection tables.
Create as many redirection tables as required for your use case.


After redirection tables are created, they can be assigned to each mode or revenue center for each workstation. This is done through the Workstation's options.
Logon to the Maitre’D Back-Office with appropriate credentials. (Distributor or System Owner)
Start the Point of Sale Control module.
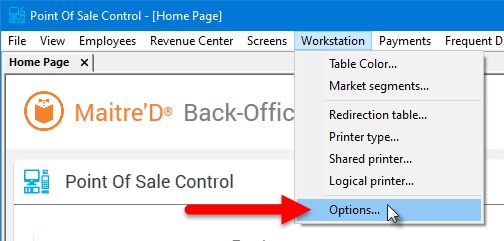
Click on the Workstation menu and select the Options... option.
The list of available workstations will be displayed. Select the workstation for which you wish to assign redirection tables and click the Modify button.
,The workstation's properties open on the Workstation branch. Click on the Printers branch.
You will see a list of the available modes.
If the Redirection Table by Revenue Center option is enabled, you will see the list of Revenue Centers instead:
Select a Mode (or Revenue Center) and click the Modify button. From the drop-down list, select the Redirection Table to assign to this Mode (or Revenue Center), then click OK.
Repeat until all modes (or Revenue Centers) are configured.
Click OK to save changes to the Workstation's configuration and return to the list of workstations.
Repeat these steps for each workstation.


