Using downloaded files is the quickest way to get a system up and running. However, it gets a bit tricky if you need to install an auxiliary or backup server. These matters will be covered here.
Before you begin, we highly recommend downloading the latest installer and service pack, and creating your own install set. This will allow you to install Maitre'D and get it updated to the latest version in one single operation.
Please see:
Create a custom Maitre'D Installer
Make sure the installer files are extracted, either on you local hard drive or on a removable media. Installation will not work if the files are still within a *.zip archive. (See )
Using Windows File Explorer, browse to the folder containing the install files.
Locate the file called Setup.exe and double-click on it.
You may get a UAC warning. Click Yes.
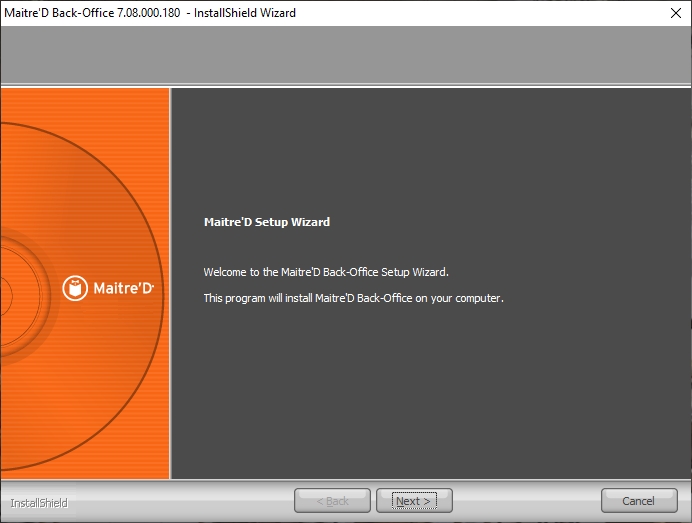
The Maitre'D Back-Office InstallShield wizard will start.
Follow the steps described in .
Extract the installation files on you local hard drive. We will be using the command prompt, so to make your life easier, you can copy the files in a folder at the root of the C:\ drive. For this example, we copied the install files to a folder called MD_Install, at the root of the C:\ drive.
Open an elevated command prompt by clicking the Windows Start menu and typing "CMD". Select the Run as Administrator option.
You may get a UAC warning. Click Yes.>
The command prompt will open at the C:\Windows\System32> prompt. Jump to the root of the C:\ drive by typing the following command:
cd\ [ENTER]
navigate to the MD_Install folder by typing the following command at the C:\> prompt:
cd md_install [ENTER]
The prompt will not look like this: C:\MD_Install>. Start the Maitre'D Auxiliary Back-Office setup by typing the following command:
setup.exe aux [ENTER]
The installation process will start. Follow the steps as outlined in the .
Repeat steps 1 through 5 of the Auxiliary Back-Office setup above.
The prompt will not look like this: C:\MD_Install>. Start the Maitre'D Backup Server setup by typing the following command:
setup.exe backup [ENTER]
The installation process will start. Follow the steps as outlined in the .
Related Topics
Originally, the Maitre'D installer was shipped on a physical DVD. Being fully aware that many recent laptops and even full-sized desktop computers are no longer shipped with optical drives, and also to reduce e-waste and shipping costs, the files are available for download from the Maitre'D Distributor Portal.
Please see:
Insert the DVD in the DVD-ROM drive.
The disk should auto-play.
Use File Explorer to browse your DVD-ROM drive.
Double-click Autorun.exe.
Copy all the DVD files to the root of a removable media, such as a USB thumb drive.
Use File Explorer to browse the removable media.
Double-click Autorun.exe.
As the Autorun tool starts, you may see a Windows User Account Control (UAC) message. Click Yes.
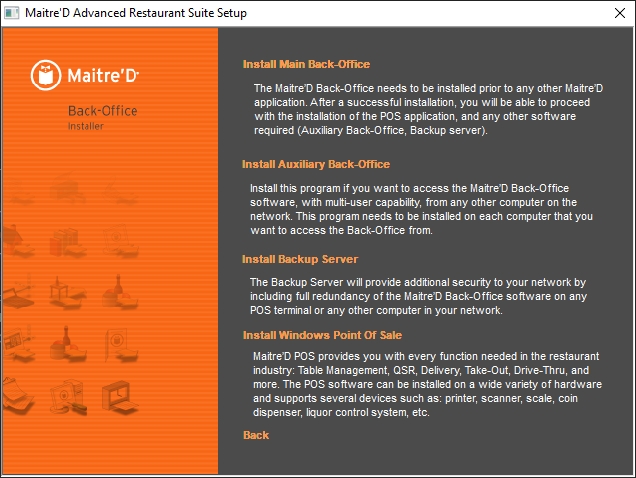
The first installer screen will be displayed:
Select the option to take a tour of Maitre'D.
Select this option to install the Maitre'D Back-Office Server, Backup Server, Auxiliary Server or Point of Sale software. This will open another menu page with all necessary installation options.
Select this option to install the Maitre'D e-Global solution. This will open another menu page with all necessary installation options.
IMPORTANT! The DataBoard option listed here is obsolete. Please consult up-to-date DataBoard documentation and installation instructions here:
Select this option to view contact information.
IMPORTANT! This will display old Posera contact Information. Please contact PayFacto instead. View up-to-date contact information here:
Select this option to exit from the installer.
Select this option to install the Maitre'D Main Back-Office server software.
The Maitre'D Back-Office needs to be installed prior to any other Maitre'D application. After a successful installation, you will be able to proceed with the installation of the Point of Sale application, and any other software required, such as the Auxiliary Back-Office or Backup Server.
Select this option to install a Maitre'D Auxiliary Back-Office.
Install this program if you want access to the Maitre'D Back-Office software, with multi-user capability, from any other computer on the Maitre'D network. This program needs to be installed on each computer that you want to access the Back-Office from.
Select this option to install a Maitre'D Backup Server.
The Backup Server will provide additional security to your network by including full redundancy of the Maitre'D Back-Office software on any Point of Sale workstation or any other computer in your network.
Select this option to install the Maitre'D Point of Sale software on a workstation.
The Maitre'D Point of Sale provides you with every function needed in the restaurant industry. Table management, QSR, Delivery, Take-out, Drive-Thru and more. The Point of Sale software can be installed on a wide variety of hardware and supports several devices such as: Printers, scanners, scales, coin dispensers, liquor control systems, etc.
Select this option to return to the previous screen.
To start the installation of the Maitre'D Back-Office, select the first option: Install Main Back-Office. This will launch the Maitre'D Back-Office InstallShield Wizard.
Select this option to install the Maitre'D e-Global Solution.
The Maitre'D e-Global corporate solution is a powerful package developed to bring increased efficiency to multi-unit food service corporations. It allows them to receive data from all units at the frequency they desire. e-Global also allows them to manage each unit's database remotely, providing more control over menus, promotions and prices.
Do not use this option, as this version of DataBoard is now obsolete.
IMPORTANT! The DataBoard option listed here is obsolete. Please consult up-to-date DataBoard documentation and installation instructions here:
IMPORTANT! Before installing a Maitre'D Auxiliary Back-Office, the main Maitre'D Back-Office must be installed. Its license must also be activated, and the Maitre'D Back-Office Server must be running.
Start the installation process using one of the following methods:
, or;
.
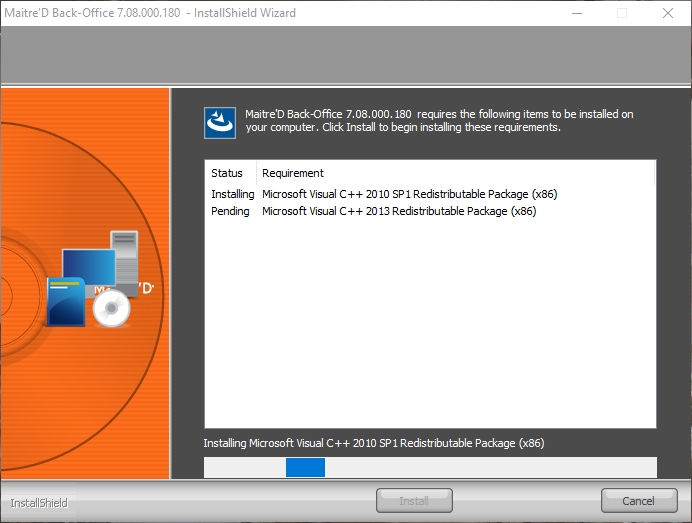
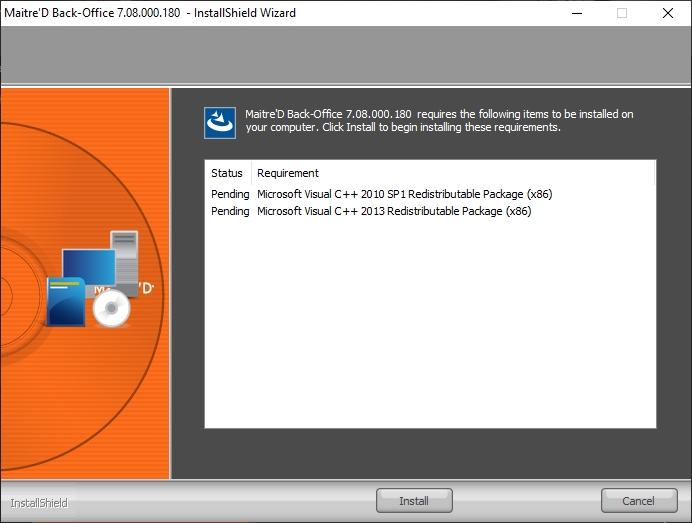
Before performing the actual installation, the InstallShield Wizard will analyze your system. If required software components are missing, these will be installed at this point. Click the Install button to proceed.
A splash Screen will be briefly displayed.
The InstallShield Wizard will prepare the installation. This could take a few seconds.
The welcome screen appears. Read the welcome message to make sure that the InstallShield Wizard will install an Auxiliary Back-Office. Click Next > to continue the installation.
Read the license agreement and select I accept the terms of the license agreement. Click Next > to continue.
Select the Maitre’D installation folders and click Next > to continue.
Select whether you prefer connecting to the Maitre'D Main Back-Office Server by Machine Name or by IP Address.
a. If Select by Machine Name was selected, you will be asked to select the PC on which the Maitre'D Main Back-Office Server is running. Click OK after making a selection.
b. If Select by IP Address was selected, you will be asked to type the IP address of the PC on which the Maitre'D Main Back-Office Server is running. Click Next > after typing the IP address.
You will be asked to provide a Workstation User ID Number for the Auxiliary Back-Office. This number needs to be unique (not already used by a POS, another auxiliary or another backup server) and between 1 and 63 inclusively.
Files will be installed automatically. This could take a few minutes.
If a service pack is available, installation will start automatically. It is highly recommended to always install the latest service pack available before using the Maitre’D software. Click Yes to begin the installation of the service pack.
IMPORTANT! Installation of the latest service pack available is required to maintain PCI-DSS compliance. Installation of the latest service pack is also required to benefit from the latest feature updates and bug fixes.
a. The InstallShield Wizard will prepare the Service Pack installation. This could take a few seconds.
b. The welcome screen appears. Click Next > to continue the installation.
c. Read the license agreement. Click Yes to agree and continue the installation.
d. Select the path where the BO.INI file can be found. This should not need to be changed, but you can click Browse… to change the folder if required. The service pack files will be installed in the path as defined in the BO.INI file. Click Next > to proceed.
e. Files will be copied. This could take a few minutes.
After files are copied, the InstallShield wizard will remind you that the computer needs to be restarted before Maitre'D can be used. Click the Finish button.
A dialog box will inform you that your computer is about to be restarted. Click OK, and your computer will restart.
WARNING! Do not attempt to override the computer restart. This will damage the Maitre'D files and cause various issues.
After the computer restart, start the Maitre'D Auxiliary Back-Office by double-clicking the icon on the Windows desktop.
Since there is no license installed, you will be prompted to enter a license serial number and a commerce name.
IMPORTANT! Now that the Maitre'D files are in place, it is strongly suggested to configure the Maitre'D Shared Folder correctly, even before activating the license. Please see
The installation process is now completed. Please proceed to the Maitre’D license activation.
Related Topics
IMPORTANT! Before installing a Maitre'D Backup Server, the main Maitre'D Back-Office must be installed. Its license must also be activated, and the Maitre'D Back-Office Server must be running.
Additionally, the POS software must be installed locally on the PC where the Backup Server will be installed.
Start the installation process using one of the following methods:
, or;
.
Before performing the actual installation, the InstallShield Wizard will analyze your system. If required software components are missing, these will be installed at this point. Click the Install button to proceed.
A splash Screen will be briefly displayed.
The InstallShield Wizard will prepare the installation. This could take a few seconds.
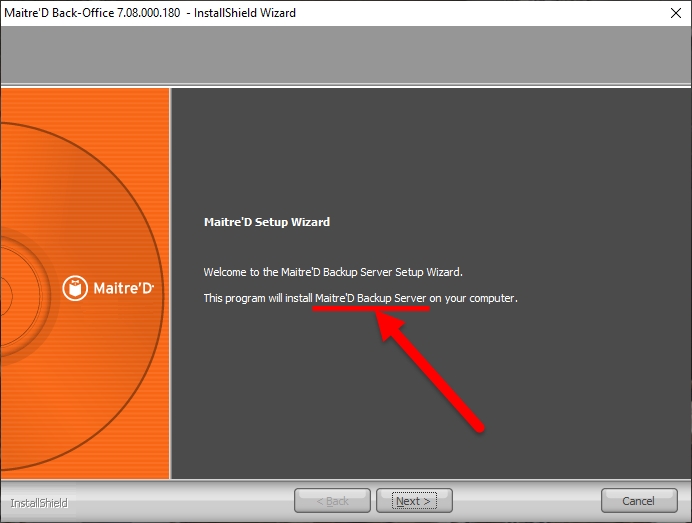
The welcome screen appears. Read the welcome message to make sure that the InstallShield Wizard will install a Maitre'D Backup Server. Click Next > to continue the installation.
Read the license agreement and select I accept the terms of the license agreement. Click Next > to continue.
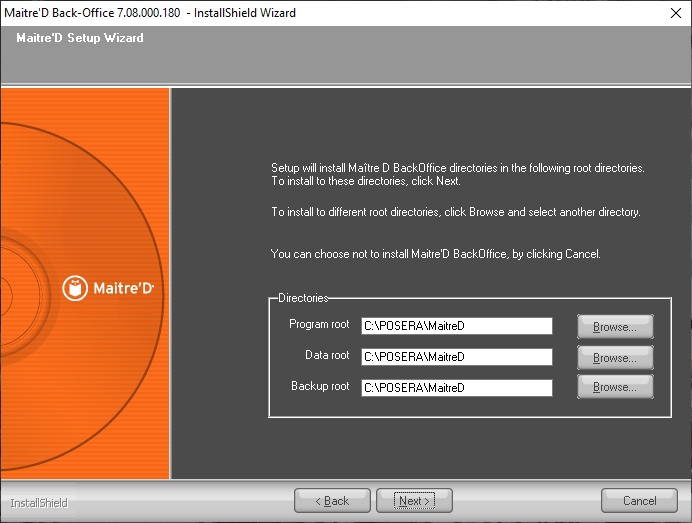
Select the Maitre’D installation folders and click Next > to continue.
Select whether you prefer connecting to the Maitre'D Main Back-Office Server by Machine Name or by IP Address.
a. If Select by Machine Name was selected, you will be asked to select the PC on which the Maitre'D Main Back-Office Server is running. Click OK after making a selection.
b. If Select by IP Address was selected, you will be asked to type the IP address of the PC on which the Maitre'D Main Back-Office Server is running. Click Next > after typing the IP address.
You will be asked to provide a Workstation User ID Number for the Backup Server. This number needs to be unique (not already used by a POS, another auxiliary or another backup server) and between 1 and 63 inclusively.
Files will be installed automatically. This could take a few minutes.
If a service pack is available, installation will start automatically. It is highly recommended to always install the latest service pack available before using the Maitre’D software. Click Yes to begin the installation of the service pack.
IMPORTANT! Installation of the latest service pack available is required to maintain PCI-DSS compliance. Installation of the latest service pack is also required to benefit from the latest feature updates and bug fixes.
a) The InstallShield Wizard will prepare the Service Pack installation. This could take a few seconds.
b) The welcome screen appears. Click Next > to continue the installation.
c) Read the license agreement. Click Yes to agree and continue the installation.
d) Select the path where the BO.INI file can be found. This should not need to be changed, but you can click Browse… to change the folder if required. The service pack files will be installed in the path as defined in the BO.INI file. Click Next > to proceed.
e) Files will be copied. This could take a few minutes.
After files are copied, the InstallShield wizard will remind you that the computer needs to be restarted before Maitre'D can be used. Click the Finish button.
A dialog box will inform you that your computer is about to be restarted. Click OK, and your computer will restart.
WARNING! Do not attempt to override the computer restart. This will damage the Maitre'D files and cause various issues.
After the computer restart, start the Maitre'D Back-Office Server will attempt to start itself in Backup mode.
Since there is no license installed, you will be prompted to enter a license serial number and a commerce name.
IMPORTANT! Now that the Maitre'D files are in place, it is strongly suggested to configure the Maitre'D Shared Folder correctly, even before activating the license. Please see
The installation process is now completed. Please proceed to the Maitre’D license activation.
Related Topics

Before performing the actual installation, the InstallShield Wizard will analyze your system. If required software components are missing, these will be installed at this point. Click the Install button to proceed.
A splash Screen will be briefly displayed.
The InstallShield Wizard will prepare the installation. This could take a few seconds.
The welcome screen appears. Click Next > to continue the installation.
Read the license agreement and select I accept the terms of the license agreement. Click Next > to continue.
Select the Maitre’D installation folders and click Next > to continue.
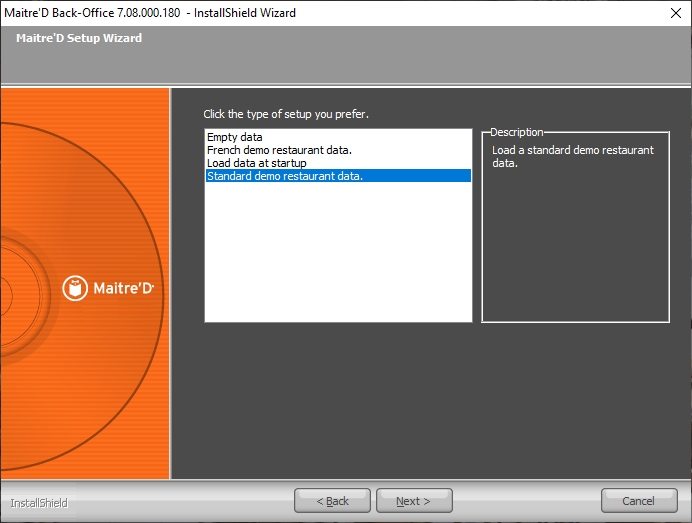
Select the type of installation and click Next > to continue. The available types are described below.
Select this option to install Maitre’D with an empty database. It will need to be fully programmed before use.
Select this option to install a generic restaurant data for demonstration purposes in the French language.
Select this option to restore an existing restaurant data when the software is started for the first time.
Select this option to install a generic restaurant data for demonstration purposes in the English language.
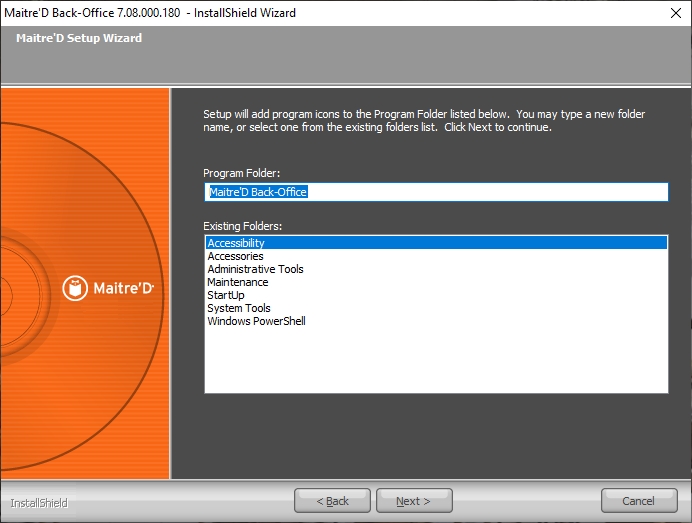
Select the Maitre’D program group that will be created in the Windows Start Menu. Click Next > to continue.
Files will be installed automatically. This could take a few minutes.
If a service pack is available, installation will start automatically. It is highly recommended to always install the latest service pack available before using the Maitre’D software. Click Yes to begin the installation of the service pack.
IMPORTANT! Installation of the latest service pack available is required to maintain PCI-DSS compliance. Installation of the latest service pack is also required to benefit from the latest feature updates and bug fixes.
a. The InstallShield Wizard will prepare the Service Pack installation. This could take a few seconds.
b. The welcome screen appears. Click Next > to continue the installation.
c. Read the license agreement. Click Yes to agree and continue the installation.
d. Select the path where the BO.INI file can be found. This should not need to be changed, but you can click Browse… to change the folder if required. The service pack files will be installed in the path as defined in the BO.INI file. Click Next > to proceed.
e. Files will be copied. This could take a few minutes.
After files are copied, the InstallShield wizard will remind you that the computer needs to be restarted before Maitre'D can be used. Click the Finish button.
A dialog box will inform you that your computer is about to be restarted. Click OK, and your computer will restart.
WARNING! Do not attempt to override the computer restart. This will damage the Maitre'D files and cause various issues.
After the computer restart, the Maitre'D Back-Office Server will attempt to start.
Since there is no license installed, you will be prompted to enter a license serial number and a commerce name.
IMPORTANT! Now that the Maitre'D files are in place, it is strongly suggested to configure the Maitre'D Shared Folder correctly, even before activating the license. Please see Configure the Maitre'D Sharing Options
The installation process is now completed. Please proceed to the Maitre’D license activation.
Related Topics