Loading...
Loading...
Loading...
Loading...
Loading...
Loading...
Loading...
Loading...
Loading...
Loading...
Loading...
Loading...
Loading...
Loading...
Loading...
Loading...
Loading...
Loading...
Loading...
Loading...
Loading...
Loading...
Loading...
Loading...
Loading...
Loading...
Loading...
Loading...
Loading...
Loading...
Loading...
Loading...
Loading...
Loading...
Loading...
Loading...
Loading...
Loading...
Loading...
Loading...
Loading...
Loading...
Loading...
Loading...
Loading...
Loading...
Loading...
Loading...
Loading...
Loading...
Loading...
Loading...
Loading...
Loading...
Loading...
Loading...
Loading...
Loading...
Loading...
Loading...
Loading...
Loading...
Loading...
Loading...
Loading...
Loading...
Loading...
Loading...
Loading...
Loading...
Loading...
Inventory Groups and Categories allow to organize inventory items in the inventory system. For example, you might have an inventory group called, "Liquor". Within the "Liquor" group, you might have categories called, "Beer", "Wines", or "Mixers". Within the "Beer" category, you might have the product names, "Budweiser", "Miller".
Description
Enter the Group Description.
Inventory Items
Overview
File
View
Action
Planning
List
Report
Report Center (Inventory)
Inventory Groups and Categories allow to organize inventory items in the inventory system. For example, you might have an inventory group called, "Liquor". Within the "Liquor" group, you might have categories called, "Beer", "Wines", or "Mixers". Within the "Beer" category, you might have the product names, "Budweiser", "Miller".
The Category function allows to select which product divisions or categories make up the individual inventory groups. For example, if the inventory group is Meat, then the inventory categories under this group could be Beef, Poultry, and Fish.
Description
Enter the Category description.
Group
Select the larger inventory group to which the smaller inventory category belongs.
Tax #1Tax #2
Each time an inventory item is sold using the Billing option, a tax can be added. These taxes rate will be applied to items belonging to this inventory category.
Ratio Report
Each Inventory category can be link to a specific Ratio. This allows to get your food or beverage cost in %. It also gives you the difference between the theoretical cost and the real cost. The Ratio report links the Inventory category and the sales Divisions. For example, you could have sales Division name "Steaks" and an Inventory category name "Beef" they could both be linked to the "Food" ratio. The Ratios are setup in the POS Control under the Revenue Center/Ratio Report option.
Automatic Sales
This option allows to decide to use the Real cost as the Theoretical cost for a specific category. An example of use is the "Condiments" category. All your condiments can be setup under this category if you do not want to include all condiments in your recipe. In this example, you will enable this option and the Real cost for this category will be used in the Ratio Report as the Theoretical cost without giving you a variance. Usually, this option is disabled.
Export Category
If you enable this option, the converter program will use the sales and items related to this category.
NOTE: For the Databoard to display Food Cost amounts, enable this option for all categories.
When doing an inventory purchase, you can select which currency is used for the invoice. Choosing from the description you enter here makes the selection of the currency.
Description
Enter here the Currency Description.
Symbols
Enter the characters representing the currency sign followed by the decimal separator character. The currency sign will appear in front of all currency amounts printed or displayed and the separator will be used to tell where the decimals begin. The separator must be present even if not used.
Example :
USA " $. " à $4.95 (with number of decimals = 2) Other " LL " à LL4950 (number of decimals = -1) Other " FF " à FF49,5 (number of decimals = 1) With a negative number of decimals, no decimals will be used because zeroes are appended to the amount.
Nb. Decimals
Enter the amount of decimals to appear in the currency amounts displayed or printed. If there are no decimals but instead there is a number of mandatory zeroes to appear, then enter the number of mandatory zeroes as a negative value in this field.
Example :
USA : 2 decimals $9.95 Other : LL9950 decimal = -1 mandatory zero here
Conversion Rate:
Define here the exchange rate between the current currency and this media. The rate takes into account the difference between the number of decimals used for the two currencies.
Example :
To convert 5.00$ to LL8000 you can use -1 as number of decimals with a rate of 1.6 and a monetary sign of " LL ", The rate needs to be 1.6 and not 1600 since there is 3 digits difference in the number of decimals between the currencies.
The Inventory management module allows to keep track of all the stock trough recipes linking ingredients to sales items.
In order to access this module, click on the Inventory icon on the screen of the Back-Office or of the module you are in.
After selecting the Inventory option, the Inventory menu displays.
The Maitre'D system can support 64 000 different items. These sales items may have 4 different prices, which may be linked to a time table for automatic price change during the day (MODE TABLE). These time tables are programmable for each day of the week and for each POS terminal. Servers may be assigned to a specific mode so that they work with a fixed selling price. One of the modes of pricing can be set as a special inventory mode; in that case the system will multiply the recipe by the special inventory ratio to calculate your exact food cost for that pricing mode. This scheme is used to support changing portion size for the same recipe.
To calculate the food cost of an item the system requires a recipe. The recipe consists of the list of ingredients used for this item. While entering a recipe, the system will display the food cost for each MODE and will allow to create new ingredients if needed.
Each ingredient has a buying format, an inventory format, a usage format and a conversion ratio between each format. These ratios can be used to control losses (ex. 12 ounces in a pound will automatically figure a 25 % loss for the cooking). Each format can be user defined.
A number of calories can also be set per usage format, with this information the system will calculate the food cost and the total calories per plate. You may enter as many items as you want in the recipe file
You can enter every ingredient, up to the salt, but you can also enter the main ingredient and use the extra field to include the approximate cost of the dressings, sauces, potatoes etc… included with the plate.
When the recipe is completed and saved the system will start using that new recipe. You may use that option to simulate food cost by varying the quantity and not saving the change.
To help you enter your recipe you can create preparation items. (Ex: SPAGHETTI SAUCE) These are regular inventory items which has a recipe linked to them and can be used in other recipe. (ex. 4 ounces of SPAGHETTI SAUCE) Preparation item can use another preparation items in their recipe.
To tell the system that preparation items have been produced you have to use the production module. This module will ask you the quantity produced and will lower the ingredients used and increase the preparation; it will also calculate the new cost for that item.
The Merchandise Reception module is used to enter items received. As the items are entered, the system will prompt you with the current price. If you change that price the system will update your inventory cost for all the sales items in the system and will log the modification in a history file to create price change report. The system will also check the date at which the item has been inventoried and will increase the stock if the stock was received after that date or will create an adjustment if it is older. This adjustment is saved in the history file. This is done for each item on the bill. You can also recall an invoice for correction, and the system will take care of all the adjustment.
You can create Purchase Orders either from scratch, or using a previous order as a template, or then again with the purchase order expert, a new and powerful decision making tool using either minimum and maximum quantities, or production schedule, both based on our previous planning reorder functions, or then again the new and powerful sales history. This latest option generates a purchase order according to the sales history. This tool calculates average of inventory item use, as well as client and meal count for the last weeks, and prompts you with the average client count or meals for the upcoming week. From the expected number of clients or meals entered manually, it will generate purchase orders.
The loss of goods management module is present to allow for removal of items from inventory. An inventory item, a full meal or a preparation may be removed from inventory. This operation is also saved in the history file.
The system also has a multi location option. With this option you can manage up to 50 different inventories in the same building. Depending on the setup of the printers, the system will decrease the right inventory.
There is also a module to do requisitions between each of the inventories.
The Inventory Management System module has a very powerful report generator that allows to display or to print any type of reports you should need to manage your inventory.
The restaurant management system can operate in two modes, either in real time or at the end of the day. If you use the multi location module then it has to operate in real time.
In real time mode the system will monitor every transaction coming from the POS and will decrease the inventory. The inventory is updated as soon as an item is ordered on the POS.
In end of day mode the inventory will decrease only when you will close the day, this mode is used only when you have an interface with POS system which are not on line with the Maitre'D system, such as REMANCO, NCR 2160, NCR 2760 and SHARP 4230 with YAKPAK.
In these two modes of operation the operating cost of the day will be calculated at the closing of the day.
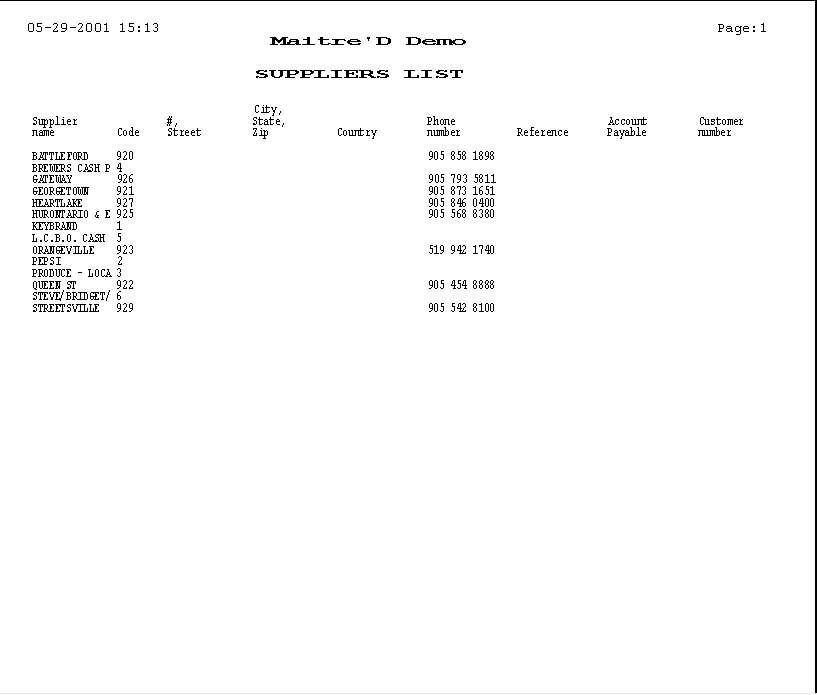
Suppliers List
The Suppliers option allows to enter information on all of your suppliers.
Select an existing supplier and click the Modify button to edit its properties.
Click the Add button to create a new supplier record from scratch.
Select an existing supplier and click the Remove button to delete it from the list.
Click Close to close this list and return to the Inventory Management Module.
Show record number
Enable this option to display the internal Record ID in the suppliers list.
Supplier Properties
Code
Enter a code for the supplier.
Name
Enter the name of your supplier.
Phone
Enter the phone number of your supplier.
Address #1, Address #2, Address #3
Enter the complete address of your supplier.
Reference
Enter the name of the person to contact for purchases.
Customer Number
You can enter in this field your customer number for this supplier.
SYSCO Number
Enter your SYSCO supplier number of up to 5 digits to exchange electronic Purchase Order files with the SYSCO Food Services.
Payable Account
Enable the account payable for this supplier.
With this option you can define the format, cost, location and recipe for all the inventory items. You can display or modify it. You can also create a new product and enter preparation recipes with this feature.
Inventory Items List
After selecting the Inventory Items... option from the File menu, the list of existing inventory items is displayed.
Select an existing inventory item and click Modify to change its properties.
Click Add to create a new inventory item from scratch.
Select an existing inventory item and click Remove to delete it.
Click Close to close this list and return to the Inventory Management Module.
Show All
Enable this option to display inventory items with the Inactive option enabled.
Show Record Number
Enable this option to display the record ID in the inventory items list.
Inventory Item Properties
Code
Enter the product code for the item you want to add.
Description
Enter the full description for the item.
Bar Code Id
Enter the bar code ID for this item, as it appears on the packaging. This is especially helpful when performing an adjustment with the bar code reader on a remote handheld device.
Suppl. Prod. Code
If you always order this item from the same supplier, enter the supplier product code for this item, as it appears on the invoices.
Category
Select the inventory category to which the ingredient belongs.
Inactive
Disable this option in an inventory item currently used for adjustments, orders and receptions. Enable it in inventory items that will eventually be used for adjustments, orders and receptions in another season or site.
NOTE: When modifying a recipe, if it already contained an inactive item, the description displays it. You can change it for the generic item.
Generic Item
Enable this option in an inventory item used in the recipes of other items. Disable it in inventory items used for adjustments, orders and receptions.
In Stock
This field displays the theoretical quantity on hand.
Adjustment
This field displays the last adjustment date.
Purchase
Select from the list the inventory unit in which the supplier sends this ingredient to you.
Inventory
Select from the list the inventory format in which you store this ingredient. The inventory format is the unit you use to count the ingredient during physical inventory.
Inventory Quantity
Enter the ratio between the inventory format and the buying format. For example, enter 4 if there are four cans in a case. If your buying unit is "recipe", enter the number of inventory units your recipe is able to produce.
Usage
Select from the list the way you intend to use this ingredient from your inventory.
Usage Quantity
Enter the ratio between the inventory format and the usage format. For example, enter 16 if there are sixteen ounces in a can.
Calories
If you know how many calories are in the quantity you chose for the "Usage format", enter the amount. The Back-Office is able to use this value to calculate the total calories for recipes once you enter all ingredients.
Minimum
Enter the minimum quantity of this ingredient that you want to keep in stock. The Back-Office uses this quantity in the Order Report . The quantity represents the inventory format.
Maximum
Enter the maximum quantity of this ingredient that you want to keep in stock. The Back-Office uses this quantity in the Order Report . The quantity represents the inventory format.
Automatic Conversion
This option is used with an inventory item that also has a recipe. When the Automatic Conversion is enabled, all of the inventory items within the recipe will be updated when entering a new purchase.
Example: Suppose that you are buying chicken. Each chicken has two breasts and two legs. You can create three inventory items: CHICKEN, BREAST, and LEGS. Inside your CHICKEN inventory item, you would build a recipe with 2 BREAST and 2 LEGS. Doing so, when you buy a CHICKEN, the system will automatically adds 2 BREAST and 2 LEGS in you inventory.
NOTE: In our example, the main inventory item (CHICKEN) will not be updated. Only the inventory items within the recipe will.
Automatic Production
Select this option if your inventory item has a recipe and you want to update your inventory each time this item is sold. Otherwise, the inventory will be updated only when you make a Production.
Cost
Enter the cost of the inventory item according to the buying format.
Sale Price
If you are using the Billing option, enter here the sale price when you are selling this inventory item.
Average Cost
For a new inventory item, the Average cost is the same amount as the one you have just enter in the Cost field. That's the only time you should change this number. It will be updated automatically each time you enter a new purchase.
Surcharge %
The surcharge is a percentage of the cost of the item on invoices from some suppliers. Enter a surcharge percentage which is applied on the item price before calculating the average cost when an invoice is completed. When entering a purchase invoice for such a supplier, you do need an account to track the surcharge.
Supplier
Enable from the list the supplier for this inventory item.
Previous Supplier
Name of the Previous Supplier.
Last Cost
Cost before the last price change.
Last Increase
Date of the last price change.
This option allows to check the quantity of an item in stock in all the inventory locations. The site, current stock level, last adjustment date and sales value are listed for each location where this item can be found.
Click the Site button to enter the site name you want to assign to this inventory item in this location. Sites are used when generating reports to group specific inventory item together.
Select a location and click the Modify button to perform adjustments for the inventory item in the selected location.
NOTE: This button only appears with Distributor access level.
Select a location and click the Delete button to permanently remove it.
NOTE: This button only appears with Distributor access level.
Location Details Fields
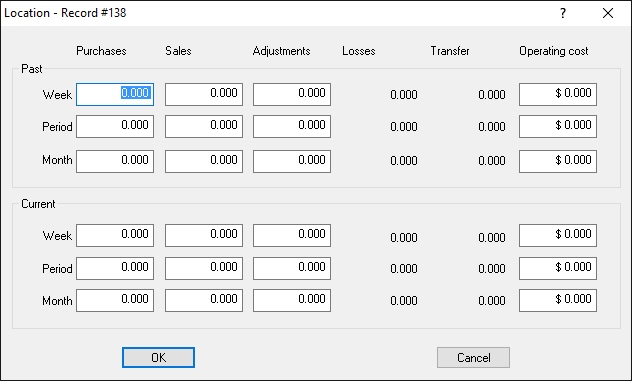
These fields displays the inventory figures recorded for the past and present Week, Period, and Month.
NOTE: These fields can only be seen by clicking the Modify button with the Distributor access level.
Inventory Recipe:
Choose an inventory recipe.
Quantity
Quantity of this item used in this recipe.
Units
Unit used for this item in this recipe.
Description
Description of the Inventory Items used in this recipe.
Unit Cost
Unit cost for this item in this recipe.
Cost
Total cost of this item in this recipe.
Calories
Calories of this item in this recipe.
Ratio
This field is only used by the Automatic Conversion option, and show the percentage of the buying cost applied to this item.
Main
Enable this field to make this the main ingredient essential to the sale of the item.
The Customers option allows to enter information on all of your customers.
Suppliers option allows to enter information on all of your suppliers.
Select an existing customer and click the Modify button to edit its properties.
Click the Add button to create a new customer record from scratch.
Select an existing customer and click the Remove button to delete it from the list.
Code
Enter the customer code that will be used when using the Billing option.
Name
Enter the customer's full name.
Address #1 Address #2 Address #3
Enter the customer's full address.
Postal Code
Enter the customer's zip or postal code.
Reference
If this account is a company, enter the name of the contact person.
Phone
Enter the customer's Phone.
Discount Rate
Enter the Discount Rate that should be applied each time this customer buys from you.
% Privilege
This field is not used with the Inventory system.
Credit Limit
Enter the customer credit limit. This credit limit will be verified each time you make a transaction for that customer.
Amount Due
The Amount Due field shows the current balance for this customer since their last transaction.
Total Amount
The Total Amount shows the sum of all charges that this customer has incurred since their account was created.
Available Credit
This field shows the customer's available credit according to their Credit Limit and recent transactions.
Detailed preparation instructions can be included with each inventory recipe. These instructions can be displayed on the POS screen for servers to refer to on demand, at any time the corresponding item is ordered.
Text Recipe List
Select an existing Text Recipe and click the Modify button to edit it.
Select an existing Text Recipe and click the Remove button to delete it.
Click the Add button to create a new Text Recipe.
Click the Close button to exit.
Text Recipe Properties
Title
Type in a meaningful title for the text recipe.
Preparation
Type in detailed preparation instructions.
Click the Scan button to include an image with the instructions.
The system keeps every transaction in the database so any purchase can be verified or modified at any time. It also keeps a trace of all adjustments, losses and production. More space will be needed every day to keep the information. This option can be used to delete older transaction.
The system will request a starting date to clean-up purchases to clean-up. If you press OK the system will use the actual date. For security purposes, the system will save at least six months regardless of the date entered. After entering the date, the system will start cleaning, erasing every transaction older than the starting date. This will affect purchases, losses, adjustments and production. Generate all required reports before the "Clean-up" because the data will be deleted.
The system keeps every transaction in the database so any Requisition can be verified or modified at any time. More space will be needed every day to keep the information. This option can be used to delete older transaction.
The system will request a starting date to clean-up requisition to clean-up. If you press OK the system will use the actual date. For security purposes, the system will save at least six months regardless of the date entered. After entering the date, the system will start cleaning, erasing every transaction older than the starting date. Generate all required reports before the "Clean-up" because the data will be deleted.
This option let you choose whether you want to see toolbar (all the icons at the top of your screens) or not. This selection toggles from enable and disable. When there is a check mark besides the option, the option is enabled and you will see the toolbar.
This option let you choose whether you want to see status bar (the line located at the bottom of your screen) or not. This selection toggles from enable and disable. When there is a check mark besides the option, the option is enabled and you will see the status bar.
Cost for Setting
This field represents the overhead cost per inventory item that includes the cost of selling each item. You may calculate this cost by adding together the cost per inventory item for laundering napkins, cleaning silverware, and other related tasks. Enter the average setting amount for the majority of your inventory items. When you setup inventory items, the system prompts to choose whether you wish to use the cost entered in this field. There may be a cost of $1.00 associated with each entree served, so you would enter $1.00 in this field. As an example of how you can modify the setting cost, you can configure all entree inventory items to use the cost in this field, but set up drinks and dessert items to ignore it.
Vegetable Cost
This field is similar to the Cost for Setting field because it is an extra cost associated with an inventory item. It adds the cost of vegetable to an entree when the vegetable automatically comes with the meal. You might set the Vegetable cost at $0.30 because that is the lowest cost of a vegetable that you serve with an entree.
Number of Locations
The Number of locations is used only for the inventory worksheet and when the Multi-Location option is not installed. There will be as many lines per item that they are locations defined here. The default value for this field is 1.
Keep Production Schedule For
Enter in this field the number of weeks to keep tracking information for the production schedule
Update
This field notes how often you would like for the Back-Office to update the inventory stock. Select from the list the appropriate setting.
Real Time
The inventory is updated every time an item is ordered at the workstation. (Default setting for most system).
Not Used
The inventory is never updated.
Availability
This field allows to control the availability of food items at the touchscreen according to inventory stock. For example, if the inventory shows that there are no more steaks, then the Back-Office makes steaks unavailable at the workstation. The Back-Office would make the steaks available again after you add steaks to the inventory through a purchase or inventory adjustment. Below are the choices for the Availability field.
Real Ingredient
If one of the ingredients of an inventory item becomes out of stock, then that item is unavailable. For example, suppose a hamburger recipe contains meat and a bun. If only the bun is out of stock, the item becomes unavailable even if the hamburger item shows that there is remaining stock.
Main item
The item becomes unavailable only when the main item is depleted from the inventory. For example, suppose that once again a hamburger recipe contains meat and a bun. If the bun is depleted from the inventory, but the hamburger item still shows some inventory, the item is still available.
Not used
The Back-Office will not automatically adjust the availability based on inventory stock.
Options
Check when Removing
If this option is enabled during an inventory item deletion the system will check for available stock. If the item is in the requisition or purchase list, the deletion will fail. If this option is disabled, the system will only check whether the item belongs to a recipe or not. During the inventory item deletion, the Back-Office will remove this item from the history file, requisition and purchases files.
Use Product Code
If you enable this option, the items, in the drop down menus, will be presented by product code. If you leave it disabled, they will be presented by items description.
Use Supplier Product Code
If you enable this option, when generating a purchase order, the supplier product code will be used.
Remote Inventory Adjustment
Enable this option to allow inventory adjustment from a remote handheld device.
Disable Item Code Modification
Enable this option to disable the edition of the Inventory item code.
Disable Recipe Modification
Enable this option to restrict access to the recipe of sales items and inventory product items to only the Distributor and F9 access levels.
Remote PO Reception
Enable this option to allow Purchase Order Reception from a Remote workstation, handheld for example.
NOTE: To allow this, also enable the Merchandise Reception option in Point of Sale Control / Employee / Configuration / Functions of at least one Configuration.
Extended Format Description
Enable this option to display the Purchase format of inventory items followed by the inventory quantity and format (in parenthesis) on the Purchase Order and Merchandise Reception screens.
Example: Vodka 10 bottles (40 ounces). This is helpful is the actual received product is in 26 ounces bottles.
Fiscal date only on Remote
Enable this option to limit merchandise receptions to the current fiscal day only when performed from a POS workstation.
The Inventory Management module allows to adjust your inventory in order to match the theoretical quantity with the real quantity in stock. Any difference will be recorded as an inventory variance and will be differentiated from a lost. A variance is missing stock that you do not know the origin instead of a lost, which has a known origin. The Maitre'D software offers you many different ways to adjust your inventory: you can make adjustment for now, for this morning, for the current or last week, for the current or last period, for the current or last month. These options allow you for example, to enter a physical inventory taken at the end of the last month, or on any day of the current month. You also have the possibility to use this function in conjunction with an inventory worksheet that is printed using the report generator. When you are entering the adjustments, the system will show you the theoretical quantity in stock for each item requested according to the period requested.
Enable here the period that you will be able to use in Action / Adjustment.
This Morning
Enable this option to allow updates of the inventory for the same morning. This morning means just after the last closing of the day before any sales.
Now
Enable this option to allow updates of the inventory after sales have been registered.
Current Week
Enable this option to allow updates of the inventory for the first day of the current week (same as the last day of the previous week).
Current Period
Enable this option to allow updates of the inventory for the first day of the current period (same as the last day of the previous period).
Current Month
Enable this option to allow updates of the inventory for the first day of the current month (same as the last day of the previous month).
Last Week
Enable this option to allow updates of the inventory for the first day of the previous week. This option should be used with caution and only to make major corrections for the past week.
Last Period
Enable this option to allow updates of the inventory for the first day of the previous period. This option should be used with caution and only to make major corrections for the past period.
Last Month
Enable this option to allow updates of the inventory for the first day of the previous month. This option should be used with caution and only to make major corrections for the past month.
Hide Theoretical Quantity
Enable this option to hide the theoretical quantity of items when entering inventory adjustments in the Back-Office from access levels other then System Owner or Distributor.
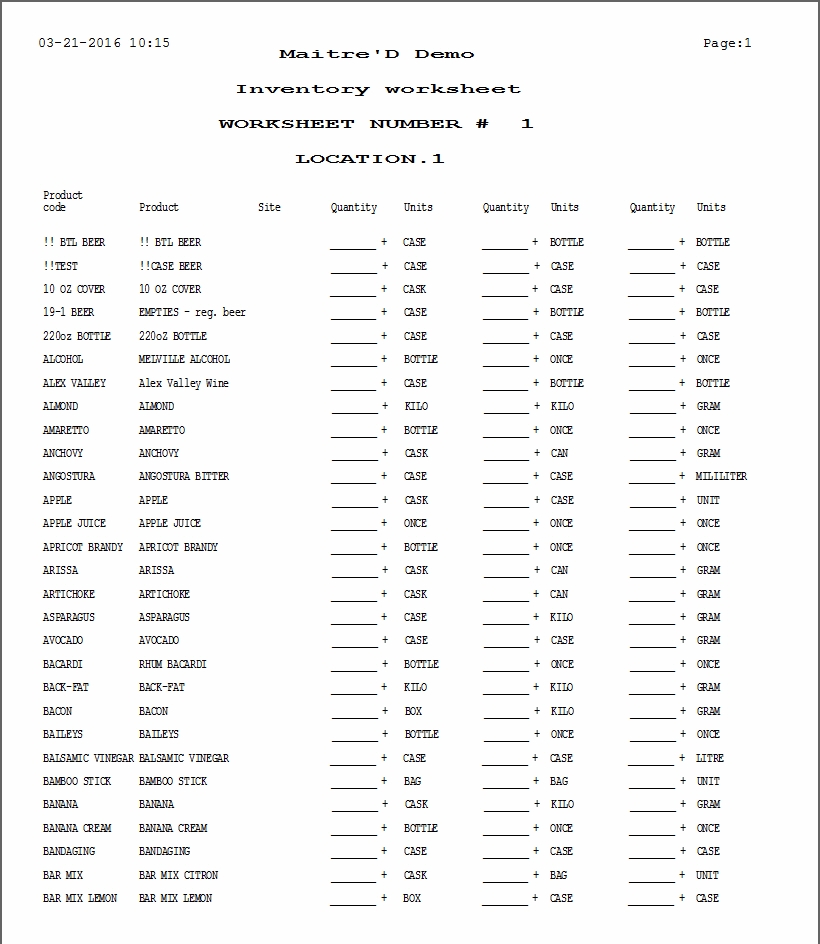
The worksheet is used to enter your physical inventory. It is either printed in double spaces with space provided, to pen in the quantity in writing and later enter it in the Back-Office, or made available to a handheld device, to enter the quantity electronically from the stockroom. The system will also give a worksheet reference number to be used for entering the physical inventory with the automatic adjustment mode. The following information will be included in the worksheet:
Print product number
Enable this field to include the inventory item code on the worksheet.
Title on new page
Select this field to display the worksheet headers on each single page.
Worksheet Filters
You will have to configure the following filters in order to create a worksheet.
Inventory Category
This is the inventory category you want to report.
Inventory Group
If you select all the categories, you can specify an inventory group.
Location
If you have the multi-location option you can select for which location you want this report.
Site
Enter the site name you want to generate a worksheet for or select All for all sites. Sites are used when generating worksheets to group specific inventory items together.
Supplier Code
Select the supplier codes you want to generate a worksheet for or select All for all suppliers.
Sort Menu
There are different ways to sort the worksheet. Select your preferred options.
Received PO Automatic Export
Enable this option to automatically create the XML export file when entering a merchandise reception.
Current Supplier by Default
Enable this option so that the Current Supplier Item List option is automatically enabled when adding items while receiving merchandise.
Use Highest PO Number Value
Enable this option to generate the next Purchase Order number from the "highest" PO number, instead of the "latest" PO number.
Disable PO Number modification
Enable this option to prevent the PO number from being modified while using a Purchase Order Expert tool.
Include Restaurant Code in PO number
Enable this option to automatically include the Restaurant Code in the PO number.
NOTE: The Restaurant Code is configured in System Configuration / View / Options / Restaurant / Code.
Disable Item Price Modification
Activate this option to forbid users other then the system owner and distributor to change the price of inventory items when creating a purchase order or receiving merchandise in the Back-Office, or on the workstation.
Import / Export
Directory
Type in the path used for importing and exporting purchase orders in XML format. Use the folder icon to browse to your shared directory. The exported file name is Poxxxx.xml, where xxxx is the purchase order sequential number.
NOTE: If a supplier's SYSCO Number was entered in Inventory Management / File / Suppliers, the exported file name is xxxxx.POE, where xxxxx is the supplier's SYSCO Number. A background application monitors this folder to send files saved by Maitre'D to the SYSCO Food Services of Los Angeles supplier server. Once that server has treated these Purchase Order files, it returns Answer Files of it's own in the same directory.
Use Food Service Price Catalogue
Enable this option to automatically update the prices from a SYSCO Food Services supplier catalogue file every time the Inventory Management module is started.
NOTE: If a Purchase Order was generated before a new price catalogue was imported, the former price is still used for the Merchandise Reception of that PO. POs generated after the catalogue import will use the new price.
Manual Update
Click this button to request a price catalogue from the food service supplier server. The supplier's server must upload this file in the Directory specified above.
NOTE: If more then one supplier is setup with a SYSCO Number, you must specify the server to interrogate. A Windows Scheduler can also be used with a batch file to get the price catalogue files periodically.
The Back-Office allows to have different Locations for the Inventory system if you are using the Multiple Location option. For example, you might have liquor behind the bar that the bartender is using. You might have another storage location that is near the bar and easy for the bartender to access. You might also have a huge storeroom in the back of restaurant where the bulk of your liquor inventory. The Inventory system allows you to track the inventory in all 3 locations.
The Location option allows to manage different storage locations in the restaurant. For example, in a hotel, you could have 3 different bars, the Lounge, the Discotheque, and the Sport Bar. Each of these could be a different Location. You can set up to 30 different Locations. For each Location you have to enter a description and select a Department.
Location List
After selecting the Locations... option from the File menu, the list of existing inventory locations is displayed.
Select an existing inventory location and click Modify to change its properties.
Click Add to create a new inventory location from scratch.
Click Close to close this list and return to the Inventory Management Module.
Location Properties
Description
Enter the Location Description.
Department
Select the Department for this Location.
NOTE: Departments and Locations are separate from inventory categories and inventory groups. Departments and Locations are actual physical areas in your store. Inventory categories and groups are ways of filling inventory items in the Back-Office system.
The Multi location is an add-on to Inventory System.
Inventory recipes are used to deplete multiple inventory items in one operation. For instance, an inventory recipe can be linked to a sales item, so that whenever that item is sold, all the ingredients used to make that sales item are depleted from the inventory in accurate quantities.
Inventory recipes can also be linked to inventory items. For instance, an inventory recipe can be linked to an inventory item called "Spaghetti Sauce", so that whenever a batch of spaghetti sauce is produced, all the necessary ingredients are automatically depleted from the inventory.
Recipes List
After selecting the Recipe... option from the File menu, the list of existing inventory recipes is displayed.
Select an existing inventory recipe and click Modify to change its properties.
Click Add to create a new inventory recipe from scratch.
Select an existing inventory recipe and click Remove to delete it.
Click Close to close this list and return to the Inventory Management Module.
Recipe Properties
Description
Enter a name for this inventory recipe.
Quantity
Quantity of this item used in this recipe.
Units
Unit used for this item in this recipe.
Description
Description of the Inventory Items used in this recipe.
Unit Cost
Unit cost for this item in this recipe.
Cost
Total cost of this item in this recipe.
Calories
Calories of this item in this recipe.
Ratio
This field is only used by the Automatic Conversion option, and show the percentage of the buying cost applied to this item.
Main
An "X" in this column indicates the main ingredient of the inventory recipe.
Click the Add button to add an ingredient to the Recipe.
Select an existing ingredient and click the Modify button to change its properties.
Select an existing ingredient and click the Delete button to remove it from the recipe.
Click the Add Text button to associate a text recipe to this inventory recipe.
NOTE: Text Recipe are created from Inventory Management / File / Text Recipes. Text Recipes can be displayed at the POS screen and are typically used to remind them of preparation steps of certain items like cocktails or specialty dishes.
Click OK to save changes and exit.
Click Cancel to exit without saving changes.
Ingredient Properties
Item
Enable an item from the list to include in your recipe.
Quantity
Enter the quantity used in this recipe.
Ratio
The Ratio field is used only with the Automatic conversion option. Enter in this field the percentage of the buying cost that you want to apply to this item.
Main Ingredient
Enable this option to make this inventory item crucial to the recipe preparation. A sales item containing this recipe becomes unavailable if the main ingredient's quantity is down to zero in the inventory.
NOTE: The Availability option must be set to Main Item in Inventory Management / View / Options
Quantity Modifier
If this inventory recipe is used as a Modifier, you can setup a different Quantity for each Level. The higher the level (the more modifiers chosen) the smaller the quantity. If the quantity is more than zero, then the quantity above will be ignored.
Level
Number of modifiers.
Quantity
Enter the quantity used in this Level.
Example:
Level 1/Quantity = 10 g
If 1 modifier is chosen then the quantity of this modifier will be 10 g.
Level 2/Quantity = 9 g
If 2 modifiers are chosen then the quantity of this modifier will be 9 g.
Level 10/Quantity = 1g
If 10 modifiers are chosen then the quantity of this modifier will be 1g.
The Log option allows to start and view operations traces about Inventory Management Module.
Log Level
Three different Log level are available, Standard, Detail and Debug. This option is for trouble shooting purpose and should be use only with the supervision of your Maitre'D reseller.
Use the View key to access to log file.
The inventory management module can help you in planning your cooking schedule. This feature is especially helpful for items that require a longer cooking time by letting you prepare these items in advance. The system looks at your sales for such items on the same day a week ago, and assumes that you will sell approximately the same number of items at approximately the same time that day. The system also takes into account the number of these items actually sold today, so it does not have you pre-cook too many of them. Prior to setting up the cooking schedule, it is important to have setup the inventory items, as well as all other settings and necessary components essential to the creation of inventory items.
Tracked Item
This column displays the names of tracked items.
Projection time in hours
This column displays the projection time in hours of each tracked item.
Click the Add button to select a new item to be tracked by the cooking schedule.
Select a tracked item and click the Modify button to change its projection time.
Select a tracked item and click the Remove button to take it out of the cooking schedule.
Click the Refresh Data button to either re-create or refresh the XML reference data used to generate the cooking schedule. This should be done after any changes to tracked items.
Extended Projection
Enable this option to use the average of the last 6 weeks instead of the sales from last week.
Display setup
Start Display Hour
Select from the list the first hour you want displayed on your cooking schedule.
End Display Hour
Select from the list the last hour you want displayed on your cooking schedule.
Tracked Item
Select from the drop-down list the inventory item to be tracked.
Projection time in hours
Select from the drop-down list the projection time, in hours, for that tracked item. For example, if you need 3 hours to thaw, marinate and cook an item, you will select a time projection of 3 hours, so that if the sales curve of the current day matches the sales curve of 7 days before, you will have plenty of time to prepare the number of items that you will likely need today.
If you select this option, the Maitre'D default home page for the Inventory Management module will be used.
Address
Enter the URL of your head-office's intranet or your complete URL on the Maitre'D Databoard server that will be used instead of the default local home page for the Inventory Management module.
User name
Enter the user name to access the Maitre'D Databoard server.
Password
Enter the password to access the Maitre'D Databoard server.
Confirm Password
Confirm the password to access the Maitre'D Databoard server.
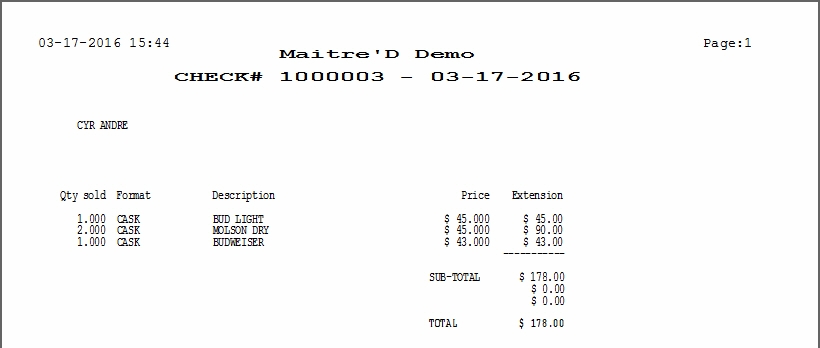
This option allows the registration of a bill when an inventory item is sold.
Customer
Enable from the list of customers the one that you are making an invoice for.
Invoice
The system automatically generates an invoice number. This number begins at 1000001 and increases by one each time you are making a new invoice.
Date
Enter the date of the invoice. The default date is today's date.
Location
Enable the appropriate provenance of the inventory stock.
Invoice
Display the invoice number automatically generated by Maitre'D for this invoice.
Customer
Displays the customer name to which the invoice is billed.
Date
Displays the date of the transaction.
Discount
Displays the discount rate assign to this customer. This discount rate is specified in the customer records and automatically discounts the price of the items included on this invoice.
Details
The Detailed section displays the list of inventory items included in the invoice.
Sub Total
Displays current items total before tax.
Tax1,Tax2
Displays tax amount applied to this invoice.
Total
Display Invoice total.
Enable Add key to add an inventory item to the invoice.
Enable Modify key to access the current highlighted inventory item.
Enable Delete key to remove the current highlighted inventory item.
Item
Select an item from the list.
Quantity
Enter the quantity you are selling.
Price
This field displays the selling price that was programmed in the inventory item. You can always enter a different price.
This module allows to adjust your inventory in order to match the theoretical quantity with the real quantity in stock. Any difference will be recorded as an inventory variance and will be differentiated from a lost. A variance is missing stock that you do not know the origin instead of a lost, which has a known origin. The Maitre'D software offers you many different ways to adjust your inventory: you can make adjustment for now, for this morning, for the current or last week, for the current or last period, for the current or last month. These options allow you for example, to enter a physical inventory taken at the end of the last month, or on any day of the current month. You also have the possibility to use this function in conjunction with an inventory worksheet that has previously printed using the report generator. When you are entering the adjustments, the system will show you the theoretical quantity in stock for each item requested according to the period requested.
Select the period for the adjustment.
NOTE: Depending of the options selected in View / Options / Adjustment branch, some of these period might not be available to you
This Morning
You can use this option to adjust the inventory for this morning. This morning means just after the last closing of the day before any sales.
Now
This option updates the inventory after sales have been registered.
Current Week
This option updates the inventory for the first day of the current week (same as the last day of the previous week).
Current Period
This option updates the inventory for the first day of the current period (same as the last day of the previous period).
Current Month
This option updates the inventory for the first day of the current month (same as the last day of the previous month).
Last Week
This option updates the inventory for the first day of the previous week. This option should be used with caution and only to make major corrections for the past week.
Last Period
This option updates the inventory for the first day of the previous period. This option should be used with caution and only to make major corrections for the past period.
Last Month
This option updates the inventory for the first day of the previous month. This option should be used with caution and only to make major corrections for the past month.
Use worksheet
Enable this option if you have previously printed an Inventory worksheet to take your physical inventory.
Worksheet
Enable the appropriate worksheet number that you want to use.
Location
Enable the appropriate inventory location.
Click the Add button to add an Item to the adjustments list.
Select an existing item and click the Modify button to change its properties.
Select an existing item and click the Delete button to remove it from the adjustments list.
Item
Select from the drop down list the item you want to make an adjustment entry for.
Quantity in Stock
Use the one/all format field(s) (purchase, inventory and usage) to enter the new inventory quantity for this inventory item.
NOTE: These fields allow mathematical additions, subtractions, multiplications and divisions (+, -, *, /) to compute the resulting quantity.
Theoretical Quantity
The Theoretical Quantity field displays the current in stock quantity of the item before your adjustment.
Variance
The Variance field displays difference between the current adjustment input and the theoretical quantity.
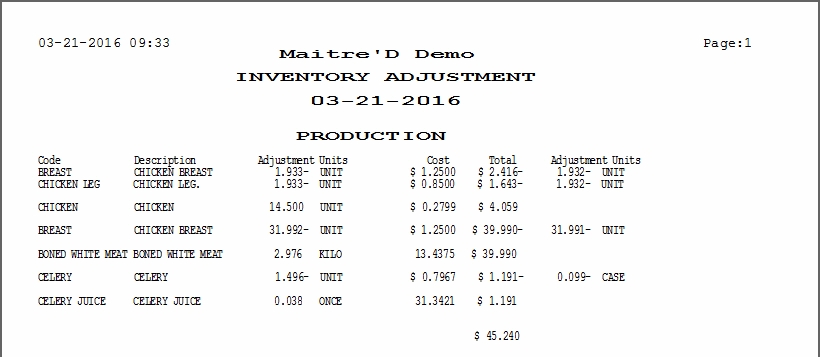
Click OK to commit changes. A legacy report will be displayed on the screen, summarizing the changes made to the inventory.
Click the Cancel button to exit without applying any changes.
With this option you can create a new purchase order either from scratch, or using a previous order as a template, or then again with the purchase order expert, a new and powerful decision making tool.
This screen displays all previously created purchase orders, unless they have been deleted or processed partially or completely through the merchandise reception option. Purchase orders imported from central purchasers at a head-office are also included. The imported file name must be PoImportxxxx.xml, where xxxx is a sequential number that must not conflict with previously imported purchase orders.
Deleted
Enable this option to delete a purchase order as soon as the New or Close buttons are clicked.
NOTE: This has exactly the same effect as selecting the Purchase Order and clicking the Delete button.
PO #
Sequential number of existing purchase order. If a purchase order was created by the order expert and was not edited since its creation, this number is preceded by an icon.
Supplier
Supplier name of existing purchase order.
Order Date
Date of creation of the existing purchase order.
Add a new purchase order.
Select an existing purchase order and click the Modify button to change its properties.
Select an existing Purchase Order and click the Delete button to mark it for deletion. This will activate the Deleted checkbox on the select PO.
NOTE: Doing this has the same effect as ticking the Deleted checkbox.
Click the UnDelete button to cancel the deletion of a purchase order. This will clear the Deleted checkbox.
Creates an XML file ready to be exported to the central purchasers at a head office.
NOTE: The file will be exported to the location defined in the XML directory line of Inventory Management / View / Options / Purchase Order branch.
New purchase order
Create a new purchase order from scratch.
Copy from an existing purchase order
Create a new purchase order using a previous purchase order as a template. This is useful when often ordering the same items from the same supplier.
Purchase Order Expert
Create a purchase order with improved decision making tools using either minimum and maximum, or production schedule, both based on our previous planning reorder functions, or then again the new and powerful sales history.
Reorder Using Minimum and Maximum
This option generates a purchase order showing what should be reordered so that the inventory does not stay under its pre-set minimum. It will suggest the quantity to order in the buying format so that the inventory gets as close as possible to its pre-set maximum without going over this maximum.
Reorder Using Production Schedule
This option generates a purchase order according to the information you have entered within the production schedule option.
Reorder Using Sales History
This very powerful new option generates a purchase order according to the sales history. This tool calculates average of inventory item use, as well as client and meal count for the last weeks, and prompts you with the average client count or meals for the upcoming week. From the expected number of clients or meals entered manually, it will generate purchase orders.
NOTE: This screen is available through the Expert Info button on the Purchase Order Detail screen only if one single purchase order is being created for one single supplier, using the Purchase Order Expert Sales History feature, and will not be available when later revising this same purchase order.
Item
Inventory item added to your purchase order.
Unit
Ratio between the inventory format and the buying format.
End Stock
Quantity on hand in inventory format.
Average Use
Quantity used in an average week, in inventory format.
Ordered
Quantity to order so that after you have served the number of meals or customers entered in the Purchase Order Expert Sales History Parameter screen, the quantity left on hand is as close to the maximum quantity programmed, without going over.
Format
Purchase format.
All Suppliers
Enable all suppliers to create multiple purchase orders at ounce.
Supplier
Enable from the list a supplier for which to create a purchase order.
Reception Date
Date you last received an order from this supplier.
Clients
Enter the number of clients expected to be served this week compared to the suggested average number of clients served in the preceding 6 weeks, except for the busiest and quietest week. From this expected number of clients, the purchase order expert will calculate the expected required inventory items to generate purchase orders.
Meals
Enter the number of meals expected to be served this week compared to the suggested average number of meals served in the preceding 6 weeks, except for the busiest and quietest week. From this expected number of meals, the purchase order expert will calculate the expected required inventory items to generate purchase orders.
Item
Enable this option to add an inventory item to your purchase order.
Code
Enable from the list the inventory item to add to your purchase order.
Current supplier item list
Enable this option to limit the code list to items whose current supplier is the selected supplier.
Show Inactive
Enable this option to also display purchase inventory items with the Inactive option enabled.
Quantity
Quantity received for this item.
NOTE: If the Extended Format Description option is enabled in Inventory Management / View / Options, the Purchase format is followed by (inventory quantity and format). Example: Vodka 10 bottles (40 ounces). This is helpful if the actual received product is in 26 ounces bottles.
Price
Price paid by purchase format.
Account
Enable this option to add a general ledger account to your purchase order.
Code
General ledger account to be added to.
Amount
Amount to add to the general ledger account.
P.O.
Original purchase order sequential number.
Date Created
Date when the original purchase order was created.
Location
Inventory location where the merchandise was received.
Purchase order detail
Description
Item description.
Quantity
Quantity of items received
P.O. Number
New purchase Order sequential number.
Location
Enable the location where the merchandise will be received.
Delivery Date
Enter the date when you expect to receive the merchandise.
PO #
Purchase order sequential number.
Supplier
Supplier from whom you made the purchase.
Delivery
Expected merchandise reception date.
Location
Inventory location where the merchandise will be received.
Code
Product code.
Description
Item description.
Quantity
Quantity of items ordered.
Format
Purchase format.
NOTE: If the Extended Format Description option is enabled in Inventory Management / View / Options, the Purchase format is followed by (inventory quantity and format). Example: Vodka 10 bottles (40 ounces). This is helpful is the actual received product is in 26 ounces bottles.
Price
Price paid by purchase format.
Total
Total $ amount of this received item.
Add an item to the purchase order.
Modify an item on the purchase order.
Remove an item from the purchase order.
Use the fast entry mode to add items to the purchase order.
Use the Expert Info button to see the Sales History information that was used by the Purchase Order Expert to calculate the recommended items and quantities.
NOTE: This button only appear if one single purchase order is being created for one single supplier, using the Purchase Order Expert Sales History feature, and will not appear when later revising this same purchase order.
Total
Total $ amount of all items entered in the purchase order.
Item
Enable from the list the inventory item to add to your purchase order.
Current supplier item list
Enable this option to limit the code list to items whose current supplier is the selected supplier.
Show Inactive
Enable this option to also display purchase inventory items with the Inactive option enabled.
Quantity
Quantity received for this item.
NOTE: If the Extended Format Description option is enabled in Inventory Management / View / Options, the Purchase format is followed by (inventory quantity and format). Example: Vodka 10 bottles (40 ounces). This is helpful is the actual received product is in 26 ounces bottles.
Price
Price paid by purchase format.
Add this item to the purchase order.
Exit fast entry mode.
Once the SYSCO server has treated the Purchase Order files, it returns Answer files of it's own in the path defined in Inventory Management / View / Options / Purchase Order. When accessing the Purchase Order screen, if Maitre'D finds such files in that folder, it displays them in the Answer File List.
Select an answer file name and click this button to open that file in Notepad, ready to be printed.
REMOVE
Select an answer file name and click this button to delete it from the list.
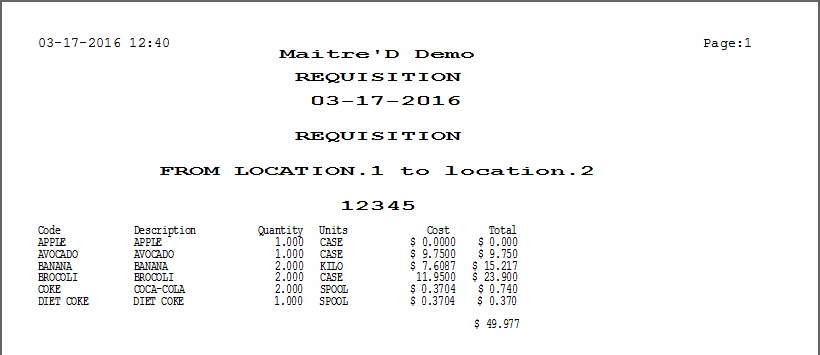
The Requisition option allows to transfer items from one location to another location.
Date
Enter the date of the requisition.
Number
Enter the number on your internal requisition form if applicable.
From
Enable the source location of the requisitioned items.
To
Select the destination location of the requisitioned items.
Click the Add button to add an Item to this requisition.
Select an existing item and click the Modify button to change its properties.
Select an existing item and click the Delete button to remove it from the requisition.
Item
Enable the inventory item that you are requisitioning.
Quantity
Enter the quantity of the item that you want to transfer.
With this option you can enter your received merchandise with or without a previously created purchase order.
Receive Merchandise without Purchase Order…
With this option you can enter your received merchandise without a previously created purchase order.
Deleted
Enable this option to delete a purchase order as soon as the buttons Receive or Close are clicked.
PO #
Enable the sequential number of a previously created purchase order to receive the associated merchandise. If a purchase order was created by the order expert and was not edited since its creation, this number is preceded by an icon.
Supplier
Supplier name of previously created purchase order.
Order Date
Date the previously created purchase order was created.
Select a PO# or "Receive Merchandise without Purchase Order" on the left and click the Received button to start entering a received order.
Select a PO# on the left and click the Delete button to remove an obsolete purchase order.
Select a PO# on the left and click the Export button to create an export file in XML format to be sent to a 3rd party software.
NOTE: The export will be stored in the folder defined in Inventory Management / View / Options / Purchase Order branch.
Click the close button to commit changes and exit this list and return to the Inventory Management module main screen.
PO #
Purchase Order sequential number.
NOTE: This field is displayed only for the merchandise reception of a previously created Purchase Order. This field is informational only and cannot be edited.
Supplier
Enable from the list the supplier from whom you made a purchase.
NOTE: For the merchandise reception of a previously created Purchase Order, this field is informational only and cannot be edited.
Reception Date
Enter the date when you received the merchandise.
NOTE: Your stock will be updated from this date.
Due Date
If indicated on the supplier invoice, enter the Date due.
Currency
Enable the appropriate currency.
Invoice #
Type in the invoice number you want to enter in the Back-Office. If the invoice already exists, the Back-Office finds it and brings the invoice on the screen.
Location
Enable the appropriate location.
User ID
Enter the name of the person who physically received and counted the merchandise during the reception.
NOTE: This field will only be available for the merchandise reception of a previously created Purchase Order. If receiving merchandise without a purchase order, this field will not be visible.
PO #
Purchase order sequential number.
Supplier
Supplier from whom you made the purchase.
Delivery
Merchandise reception date.
Invoice #
Invoice number entered in the previous window.
Code
Product code.
Description
Item description.
Qty Ordered
Quantity of items ordered.
Qty Received
Quantity of items received.
Format
Purchase format.
NOTE: If the Extended Format Description option is enabled in Inventory Management / View / Options, the Purchase format is followed by (inventory quantity and format). Example: Vodka 10 bottles (40 ounces). This is helpful is the actual received product is in 26 ounces bottles.
Price
Price paid by purchase format.
Total
Total $ amount of this received item.
Compl.
Enabled when quantity received equals quantity ordered.
Reason
Explanation of backorder.
Add an item to the purchase order.
Modify an item on the purchase order.
Remove an item from the purchase order.
Use the fast entry mode to add items to the purchase order.
Makes quantity received equal to quantity ordered for all items entered in the purchase order.
Scan
Use this button to scan the invoice during merchandise reception and save it in the folder C:\Posera\MaitreD\Data\Scan.
NOTE: You need to have a Twain-compatible scanner and drivers installed in Windows.
Attachment
If an invoice has been scanned, use this button to view the saved file.
Total
Total $ amount of all items entered in the purchase order.
Item
Enable from the list the inventory item to add to your purchase order.
Current supplier item list
Enable this option to limit the code list to items whose current supplier is the selected supplier.
Show Inactive
Enable this option to also display purchase inventory items with the Inactive option enabled.
Quantity
Quantity received for this item.
NOTE: If the Extended Format Description option is enabled in Inventory Management / View / Options, the Purchase format is followed by (inventory quantity and format). Example: Vodka 10 bottles (40 ounces). This is helpful is the actual received product is in 26 ounces bottles.
Price
Price paid by purchase format.
Add this item to the purchase order.
Exit fast entry mode.
Item
Enable this option to add an inventory item to your purchase order.
Code
Enable from the list the inventory item to add to your purchase order.
Current supplier item list
Enable this option to limit the code list to items whose current supplier is the selected supplier.
Show Inactive
Enable this option to also display purchase inventory items with the Inactive option enabled.
Quantity
Quantity received for this item.
NOTE: If the Extended Format Description option is enabled in Inventory Management / View / Options, the Purchase format is followed by (inventory quantity and format). Example: Vodka 10 bottles (40 ounces). This is helpful is the actual received product is in 26 ounces bottles.
Price
Price paid by purchase format.
Completed
Checked when quantity received equals quantity ordered.
NOTE: If you check the Completed option, the Quantity field above is automatically set to the Quantity Ordered. If you manually enter a value higher then the Quantity Ordered in the Quantity field above, the Completed option is automatically checked.
Undelivered Reason
Explanation of backorder.
Account
Enable this option to add a general ledger account to your purchase order.
Code
General ledger account to be added to.
Amount
Amount to add to the general ledger account.
With this option, you can enter any spillage in the kitchen or at the bar.
Date
Enter the date when the waste occurred.
Click the Add button to add an Item to the waste list.
Select an existing item and click the Modify button to change its properties.
Select an existing item and click the Delete button to remove it from the waste list.
Item
Select an inventory item from the list.
Quantity
Enter the quantity that you have lost.
Location
Select the appropriate inventory location.
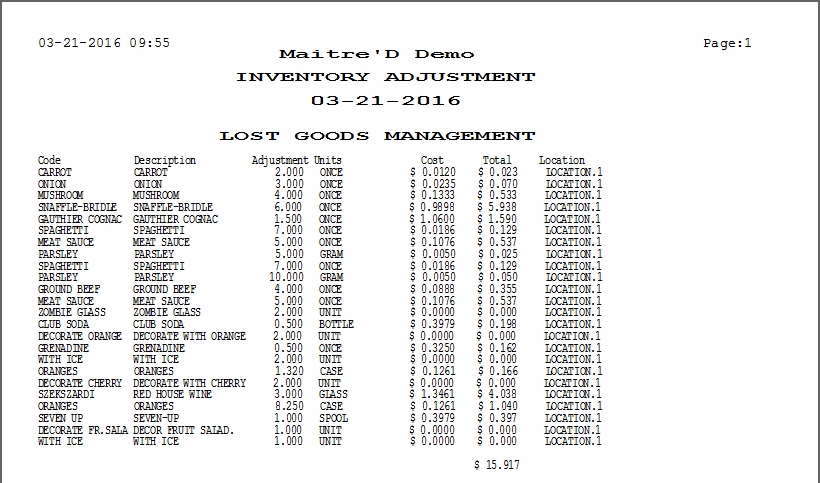
Click OK to commit changes. A legacy report will be displayed on the screen, summarizing the changes made to the inventory.
Click the Cancel button to exit without applying any changes.
Enter the sales items (prepared dishes) that have been wasted (e.g. dropped) or that the customers have turned back. Select Revenue Center. See Inventory item waste.
Date
Enter the date when the waste occurred.
Click the Add button to add an Item to the waste list.
Select an existing item and click the Modify button to change its properties.
Select an existing item and click the Delete button to remove it from the waste list.
Item
Select a sales item from the list.
Revenue Center
Select the appropriate Revenue Center.
Mode
Select the appropriate Mode.
Quantity
Enter the quantity that you have lost.
Location
Select the appropriate inventory location.
Click OK to commit changes. A legacy report will be displayed on the screen, summarizing the changes made to the inventory.
Click the Cancel button to exit without applying any changes.
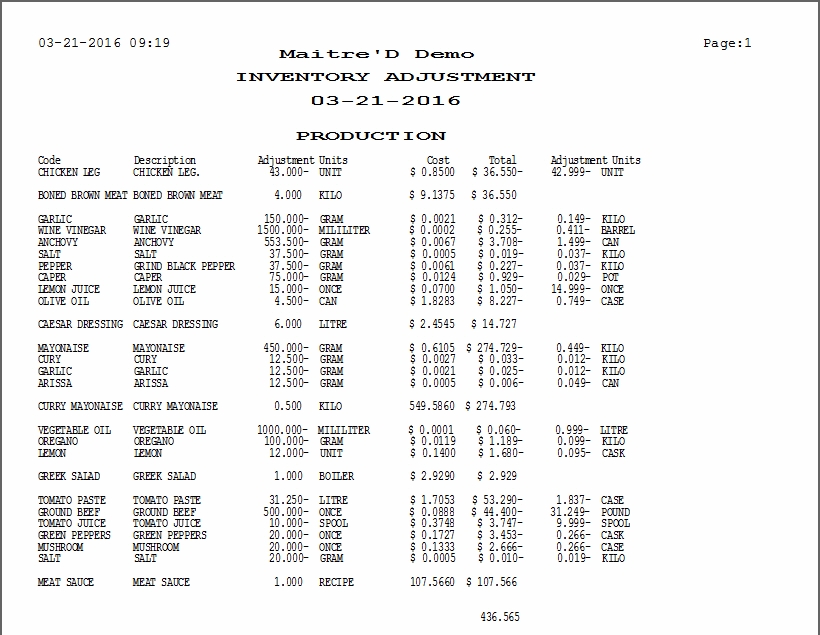
The Production option allows to create a batch for producing a large quantity of menu items and to decrease the inventory based on recipe ingredients that you use to make the batch. For example, you could produce 25 club sandwiches every morning for lunch. You could also make 100 gallons of spaghetti sauce every Friday. In the production screen, you can enter the date required for production, add new items, make modifications, or delete an item.
Date
Select the Date for this Production.
Click the Add button to add an Item to this production.
Select an existing item and click the Modify button to change its properties.
Select an existing item and click the Delete button to remove it from this production.
Item
Select the inventory item for which you want to make a production.
Quantity
Enter the inventory unit quantity that you want to produce.
Location
Select the Location where the batch will be made.
Click OK to commit changes. A legacy report will be displayed on the screen, summarizing the changes made to the inventory.
Click the Cancel button to exit without applying any changes.
The Reversed Production option will produce an inventory item based on the quantity of the main ingredient of the recipe given for production. In the production screen, you can enter the date required for production, add new items, make modifications, or delete an item.
Date
Select the Date for this Production.
Click the Add button to add an Item to this production.
Select an existing item and click the Modify button to change its properties.
Select an existing item and click the Delete button to remove it from this production.
Item
Select the inventory item for which you want to make a production.
Quantity
Enter the inventory unit quantity that you want to produce.
Location
Select the Location where the batch will be made.
Click OK to commit changes. A legacy report will be displayed on the screen, summarizing the changes made to the inventory.
Click the Cancel button to exit without applying any changes.
Merchandise Reception
puechase Order
This report will show you the percentage of increase of the buying cost by item for every item affected by a price change for a period of time. This will help to find out the reason for an operating cost increase by spotting the variation of the buying price.
This report may also be useful when you are buying stock at a guaranteed price from a supplier and you want to verify no price changes were maid.
Supplier Code
Select a supplier code from the list
Product Code
Select a product code from the list.
Inventory Category
If you have selected all the products, you can specify an inventory category.
Inventory Group
If you have selected all the categories, you can specify an inventory group.
Date
Select a date range by entering the beginning and ending date.
Sort Order
Select the field you want the information to be sorted on. There are six different sorts available: The Description The Category
Time period The Group The Supplier
The %
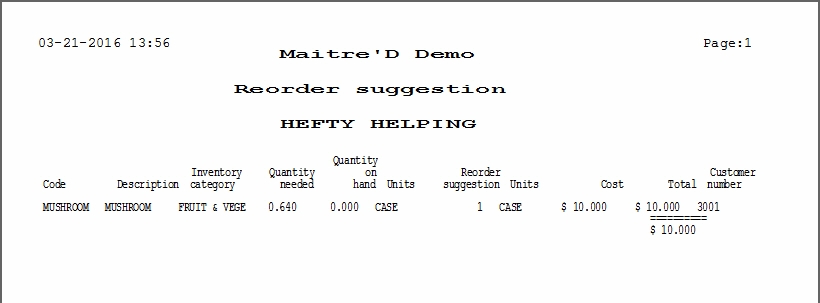
This option will print a reorder suggestion according the information you have entered with the "Production Schedule " option.
Supplier Code
Select a supplier code from the list.
Inventory Category
If you select all the items, you can specify the inventory category you want to report.
Inventory Group
If select all the categories, you can specify an inventory group.
Location,Department
With the multi-locations option the system gives you the possibility to select a specific location in a drop-down list. If you want this report for all the locations just check the "All" option. In this case you will have to specify if you want a specific department by selecting its name or by checking "All' option if you want all of them.
Sort Order
Select the field you want the information to be sorted on. There are four different sorts available: The Description The Category The Group The Supplier
The following information will be printed on this order:
Code
The product code of the inventory item.
Description
The product description of the inventory item.
Supplier
The description of the last supplier.
Inventory Category
The inventory category belongs to.
Quantity Needed
This is the quantity you should need according the information entering with "Production Schedule" option.
Quantity on Hand
The actual quantity in stock using the inventory formats.
Inventory Unit
The inventory format of this item.
Reorder Suggestion
This is the quantity you should order (using the buying format) to get enough stock for the production.
Buying Unit
The is the purchase format.
Cost
This is the last unit price you paid for this item.
Total
The total dollar amount to purchase. The last line of this column will show you the complete total.
The cooking schedule function can be used to plan the quantity of key items to cook throughout the day. This feature is especially helpful for items that require a longer cooking time by letting you prepare these items in advance. The system looks at your sales for such items on the same day a week ago, and assumes that you will sell approximately the same number of items at approximately the same time that day. The system also takes into account the number of these items actually sold today, so it does not have you pre-cook too many of them. Prior to using the cooking schedule, you have to set it up in View \ Options \ Cooking Schedule branch. This function does not do any inventory posting. It only helps you schedule your work.
Item
Enable from the list the item to track. It must first have been configured in View \ Options \ Cooking Schedule.
Time
Hour slice.
Current
Sold/Hour
Quantity sold during that hour today.
Total
Total quantity sold from midnight until that hour today.
Previous
Sold/Hour
Quantity sold during that same hour 7 days ago.
Total
Total quantity sold from midnight until that hour 7 days ago.
Var/Hour
Difference between quantities sold during that hour today and 7 days ago.
Var/Day
Difference between total quantities sold from midnight until that hour today and 7 days ago.
Projection (Xh)
Projected quantity needed in the next X hours, where X is the time projection selected for this item.
On Hand
Quantity of this item on hand.
Cook
Quantity of this item to cook during this hour to avoid running out according to the variation between today and 7 days ago..
Click this button to manually change the quantity on hand.
Click this button to print the cooking schedule.
New On Hand Quantity
Enter a manual adjustment of you on hand quantity, disabling the automatic calculation.
Auto
Enable this option for the system to revert back to automatic calculation of on hand quantity.
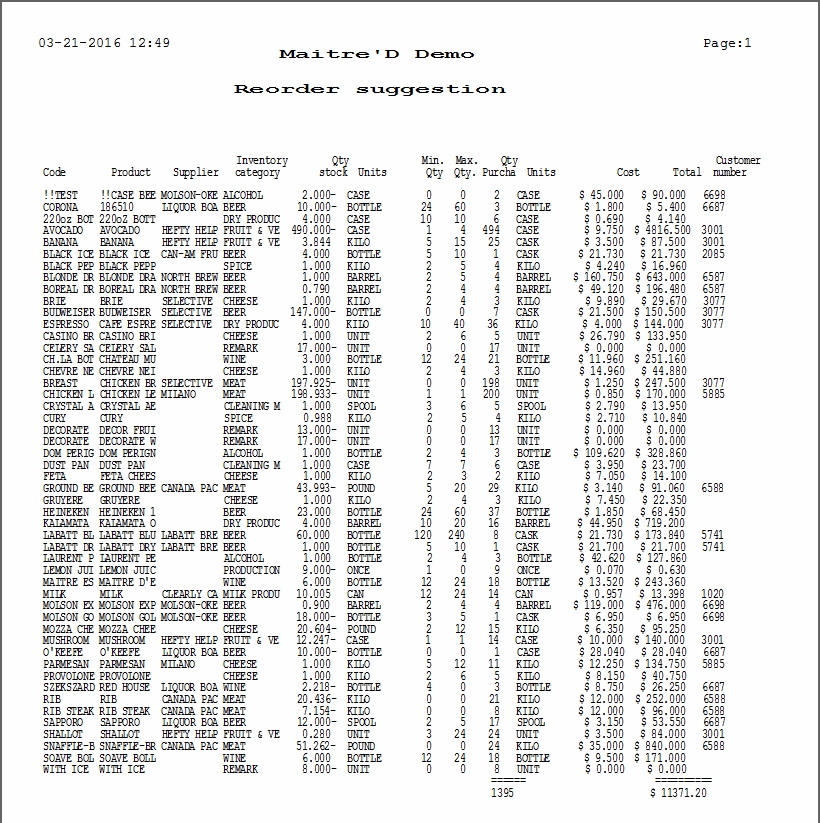
This option generates a report showing what should be reordered so that the inventory does not stay under its pre-set minimum. It will suggest the quantity to order in the buying format so that the inventory gets back to its pre-set maximum. The following information will be printed on this report:
Supplier Code
Select a supplier code from the list
Inventory Category
If you select all the items, you can specify the inventory category you want to report.
Inventory Group
If select all the categories, you can specify an inventory group.
Location
With the multi-locations option the system gives you the possibility to select a specific location in a drop-down list. If you want this report for all the locations just check the "All" option. In this case you will have to specify if you want a specific department by selecting its name or by checking "All' option if you want all of them.
Department
Departments can be selected only if the All checkbox is un-checked for the Location filter.
Sort Order
Select the field you want the information to be sorted on. There are four different sorts available: The Description The Category The Group The Supplier
The following information will be printed in this order:
Code
The product code of the inventory item.
Product
The product description of the inventory item.
Supplier
The description of the last supplier.
Inventory Category
The inventory category this item belongs to.
Qty Stock
The actual quantity in stock using the inventory formats.
Inventory Unit
The inventory format of this item.
Min.Qty
The minimum quantity using the inventory format entered for that item.
Max.Qty
The maximum quantity required using the inventory format.
Qty.Purchase
The quantity suggested to buy (using the buying format) in order to reach the maximum quantity.
Buying Unit
This is the purchase format.
Cost
This is the last unit price you paid for this item.
Total
The total dollar amount to purchase. The last line of this column will show you the complete total.
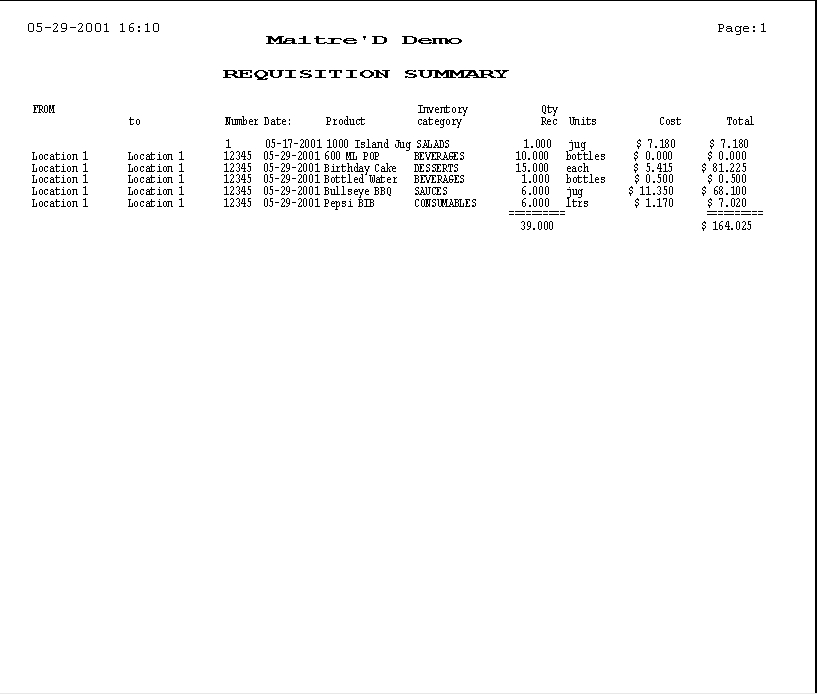
This option allows to get a history report of requisition to and from any locations during a specified period. Before the system can generate it you will have to complete the following information:
Product Code
Select the inventory item code.
Inventory Category
If you have selected all the items at the previous field you have the possibility to specify a inventory category.
Inventory Group
If you have selected all the categories at the previous field you have the possibility to specify an inventory.
From
This is the source location of the requisitions you want to list.
To
This is the destination location of the requisitions you want to list.
Date
You can enter the beginning and the ending date of the period you want this report for.
Number
You can enter the Requisition number you want this report for.
Sort Order
Select the field you want the information to be sorted on. There are five different sorts available: The Description The Category The Group By Time period
The Number
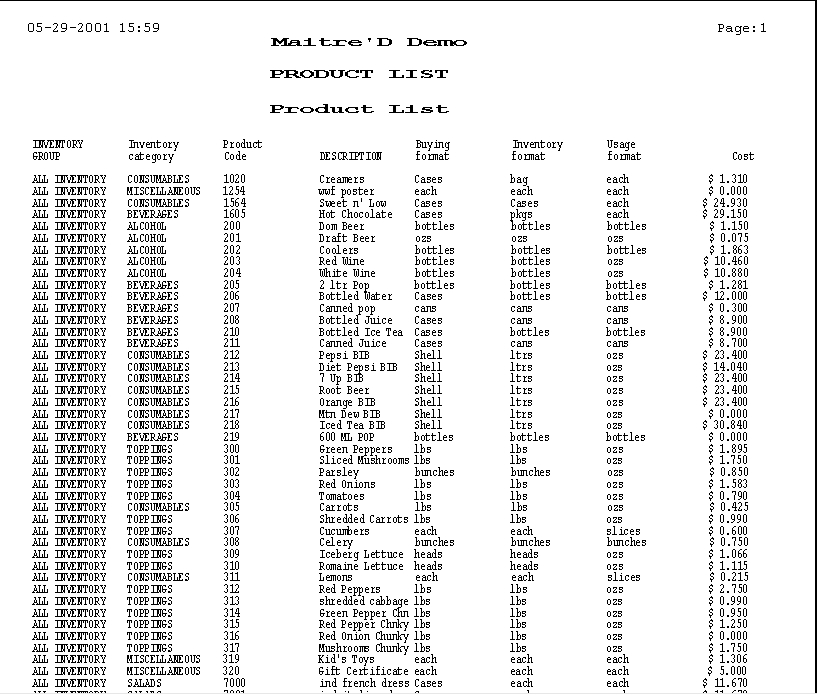
The Inventory Management Module allows to create any type of product list you need to manage your inventory. You can program the list format with the "Products List Setup " option.
Report
Select the format of the list you want.
Supplier Code
Select the supplier code from the list displayed. If you want all the suppliers check "All".
Product Code
This is an eight letters mask. The system uses this mask to select the item to be printed. For example you can enter "AR" to get all the items beginning by "AR" (this function is case insensitive). If you want all the items check the "All".
Inventory Category
If you select all the items you can specify the inventory category you want to report
Inventory Group
If you select all the categories, you can specify an inventory group
Location
If you have the multi-location option you can select for which location you want this report.
Site
Type in the site description you want or check the "All" option for all sites.
Sort Order
Select the field you want the information to be sorted on. There are six different sorts available: The Description The Category The Group The Supplier
The Product code
The Site
The Production schedule option can be used to schedule the next weekly production. The computer will include the needed products day by day for the entire following week and print a report if requested. This function will not do any inventory posting; it will only help schedule your work and purchases. You can print the Production schedule with Reorder Report option.
Day
Enable the weekday when an employee should produce a batch.
Enable this option for adding an entry .
Enable this option for Modify an entry.
Enable this option for Deleting an Entry.
Revenue Center
To produce a sales item, select the appropriate Revenue Center.
To produce an ingredient, select the Product option.
Mode
To produce a sales item, select the appropriate Mode.
Item
Select the sales item or product code to produce.
Quantity
Enter the quantity to produce.
Print recipe
Enable this option to include the menu items and preparation recipes on the Order Report.
This function permits creation or modification of the report format being used with the "Products List" report. You can create as many reports as you need.
Select this option to Modify a report.
Select this option to Add a new report.
Select this option to Remove a report.
Code
This is the code for this report format.
Description
This is the complete description for this report format. This field will be printed as a title on the reports.
Column 1 to 10
For each format report you can select up to 10 columns. There are 25 options available to fill a column. When an option as been enabled it will removed from the list of available options, this will prevent to insert two time the same information in a report.
Options List:
Adjustment
Date of adjustment.
Average Cost
The average cost.
Buying Format
The unit of measure used for the buying format.
Code
The code of the inventory item.
Cost
The actual buying cost.
Description
The complete item description.
Inventory Format
The unit used for the inventory format.
Inventory Format Quantity
The quantity of the buying format constituting an inventory format.
Inventory Category
The category this inventory item belongs to.
Inventory Group
The group this inventory item belongs to.
Last Cost
The buying cost before the last increase.
Last Increase
Day of increase.
Last Supplier
The supplier before the actual supplier.
Maximum
This option will print the maximum stock quantity requested.
Minimum
This option will print the minimum stock quantity requested.
Monthly turnover
This is the number of months it will take to sell the inventory.
Periodic Turnover
This is the number of period it will take to sell the inventory.
Quantity on Hand
Quantity in stock.
Site
The site in the requested location.
Supplier
The actual supplier.
Unit Cost
The buying cost for a buying format.
Usage
This is the average amount of product being used.
Usage Format
The unit used for the usage format.
Usage Format Quantity
The quantity of the inventory format constituting an usage format.
Weekly Turnover
This is the number of weeks it will take to sell the inventory.
Not Defined
Any unused.
This report shows you your sales grouped by supplier, invoice number ,date and inventory group for the specific week.
Period
Enter the Period number for which you want to see this report.
Week
Enter the Week number for which you want to see this report.
With this option you will see the supplier, the date, the product, the quantity received, the cost of each item and the amount of each purchase.
Supplier Code
Select the supplier code from the list displayed. If you want all the suppliers check "All".
Product Code
Select the Product code from the list displayed. If you want all product codes check "All".
Inventory Category
If you select all the items you can specify the inventory category you want to report.
Inventory Group
If you select all the categories, you can specify an inventory group.
Location
If you have the multi-location option you can select for which location you want this report.
Date
Enter here the Beginning and the ending date for this report.
Sort Order
Select the field you want the information to be sorted on. There are six different sorts available: The Description The Category The Group The Supplier
By Time period
By Check number
This report will show you the following information:
Supplier
Displays the supplier name.
Date
Displays the date of the invoice.
Product
Displays the inventory item description.
Quantity Received
Displays the quantity received.
Cost of each Item
Displays unit cost of the inventory item.
Total Invoice
Displays the total amount per invoice.
This report shows purchases grouped by supplier, invoice number, date and inventory group for the specific period.
Supplier
For the Purchase Analysis report, you can select a specific Supplier or click "All" to see all suppliers.
Start Date,End Date
You can select a range of date or select "All" to see the complete purchase analysis.
This report shows you your sales grouped by supplier, invoice number ,date and inventory group for the specific week.
Period
Enter the Period number for which you want to see this report.
Week
Enter the Week number for which you want to see this report.
