Loading...
Loading...
Loading...
Loading...
Loading...
Loading...
Loading...
Loading...
Loading...
Loading...
Loading...
Loading...
Loading...
Loading...
Loading...
Loading...
Loading...
Prior to installing Maitre’D, the computer’s hard drive must be properly formatted and partitioned, and a compatible version of Microsoft Windows® needs to be installed. For instruction on formatting and partitioning the hard disk and installing Microsoft Windows®, please refer to Microsoft Windows® documentation or to the documentation provided by your computer's manufacturer.
This manual explains the installation for the Maitre’D software on the Microsoft Windows 10 operating system with Microsoft Network. Maitre’D can be installed on any networking system that uses or emulates the TCP/IP communication protocol. Please refer to the appropriate documentation for more information.
Your operating system needs to be kept up-to-date with all the latest updates. This will ensure that all critical and security-related updates are installed and will help maintain PCI-DSS compliance.
Most recent Windows operating systems use a feature called User Account Control or UAC . This feature exists to improve the operating system's security by preventing some types of applications to run without the user's knowledge. Make sure that this feature is activated and set to the default (recommended) level before installing Maitre’D. Using UAC is required to maintain PCI-DSS compliance and to ensure basic safety of the system.
IMPORTANT! In Windows 10, disabling UAC through registry hacks or Group Policy Objects (GPOs) will cause some operating system features to stop working correctly, in addition to compromize the system's overall security. Also, installing any software in a “non-UAC” environment and re-enabling UAC afterwards WILL cause issues. For instance, automatic End of Day may not work, or you may be unable to start or stop the Maitre’D Back-Office server from the Server Control module. Other unforeseen and unwanted side effects may also occur.
Starting with Windows 10, Windows Smart Screen is an integral part of the operating system. This feature is active by default and needs to remain active in order to ensure basic safety of the system and maintain PCI-DSS compliance.
Install a reputable anti-virus and anti-malware solution on the PC. The Anti-Virus / Anti-Malware solution needs to be fully operational at all times and maintained with the latest updates and virus definitions. It needs to be installed on the main Back-Office PC as well as all POS workstations, Auxiliary Back-Office and Backup Servers. PayFacto does not recommend any brand in particular. However, while Microsoft's Windows Defender solution is free, bundled with Windows and works in most cases, we do recommend using a reputable, independently branded and well reviewed product.
This is a critical component of the Maitre’D system’s security and a requirement for PCI-DSS compliance.
In addition to the perimeter firewall which protects your network, a software firewall needs to be installed on the main Back-Office PC as well as all POS workstations, Auxiliary Back-Office and Backup Servers. The Windows Defender Firewall is adequate for most installations.
This is a critical component of the Maitre’D system’s security and a requirement for PCI-DSS compliance.
POS Workstations are generally pre-configured with an appropriate version of Microsoft Windows. Like the Maitre’D Back-Office Server PC, make sure to:
Install all Windows Updates.
Ensure that UAC is enabled and set to the default level.
Ensure that Windows Smart Screen is enabled.
Install, update and maintain a reputable anti-virus / anti-malware solution.
Install, update and maintain a reputable software firewall.
Make sure that the TCP/IP network is properly configured so that the Maitre’D Back-Office Server PC and all POS workstations can communicate with each other.
IMPORTANT! With Windows 10, Network Discovery and File & Printer sharing are disabled by default. Password Protected Sharing is enabled. These default settings may prevent Maitre'D from working correctly. See how to correctly configure these settings in this topic: Configure your Windows Network Profile
To be able to download files for the Maitre'D POS system, you need a distributor account. Please contact your sales representative to obtain an account if you don't already have one.
Logon to:
Select your language.
Enter your username and password.
Click the Login button.
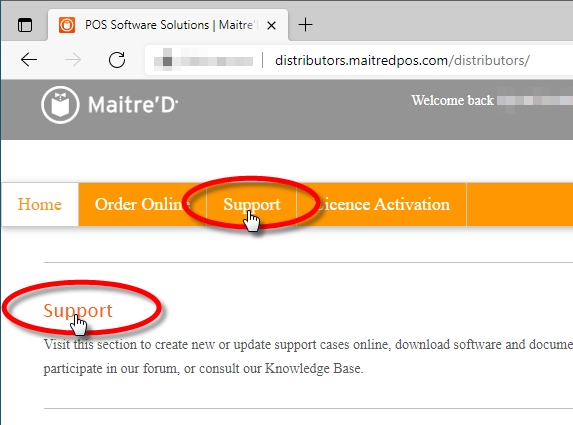
Click the Support link, either at the very top of the page or in the main body.
Click Knowledge Base. (You may need to scroll down a bit) This will open a new browser window.
Click the Knowledge Base tile.
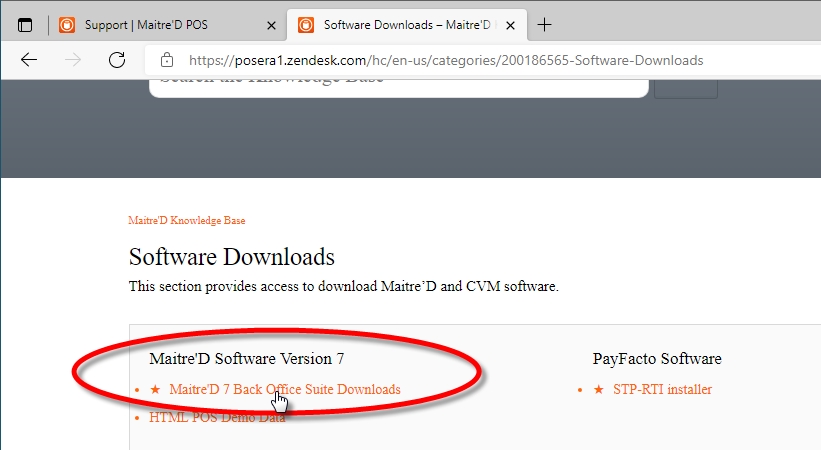
Click the Software Downloads tile.
Click the Maitre'D 7 Back-Office Suite Downloads link.
For Maitre'D 7, there are 3 downloads:
Download this file if Maitre'D is already installed and needs to be upgraded to the latest version.
Download this file to install Maitre'D from scratch on a new system. Includes Service Pack Update 7.08.000.180.
Download this file to have the full contents of the original Maitre'D DVD, which includes the Maitre'D Back-Office Full Install, with a graphical user interface to facilitate the installation of backup and auxiliary servers, POS workstations, etc.
IMPORTANT! Downloaded files are *.zip archives that need to be extracted for the installation to work. Please see Extracting Files
Related Topics
The Network Profile feature was introduced with Windows Vista and was carried over to later versions of Microsoft Windows. In Windows 10, the default Network Profile settings will prevent Maitre'D from working correctly by disabling File & Printer sharing and forcing Password Protected Sharing. This topic explains how to configure these settings to allow Maitre'D to operate normally.
By default, on a new Windows 10 installation, your Network Profile will be set to "Public". This is the most secure setting, and is intended for use on public networks, such as public WiFi provided at airports, coffee shops, etc. This setting will "hide" the PC from other devices on the network, which will cause issues with Maitre'D. This profile also hides settings that need to be enabled for Maitre'D to work correctly. This needs to be changed to either Private or Domain.
In the Windows Notification area, click on the Network Connection icon, then click on the network connection you wish to configure. (there could be more than one.)
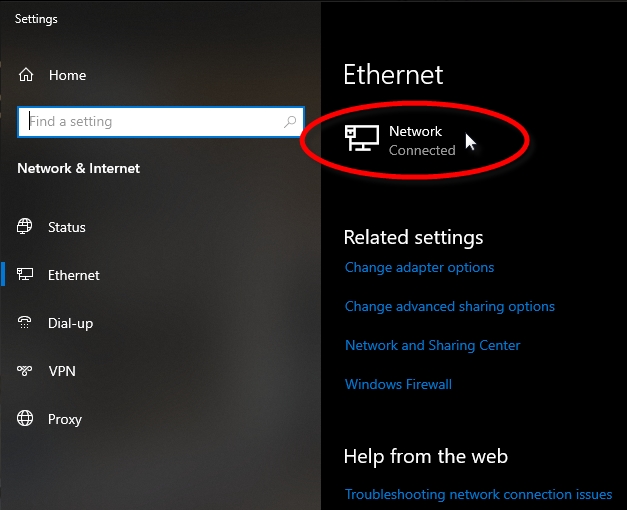
This will bring up basic settings. Click on the Network connection (again).
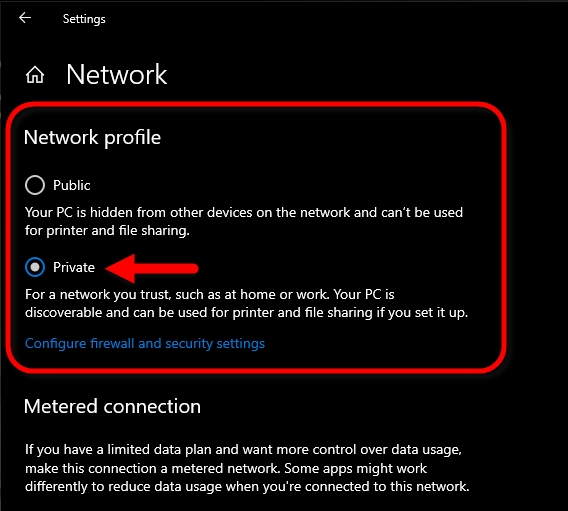
The Network profile options will be displayed. Select either Private or Domain.
If your Maitre'D Main Back-Office PC is part of an Active Directory Domain, your Network Profile needs to be set to "Domain". If the PC is not on a domain, this option will not be available, therefore your Network Profile needs to be set to "Private".
If you believe that the PC should be using the Domain Network Profile but this option is not available, please ask your network administrator for advice.
Just like before, in the Windows Notification area, click on the Network Connection icon, then click on the network connection you wish to configure. (there could be more than one.)
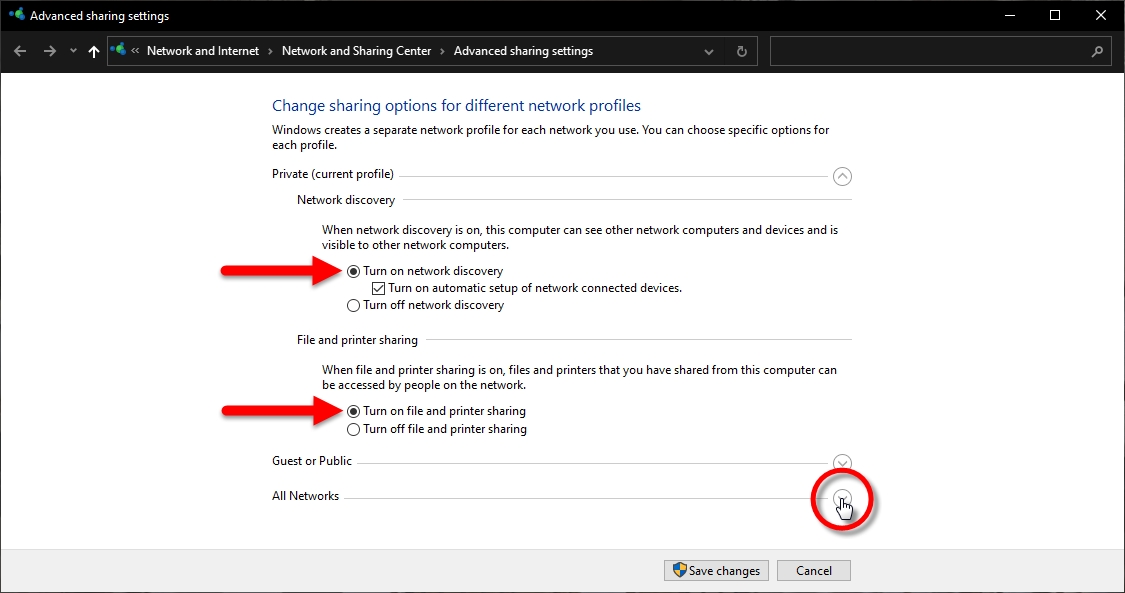
This will bring up basic settings. This time, click Change advanced sharing options.
Under the Private (or domain) profile, make sure that:
a. Turn on network discovery is selected.
b. Turn on file and printer sharing is selected.
Click on the down-arrow next to All Networks. This will display more options.
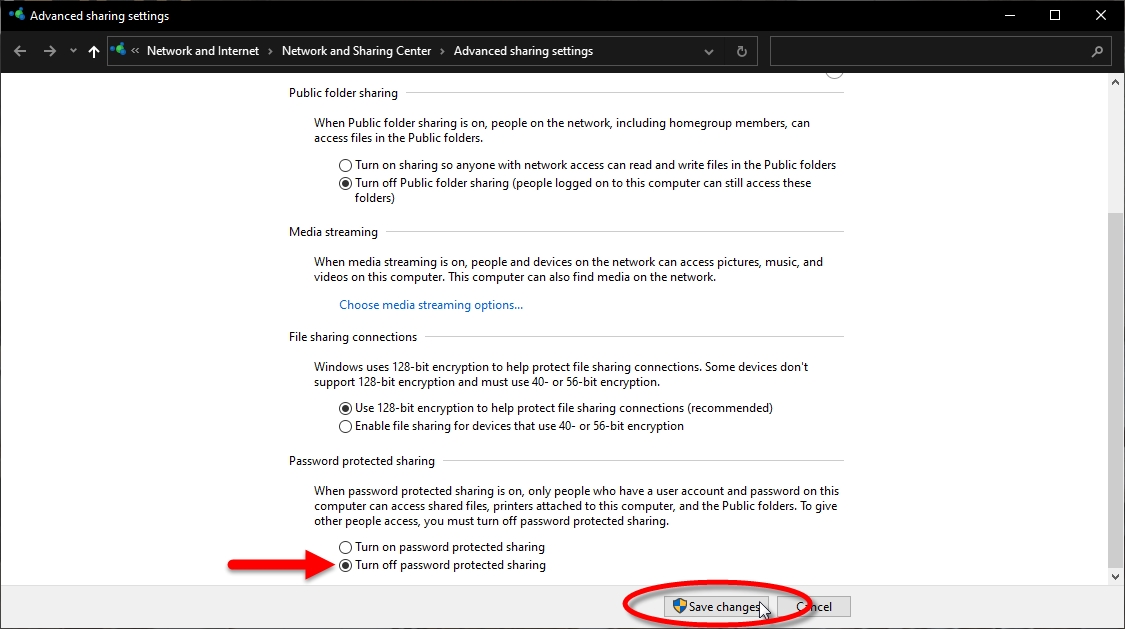
Scroll down to the Password Protected Sharing section and select Turn off password protected sharing.
Click Save changes.
This configuration needs to be done on the Main Back-Office PC, all Auxiliary Back-Office and Backup Server PCs, as well as on all POS workstations.
The connectivity between the Main Maitre'D Back-Office PC and other components of the Maitre'D network can easily be tested. For the example below, we are testing connectivity to a PC named "MAIN-BACK-OFFICE".
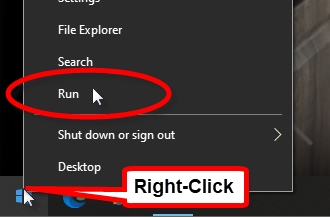
From any PC or POS on the Maitre'D network, right-click the Windows Start button and select Run...
In the Run... box, type two back-slashes (\\) followed by the name of the PC you want to connect to. For example:
\\MAIN-BACK-OFFICE
Click OK.
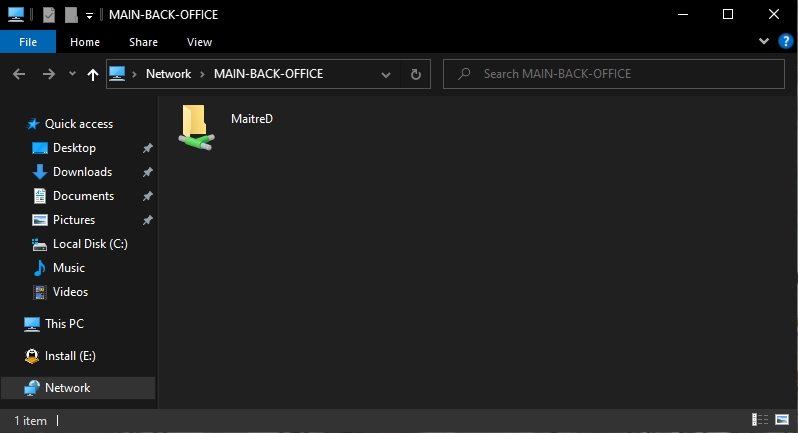
a. If the Maitre'D Back-Office is already installed, you will see the MaitreD shared folder on the PC named MAIN-BACK-OFFICE.
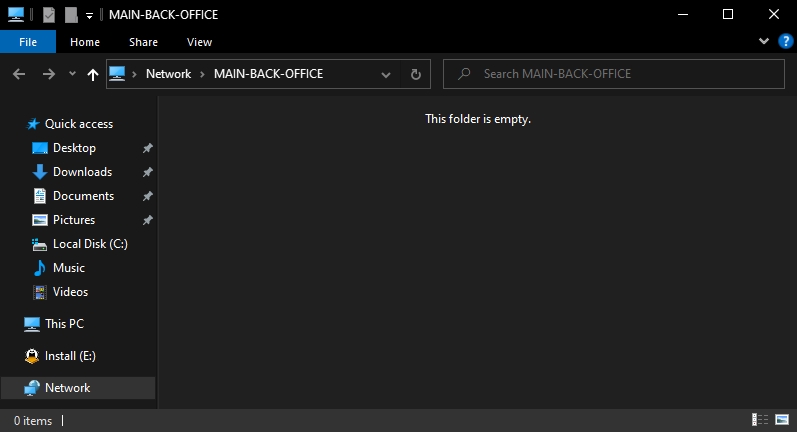
b. If the Maitre'D Back-Office is not yet installed, you will see an empty folder on the PC named MAIN-BACK-OFFICE.
c. If the network settings are not configured properly, you will see an error message.
The network settings now allow communication between all the components of the Maitre'D Network.
To save some time during the installation of a new Maitre'D POS system, a custom installer set can easily be created with the latest service pack update. This way, Maitre'D will be installed and updated to the latest version in one single operation.
Custom installers can be created from the Maitre'D DVD or the Back-Office full install. Download the one you want (or both), and also download the latest service pack update.
Instructions to download files are provided here:
The files downloaded from the Distributor portal are *.zip files that need to be extracted before they can be used. Fortunately, even a "vanilla" Windows 10 installation has the necessary tools to work with *.zip files.
Copy downloaded files to your Windows Desktop.
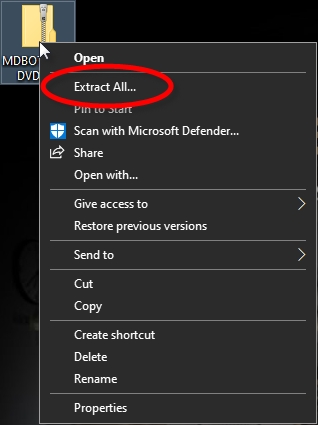
Right-Click the file you wish to extract, and select the Extract All... option.
By default, the Windows Zip extraction tool will create a folder with the same name as the Zip file where files will be extracted. Don't change anything and simply click the Extract button. (Don't worry, the original *.zip file will NOT be overwritten).
A new folder will be created to store all the extracted files. You may see a progress bar while large files are being extracted.
The folder where files were extracted will open automatically for you. You can minimize it to the task bar. We'll be using this later.
Repeat this process for all 3 downloaded files:
MDBO708000DVD.zip (Maitre'D DVD)
MDBO708000BO.zip (Maitre'D Back-Office Full Install)
MDBO708000xxx.zip (Service Pack update, where "xxx" is the Service Pack version number)
NOTE: If you use a third-party archiving tool to extract files, please refer to the documentation provided with your tool of choice.
Now that all files were extracted, we need to copy the latest service pack update in the installer sets.
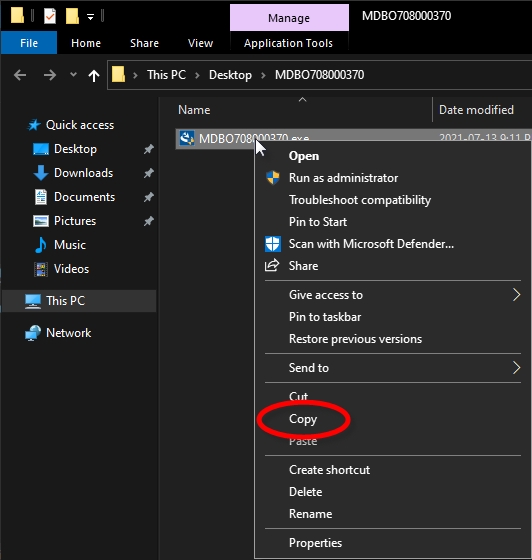
Open the MDBO708000xxx folder, then right-click the MDBO708000xxx.exe file and select Copy.
Open the MDBO708000DVD folder, then browse to the \bo\Disk1\ subfolder.
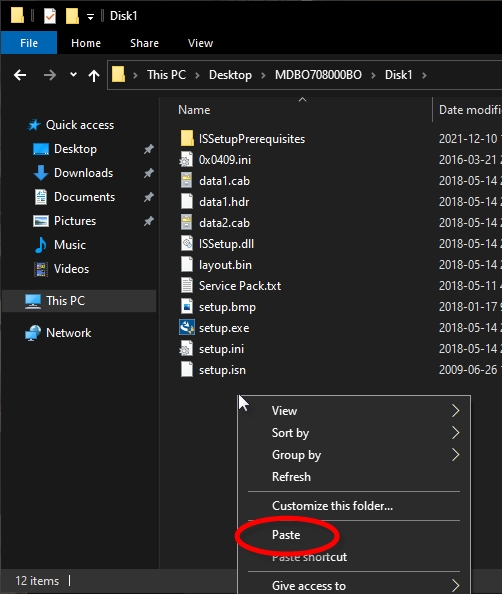
Right-click in an empty space within the folder and select the Paste option.
The file will be copied.
Copy the contents of the MDBO708000DVD folder to the root of a removable media, such as a DVD-ROM or a USB thumb drive.
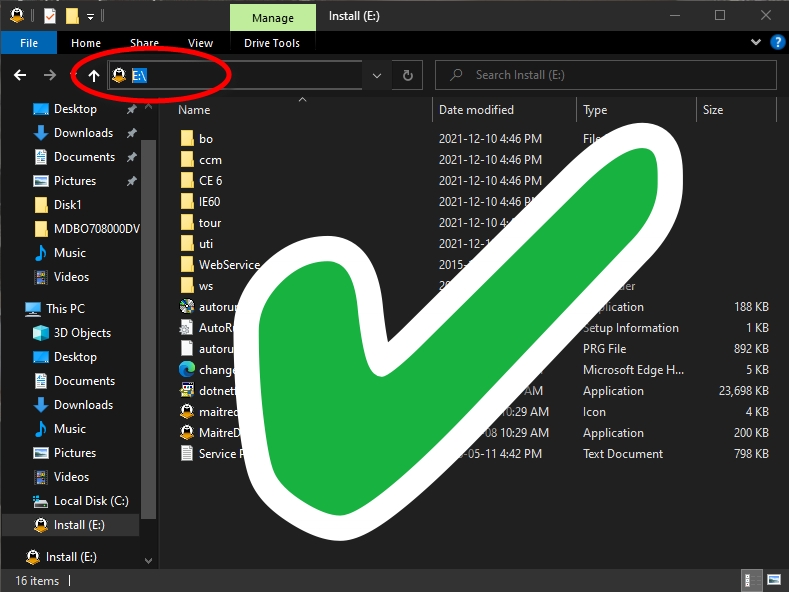
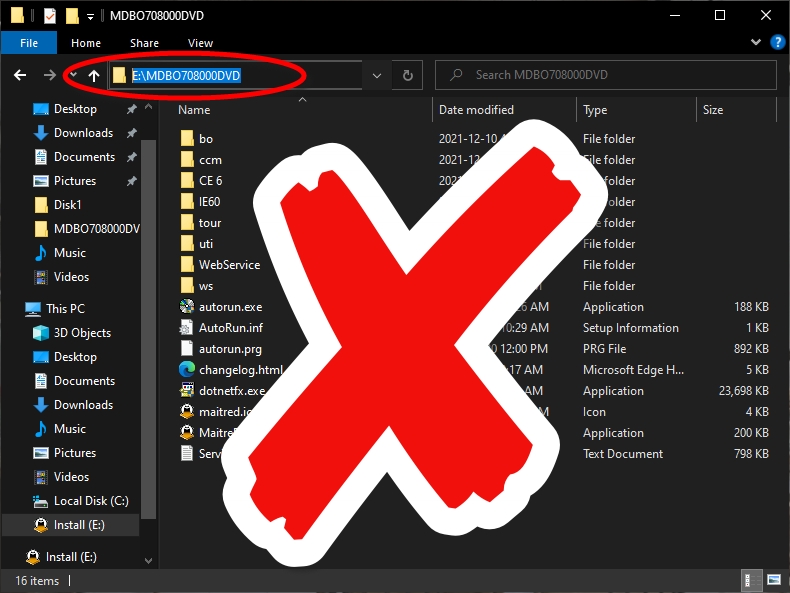
IMPORTANT! The files must be copied at the root of the removable media (DVD-ROM or USB Thumb drive). If the files are inside a sub-folder, the links provided in the autorun program will not work, and you will get error messages when attempting to install applications.
Installer files are located at the root of the E:\ drive.
This installer will work.
Installer files are located inside a folder, in E:\MDBO708000DVD.
This installer will NOT work.
Open the MDBO708000xxx folder, then right-click the MDBO708000xxx.exe file and select Copy.
Open the MDBO708000BO folder, then browse to the \Disk1\ subfolder.
Right-click in an empty space within the folder and select the Paste option.
The file will be copied.
The installers are now ready to be used. With the service pack update file copied to the installer folder, the installer will automatically detect that an update is available and prompt for its installation during the Maitre'D setup process.
You can run the Maitre'D Back-Office installation program straight from your desktop. However, it is recommended to copy the install set(s) to removable media, such as a portable hard drive, DVD-ROM or USB thumb drive.
IMPORTANT! The DVD Installer files MUST be copied to the root of a removable media (DVD-ROM or USB Thumb Drive) to work correctly. The Autorun installer will not work if the files are located in a sub-folder.
Before Installing Maitre'D
Configure your Windows Network Profile
Download Maitre'D Setup Files
Creat your own Custom Maitre'D Installer



Originally, the Maitre'D installer was shipped on a physical DVD. Being fully aware that many recent laptops and even full-sized desktop computers are no longer shipped with optical drives, and also to reduce e-waste and shipping costs, the files are available for download from the Maitre'D Distributor Portal.
Please see:
Insert the DVD in the DVD-ROM drive.
The disk should auto-play.
Use File Explorer to browse your DVD-ROM drive.
Double-click Autorun.exe.
Copy all the DVD files to the root of a removable media, such as a USB thumb drive.
Use File Explorer to browse the removable media.
Double-click Autorun.exe.
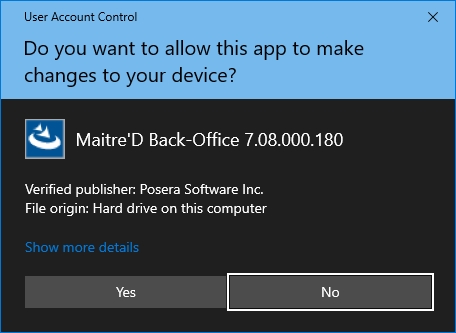
As the Autorun tool starts, you may see a Windows User Account Control (UAC) message. Click Yes.
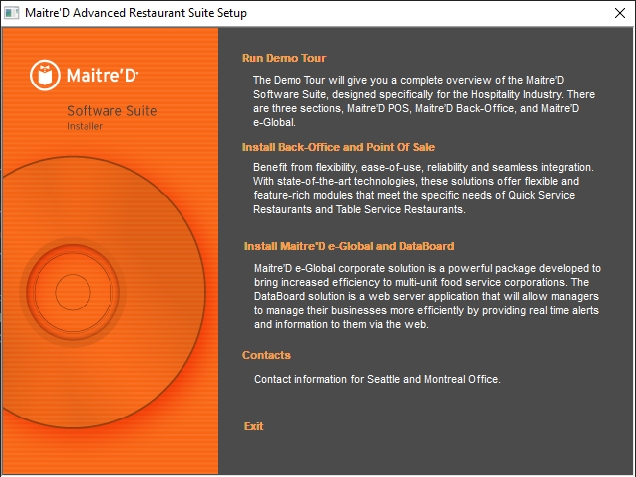
The first installer screen will be displayed:
Select the option to take a tour of Maitre'D.
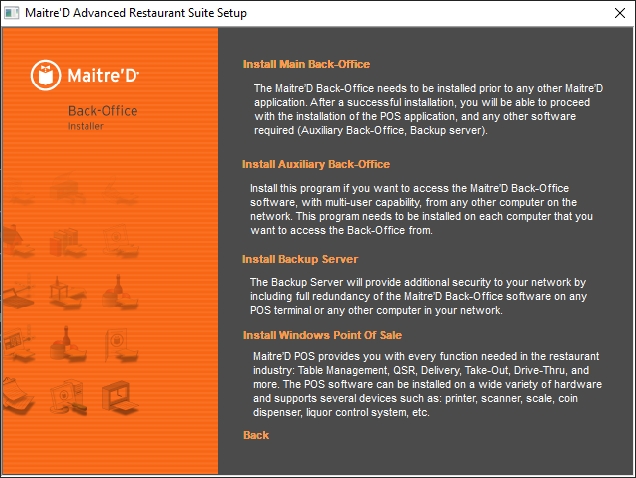
Select this option to install the Maitre'D Back-Office Server, Backup Server, Auxiliary Server or Point of Sale software. This will open another menu page with all necessary installation options.
Select this option to install the Maitre'D e-Global solution. This will open another menu page with all necessary installation options.
IMPORTANT! The DataBoard option listed here is obsolete. Please consult up-to-date DataBoard documentation and installation instructions here:
Select this option to view contact information.
IMPORTANT! This will display old Posera contact Information. Please contact PayFacto instead. View up-to-date contact information here:
Select this option to exit from the installer.
Select this option to install the Maitre'D Main Back-Office server software.
The Maitre'D Back-Office needs to be installed prior to any other Maitre'D application. After a successful installation, you will be able to proceed with the installation of the Point of Sale application, and any other software required, such as the Auxiliary Back-Office or Backup Server.
Select this option to install a Maitre'D Auxiliary Back-Office.
Install this program if you want access to the Maitre'D Back-Office software, with multi-user capability, from any other computer on the Maitre'D network. This program needs to be installed on each computer that you want to access the Back-Office from.
Select this option to install a Maitre'D Backup Server.
The Backup Server will provide additional security to your network by including full redundancy of the Maitre'D Back-Office software on any Point of Sale workstation or any other computer in your network.
Select this option to install the Maitre'D Point of Sale software on a workstation.
The Maitre'D Point of Sale provides you with every function needed in the restaurant industry. Table management, QSR, Delivery, Take-out, Drive-Thru and more. The Point of Sale software can be installed on a wide variety of hardware and supports several devices such as: Printers, scanners, scales, coin dispensers, liquor control systems, etc.
Select this option to return to the previous screen.
To start the installation of the Maitre'D Back-Office, select the first option: Install Main Back-Office. This will launch the Maitre'D Back-Office InstallShield Wizard.
Select this option to install the Maitre'D e-Global Solution.
The Maitre'D e-Global corporate solution is a powerful package developed to bring increased efficiency to multi-unit food service corporations. It allows them to receive data from all units at the frequency they desire. e-Global also allows them to manage each unit's database remotely, providing more control over menus, promotions and prices.
Do not use this option, as this version of DataBoard is now obsolete.
IMPORTANT! The DataBoard option listed here is obsolete. Please consult up-to-date DataBoard documentation and installation instructions here:
Before the license can be activated, you need:
The Maitre’D license serial number can be obtained by ordering a Maitre’D license through our ordering system, by phone or by e-mail.
NOTE: Please note that there is a turnaround time of 4 hours for all orders and that new licenses are only created during normal business hours. The License serial number can be found on the invoice received after the creation of the license.
Obtain the commerce name from the restaurant owner or manager. The commerce name is limited to 20 characters, including spaces.
When a new license is activated for the first time, you will be given the opportunity to configure the commerce name as it will appear in the Maitre’D Back-Office, on report headers and on the header of printed guest checks, invoices and receipts.
With the license serial number and commerce name in hand, you can proceed with the license activation.
After restarting from the installation of the Maitre’D Back-Office, Auxiliary or Backup Server software, the Maitre’D License Activation prompt will automatically appear.
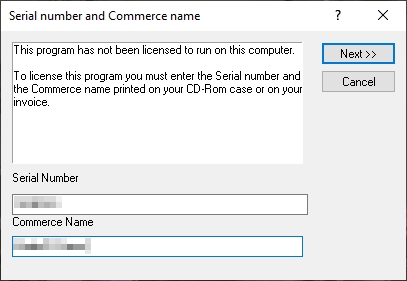
Enter the required information:
a. Type in the license Serial Number as it appears on your Maitre’D invoice.
b. Type in the Commerce Name as it should appear in the Maitre’D Back-Office, on report headers and on the header of printed guest checks, invoices and receipts.
c. Click Next >> to continue the process.
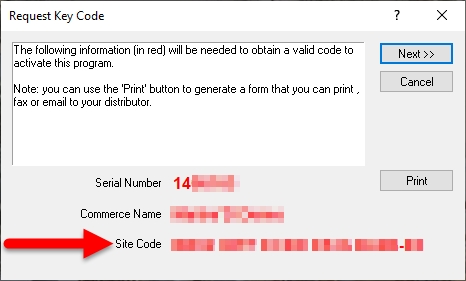
The Site Code will be generated. Select it and copy it to the clipboard.
Logon to the Maitre'D Distributor Portal:
http://distributors.maitredpos.com/
Select your language.
Enter your username and password, then click the Login button.
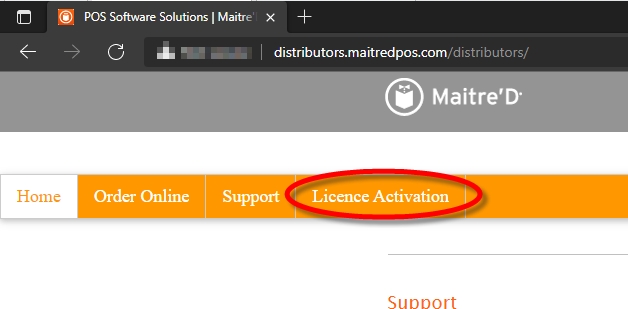
Click the License Activation link, near the top of the page.
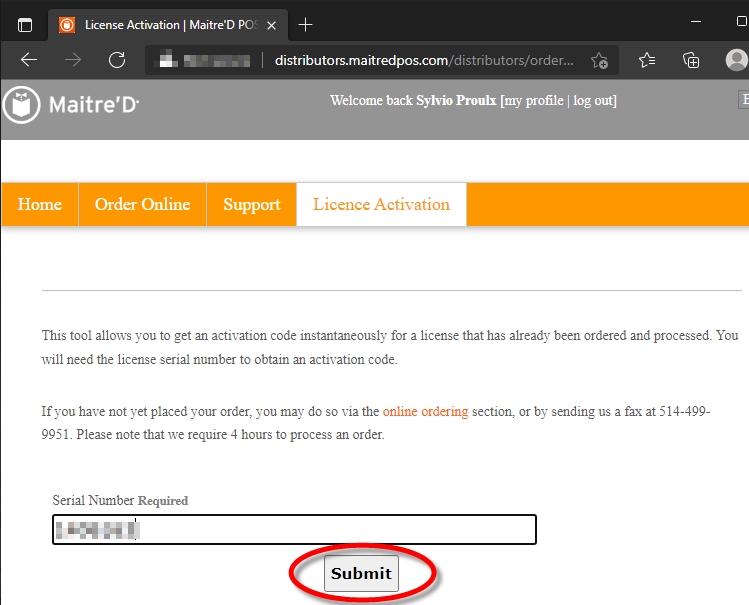
Type in the license serial number and click the Submit button.
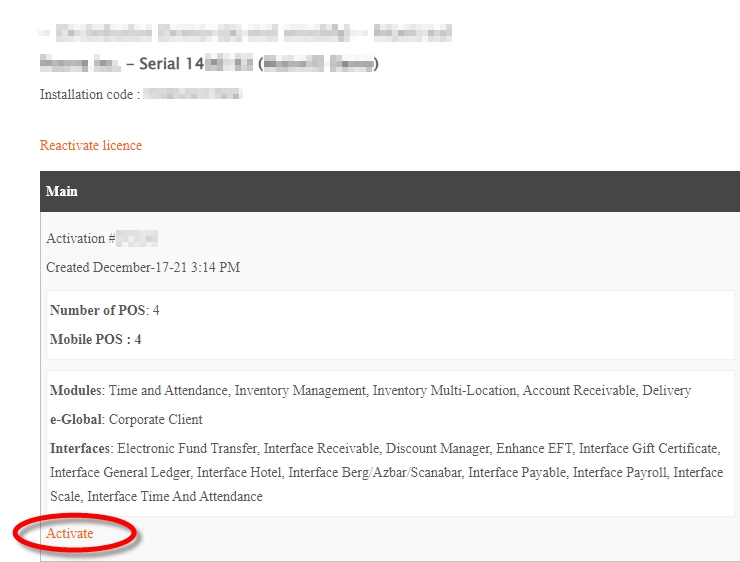
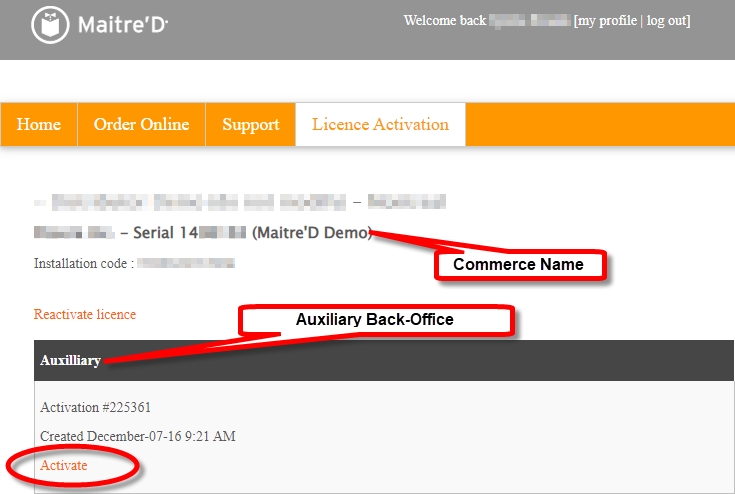
Locate the activation record for your license and click the Activate link.
NOTE: The activation record for the Main Back-Office is identified by the word "Main" in the record header. Also, all the modules and interfaces purchased with the license are listed.
If this is the very first activation of this license, you will be allowed to type in the Restaurant Name (commerce name). This name is case sensitive. Otherwise, the restaurant name will be filled in for you and cannot be modified.
Paste in the Site Code copied earlier.
Click the Generate button.
Your Activation Code (key code) will be generated. Select it and copy it to the clipboard.
Paste the key code (activation code) in the Key Code field and click Next >> to continue.
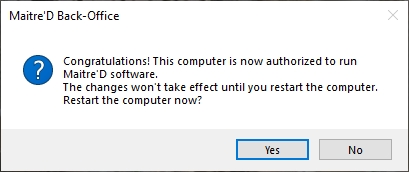
A confirmation prompt will appear, stating that the computer needs to be restarted.
Click Yes to restart your computer.
IMPORTANT! The computer MUST be restarted at this point. Otherwise, the license will not work properly.
After restarting, the Maitre’D Back-Office Server will attempt to start itself. You may see various progress bars as the Maitre'D database is updated.
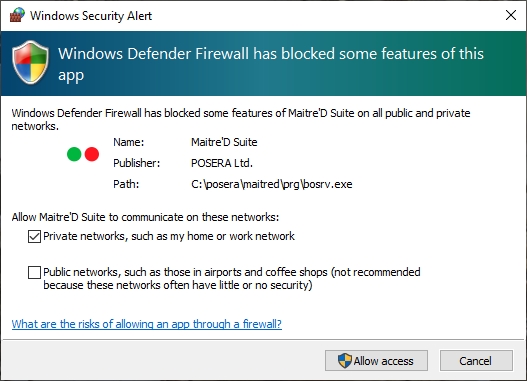
If the Maitre’D Back-Office Server is not already authorized, a Windows Security Alert will be triggered from the Windows Firewall:
a. If the Maitre’D Back-Office computer is on a domain, select the Domain networks, such as a workplace network option.
b. If the Maitre’D Back-Office computer is on a network without a domain, select the Private networks, such as my home or work network option.
c. Click the Allow Access button.
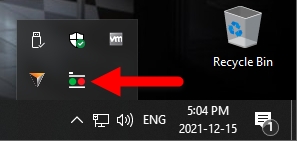
The Maitre'D Back-Office Server will start, and an icon will be added to the notification area.
The Maitre'D Back-Office Software is now licensed to run on this PC.
Start the installation process using one of the following methods:
Before performing the actual installation, the InstallShield Wizard will analyze your system. If required software components are missing, these will be installed at this point. Click the Install button to proceed.
NOTE: The PC may need to be restarted after components are installed. Following a computer restart, you will need to start the installation process again.
A splash Screen will be briefly displayed.
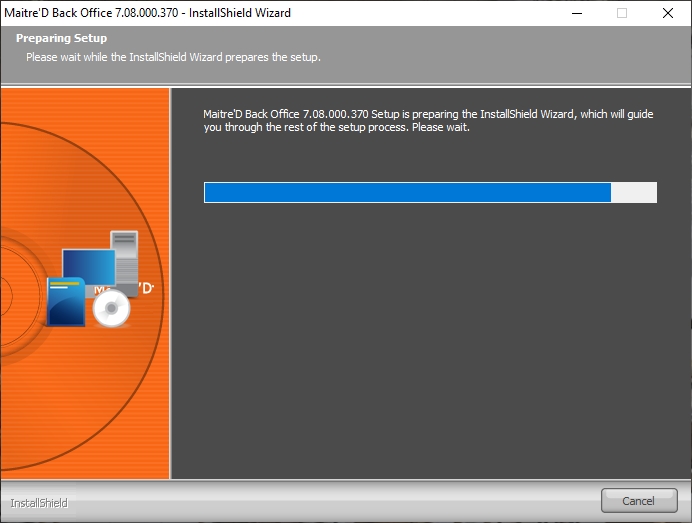
The InstallShield Wizard will prepare the installation. This could take a few seconds.
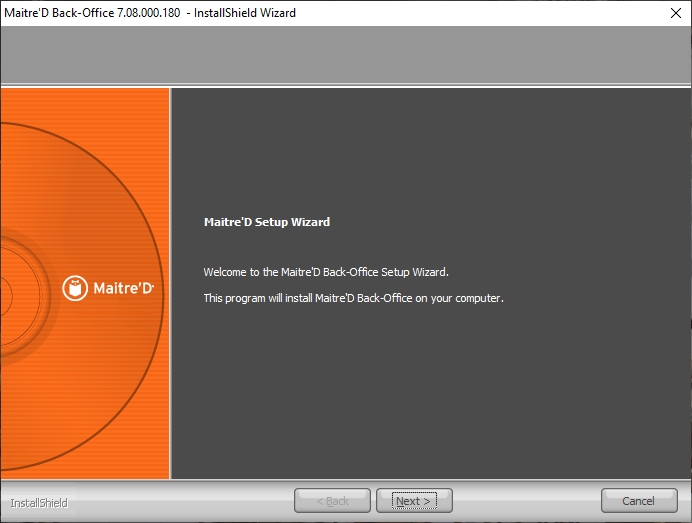
The welcome screen appears. Click Next > to continue the installation.
Read the license agreement and select I accept the terms of the license agreement. Click Next > to continue.
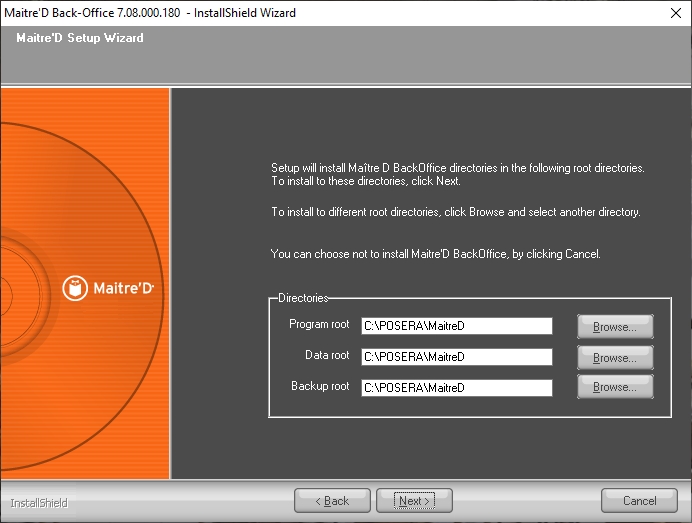
Select the Maitre’D installation folders and click Next > to continue.
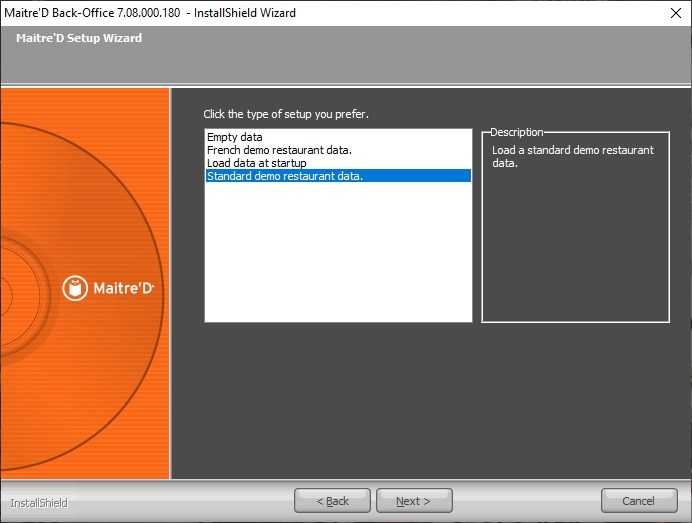
Select the type of installation and click Next > to continue. The available types are described below.
Select this option to install Maitre’D with an empty database. It will need to be fully programmed before use.
Select this option to install a generic restaurant data for demonstration purposes in the French language.
Select this option to restore an existing restaurant data when the software is started for the first time.
Select this option to install a generic restaurant data for demonstration purposes in the English language.
Select the Maitre’D program group that will be created in the Windows Start Menu. Click Next > to continue.
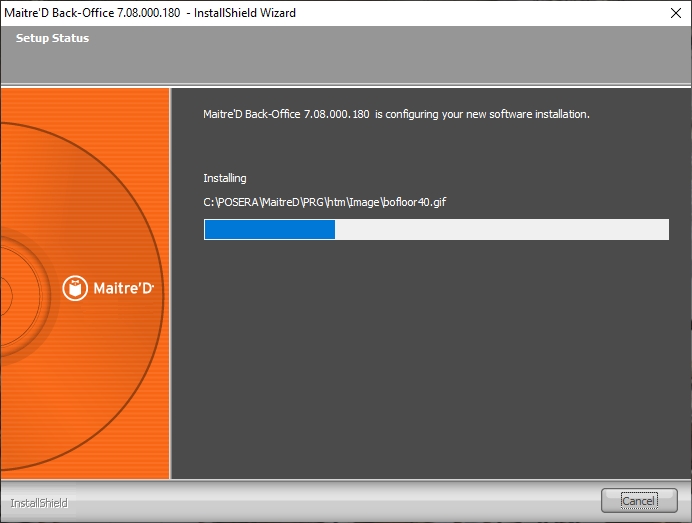
Files will be installed automatically. This could take a few minutes.
If a service pack is available, installation will start automatically. It is highly recommended to always install the latest service pack available before using the Maitre’D software. Click Yes to begin the installation of the service pack.
IMPORTANT! Installation of the latest service pack available is required to maintain PCI-DSS compliance. Installation of the latest service pack is also required to benefit from the latest feature updates and bug fixes.
a. The InstallShield Wizard will prepare the Service Pack installation. This could take a few seconds.
b. The welcome screen appears. Click Next > to continue the installation.
c. Read the license agreement. Click Yes to agree and continue the installation.
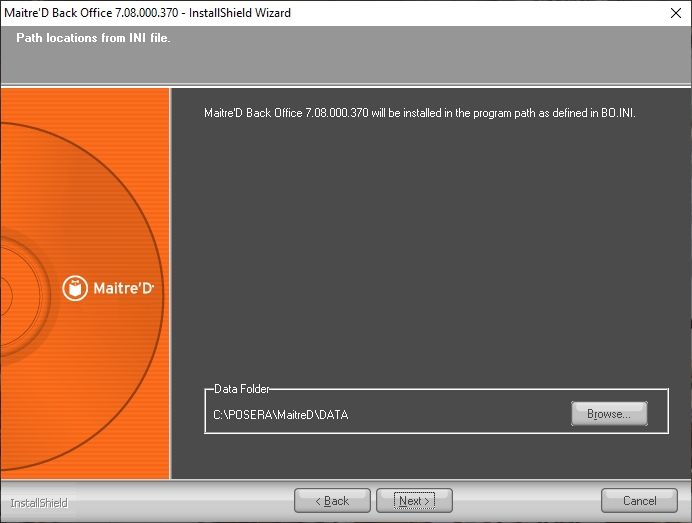
d. Select the path where the BO.INI file can be found. This should not need to be changed, but you can click Browse… to change the folder if required. The service pack files will be installed in the path as defined in the BO.INI file. Click Next > to proceed.
e. Files will be copied. This could take a few minutes.
After files are copied, the InstallShield wizard will remind you that the computer needs to be restarted before Maitre'D can be used. Click the Finish button.
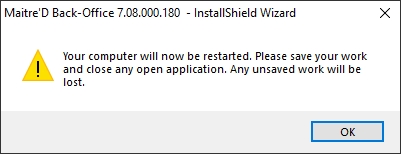
A dialog box will inform you that your computer is about to be restarted. Click OK, and your computer will restart.
WARNING! Do not attempt to override the computer restart. This will damage the Maitre'D files and cause various issues.
After the computer restart, the Maitre'D Back-Office Server will attempt to start.
Since there is no license installed, you will be prompted to enter a license serial number and a commerce name.
IMPORTANT! Now that the Maitre'D files are in place, it is strongly suggested to configure the Maitre'D Shared Folder correctly, even before activating the license. Please see Configure the Maitre'D Sharing Options
The installation process is now completed. Please proceed to the Maitre’D license activation.
Related Topics
Using downloaded files is the quickest way to get a system up and running. However, it gets a bit tricky if you need to install an auxiliary or backup server. These matters will be covered here.
Before you begin, we highly recommend downloading the latest installer and service pack, and creating your own install set. This will allow you to install Maitre'D and get it updated to the latest version in one single operation.
Please see:
Create a custom Maitre'D Installer
Make sure the installer files are extracted, either on you local hard drive or on a removable media. Installation will not work if the files are still within a *.zip archive. (See Extracting Files)
Using Windows File Explorer, browse to the folder containing the install files.
Locate the file called Setup.exe and double-click on it.
You may get a UAC warning. Click Yes.
The Maitre'D Back-Office InstallShield wizard will start.
Follow the steps described in Installation Process for the Maitre'D Back-Office.
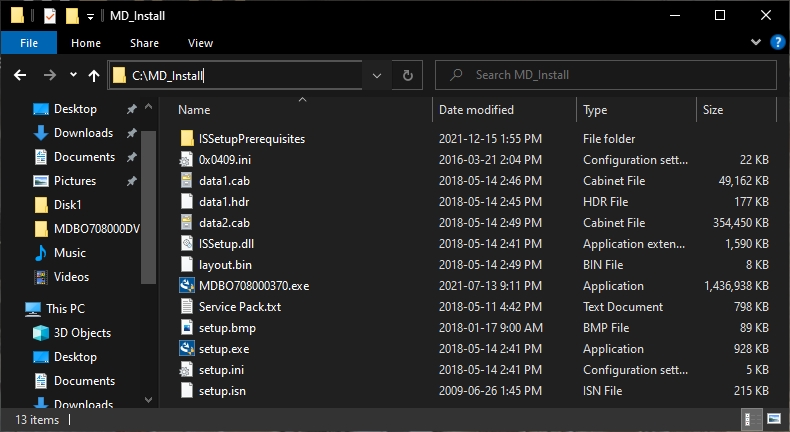
Extract the installation files on you local hard drive. We will be using the command prompt, so to make your life easier, you can copy the files in a folder at the root of the C:\ drive. For this example, we copied the install files to a folder called MD_Install, at the root of the C:\ drive.
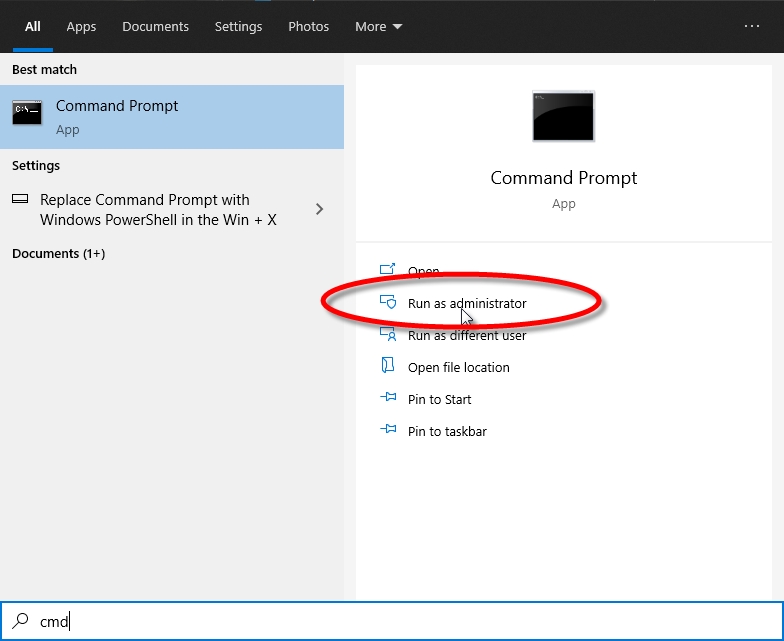
Open an elevated command prompt by clicking the Windows Start menu and typing "CMD". Select the Run as Administrator option.
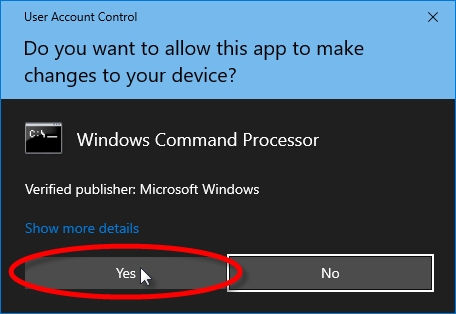
You may get a UAC warning. Click Yes.>
The command prompt will open at the C:\Windows\System32> prompt. Jump to the root of the C:\ drive by typing the following command:
cd\ [ENTER]
navigate to the MD_Install folder by typing the following command at the C:\> prompt:
cd md_install [ENTER]
The prompt will not look like this: C:\MD_Install>. Start the Maitre'D Auxiliary Back-Office setup by typing the following command:
setup.exe aux [ENTER]
The installation process will start. Follow the steps as outlined in the Installation Process for the Maitre'D Auxiliary Back-Office.
Repeat steps 1 through 5 of the Auxiliary Back-Office setup above.
The prompt will not look like this: C:\MD_Install>. Start the Maitre'D Backup Server setup by typing the following command:
setup.exe backup [ENTER]
The installation process will start. Follow the steps as outlined in the Installation Process for the Maitre'D Backup Server.
Related Topics
IMPORTANT! Before installing a Maitre'D Backup Server, the main Maitre'D Back-Office must be installed. Its license must also be activated, and the Maitre'D Back-Office Server must be running.
Additionally, the POS software must be installed locally on the PC where the Backup Server will be installed.
Start the installation process using one of the following methods:
Before performing the actual installation, the InstallShield Wizard will analyze your system. If required software components are missing, these will be installed at this point. Click the Install button to proceed.
NOTE: The PC may need to be restarted after components are installed. Following a computer restart, you will need to start the installation process again.
A splash Screen will be briefly displayed.
The InstallShield Wizard will prepare the installation. This could take a few seconds.
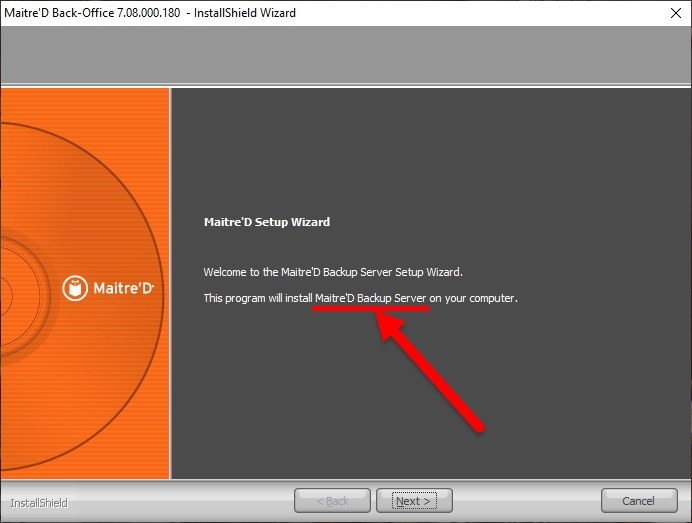
The welcome screen appears. Read the welcome message to make sure that the InstallShield Wizard will install a Maitre'D Backup Server. Click Next > to continue the installation.
Read the license agreement and select I accept the terms of the license agreement. Click Next > to continue.
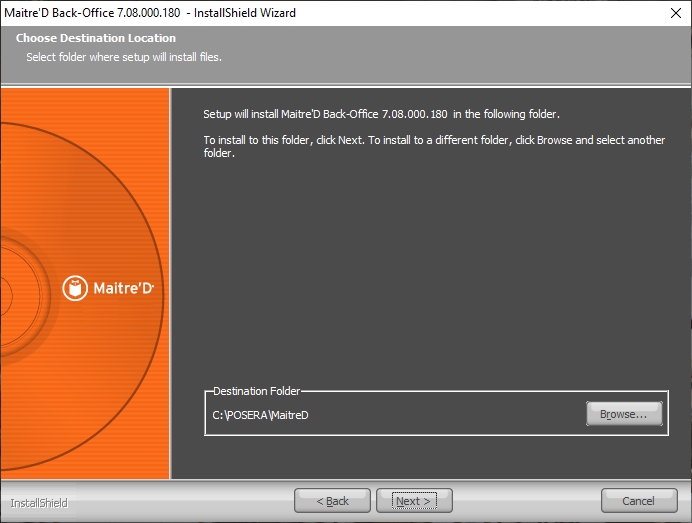
Select the Maitre’D installation folders and click Next > to continue.
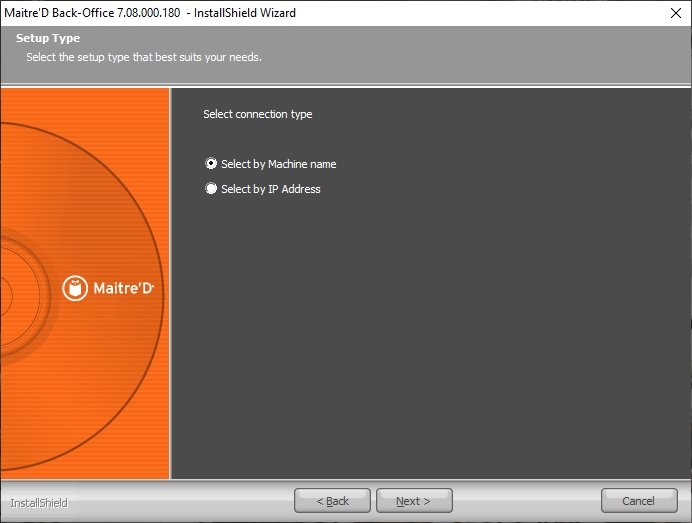
Select whether you prefer connecting to the Maitre'D Main Back-Office Server by Machine Name or by IP Address.
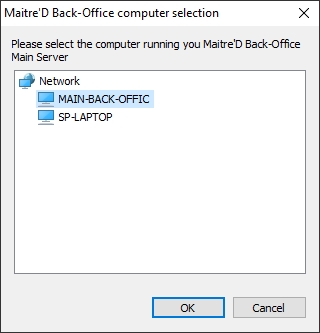
a. If Select by Machine Name was selected, you will be asked to select the PC on which the Maitre'D Main Back-Office Server is running. Click OK after making a selection.
NOTE: If the computer running the Maitre'D Main Back-Office Server is not listed, click Cancel and connect by IP Address instead.
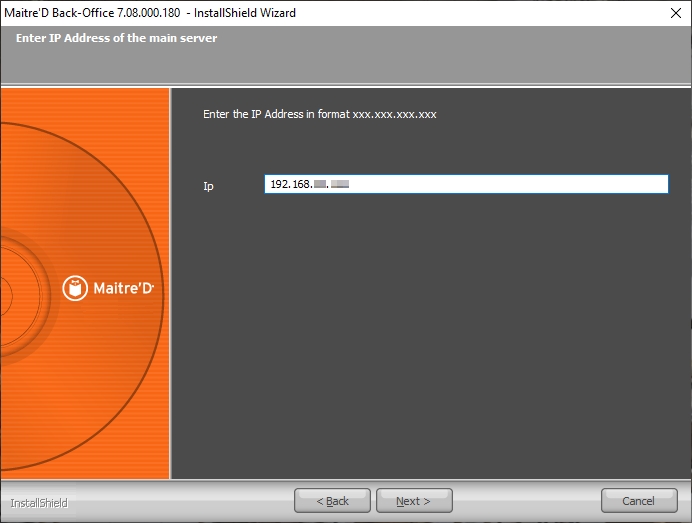
b. If Select by IP Address was selected, you will be asked to type the IP address of the PC on which the Maitre'D Main Back-Office Server is running. Click Next > after typing the IP address.
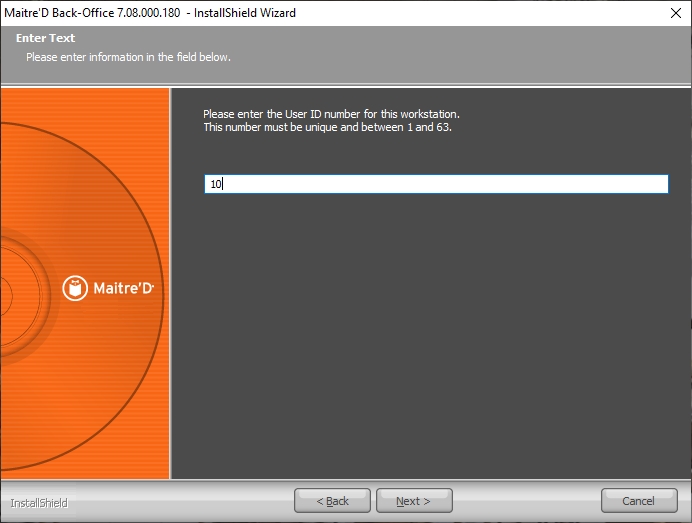
You will be asked to provide a Workstation User ID Number for the Backup Server. This number needs to be unique (not already used by a POS, another auxiliary or another backup server) and between 1 and 63 inclusively.
NOTE: We recommend assigning a number higher than the maximum number of POS, while also leaving "free numbers" for future expansion. For example, if you currently have 4 POS workstations, we would recommend assigning number 10 to the Auxiliary Back-Office.
Files will be installed automatically. This could take a few minutes.
If a service pack is available, installation will start automatically. It is highly recommended to always install the latest service pack available before using the Maitre’D software. Click Yes to begin the installation of the service pack.
IMPORTANT! Installation of the latest service pack available is required to maintain PCI-DSS compliance. Installation of the latest service pack is also required to benefit from the latest feature updates and bug fixes.
a) The InstallShield Wizard will prepare the Service Pack installation. This could take a few seconds.
b) The welcome screen appears. Click Next > to continue the installation.
c) Read the license agreement. Click Yes to agree and continue the installation.
d) Select the path where the BO.INI file can be found. This should not need to be changed, but you can click Browse… to change the folder if required. The service pack files will be installed in the path as defined in the BO.INI file. Click Next > to proceed.
e) Files will be copied. This could take a few minutes.
After files are copied, the InstallShield wizard will remind you that the computer needs to be restarted before Maitre'D can be used. Click the Finish button.
A dialog box will inform you that your computer is about to be restarted. Click OK, and your computer will restart.
WARNING! Do not attempt to override the computer restart. This will damage the Maitre'D files and cause various issues.
After the computer restart, start the Maitre'D Back-Office Server will attempt to start itself in Backup mode.
Since there is no license installed, you will be prompted to enter a license serial number and a commerce name.
IMPORTANT! Now that the Maitre'D files are in place, it is strongly suggested to configure the Maitre'D Shared Folder correctly, even before activating the license. Please see Configure the Maitre'D Sharing Options
The installation process is now completed. Please proceed to the Maitre’D license activation.
Related Topics
IMPORTANT! Before installing a Maitre'D Auxiliary Back-Office, the main Maitre'D Back-Office must be installed. Its license must also be activated, and the Maitre'D Back-Office Server must be running.
Start the installation process using one of the following methods:
Before performing the actual installation, the InstallShield Wizard will analyze your system. If required software components are missing, these will be installed at this point. Click the Install button to proceed.
NOTE: The PC may need to be restarted after components are installed. Following a computer restart, you will need to start the installation process again.
A splash Screen will be briefly displayed.
The InstallShield Wizard will prepare the installation. This could take a few seconds.
The welcome screen appears. Read the welcome message to make sure that the InstallShield Wizard will install an Auxiliary Back-Office. Click Next > to continue the installation.
Read the license agreement and select I accept the terms of the license agreement. Click Next > to continue.
Select the Maitre’D installation folders and click Next > to continue.
Select whether you prefer connecting to the Maitre'D Main Back-Office Server by Machine Name or by IP Address.
a. If Select by Machine Name was selected, you will be asked to select the PC on which the Maitre'D Main Back-Office Server is running. Click OK after making a selection.
NOTE: If the computer running the Maitre'D Main Back-Office Server is not listed, click Cancel and connect by IP Address instead.
b. If Select by IP Address was selected, you will be asked to type the IP address of the PC on which the Maitre'D Main Back-Office Server is running. Click Next > after typing the IP address.
You will be asked to provide a Workstation User ID Number for the Auxiliary Back-Office. This number needs to be unique (not already used by a POS, another auxiliary or another backup server) and between 1 and 63 inclusively.
NOTE: We recommend assigning a number higher than the maximum number of POS, while also leaving "free numbers" for future expansion. For example, if you currently have 4 POS workstations, we would recommend assigning number 10 to the Auxiliary Back-Office.
Files will be installed automatically. This could take a few minutes.
If a service pack is available, installation will start automatically. It is highly recommended to always install the latest service pack available before using the Maitre’D software. Click Yes to begin the installation of the service pack.
IMPORTANT! Installation of the latest service pack available is required to maintain PCI-DSS compliance. Installation of the latest service pack is also required to benefit from the latest feature updates and bug fixes.
a. The InstallShield Wizard will prepare the Service Pack installation. This could take a few seconds.
b. The welcome screen appears. Click Next > to continue the installation.
c. Read the license agreement. Click Yes to agree and continue the installation.
d. Select the path where the BO.INI file can be found. This should not need to be changed, but you can click Browse… to change the folder if required. The service pack files will be installed in the path as defined in the BO.INI file. Click Next > to proceed.
e. Files will be copied. This could take a few minutes.
After files are copied, the InstallShield wizard will remind you that the computer needs to be restarted before Maitre'D can be used. Click the Finish button.
A dialog box will inform you that your computer is about to be restarted. Click OK, and your computer will restart.
WARNING! Do not attempt to override the computer restart. This will damage the Maitre'D files and cause various issues.
After the computer restart, start the Maitre'D Auxiliary Back-Office by double-clicking the icon on the Windows desktop.
Since there is no license installed, you will be prompted to enter a license serial number and a commerce name.
IMPORTANT! Now that the Maitre'D files are in place, it is strongly suggested to configure the Maitre'D Shared Folder correctly, even before activating the license. Please see Configure the Maitre'D Sharing Options
The installation process is now completed. Please proceed to the Maitre’D license activation.
Related Topics
Before the license can be activated, you need:
When activating an Auxiliary Back-Office, the serial number to use is the same as the Main Back-Office. The Auxiliary back-Office is an option that can be purchased through the same channels as new licenses and license add-ons.
NOTE: Please note that there is a turnaround time of 4 hours for all orders and that new licenses are only created during normal business hours. The License serial number can be found on the invoice received after the creation of the license.
When activating an Auxiliary Back-Office, the Main Back-Office should already be up-and-running, therefore the commerce name is already established and can no longer be changed.
Obtain the commerce name from printed guest checks or receipts, or by looking up the license details on the Main Back-Office PC.
With the license serial number and commerce name in hand, you can proceed with the license activation.
After restarting from the installation of the Maitre’D Back-Office, Auxiliary or Backup Server software, the Maitre’D License Activation prompt will automatically appear.
Enter the required information:
a. Type in the license Serial Number as it appears on your Maitre’D invoice.
b. Type in the Commerce Name as it should appear in the Maitre’D Back-Office, on report headers and on the header of printed guest checks, invoices and receipts.
c. Click Next >> to continue the process.
The Site Code will be generated. Select it and copy it to the clipboard.
Logon to the Maitre'D Distributor Portal:
http://distributors.maitredpos.com/
Select your language.
Enter your username and password, then click the Login button.
Click the License Activation link, near the top of the page.
Type in the license serial number and click the Submit button.
Locate the activation record for your license and click the Activate link.
NOTE: The activation record for the Auxiliary Back-Office is identified by the word "Auxiliary" in the record header. Because the Main Back-Office was already activated, the commerce name is displayed and cannot be modified.
If this is the very first activation of this license, you will be allowed to type in the Restaurant Name (commerce name). This name is case sensitive. Otherwise, the restaurant name will be filled in for you and cannot be modified.
Paste in the Site Code copied earlier.
Click the Generate button.
Your Activation Code (key code) will be generated. Select it and copy it to the clipboard.
Paste the key code (activation code) in the Key Code field and click Next >> to continue.
A confirmation prompt will appear, stating that the computer needs to be restarted.
Click Yes to restart your computer.
IMPORTANT! The computer MUST be restarted at this point. Otherwise, the license will not work properly.
After restarting, start the Maitre’D Auxiliary Back-Office by double-clicking the corresponding icon on the Windows Desktop.
The Maitre'D Auxiliary Back-Office Software is now licensed to run on this PC.
Start the Installation from a DVD (for downloaded DVD Files)
Start the Installation from Downloaded Files
Installation Process for the Maitre'D Back-Office
Installation Process for the Maitre'D Point of Sale
Installation Process for the Maitre'D Auxiliary Back-Office
Installation Process for the Maitre'D Backup Server
Main Back Office - Before Activating the License
Main Back-Office - License Activation
Auxiliary Back - Office - Before Activating the License
Auxiliary Back - Office License Activation

















This section explains how to logon to the Maitre’D Back-Office for the first time after installing and activating the Maitre’D software.
From the Windows Desktop, double-click the Maitre’D Back-Office icon.
The login prompt appears. Type Distributor (with a capital “D”) in the User Name field, and press the space bar twice in the password field. Click OK to proceed.
The language selector appears. Select the appropriate language and click OK to proceed.
NOTE: The language that is selected by default depends on the language settings of the System Owner access level.
You will be prompted to create a new Distributor password. Enter a password that meets requirements and click OK to proceed.
The Maitre’D Back-Office desktop will be displayed.
IMPORTANT! After the first login, it is strongly recommended to create more Maitre’D Back-Office user accounts for managers and employees who will require access to the Maitre'D Back-Office for various tasks.

